Scheduler in the Start Menu
The Scheduler section in the Start Menu is where Appointments can be created, cancelled, or moved, and where Scheduler settings can be adjusted. All the options available are detailed in this section.
Note: This section focuses on the shortcuts keys and actions possible from within the Scheduler portion of the Start Menu. For detailed workflows within the Scheduler Tab see the Scheduler Section of the Accuro User Guide.
Create Appointment
- A patient and appointment time slot must be selected within the Scheduler
 on the Accuro Navigation bar.
- Through the Accuro Start Menu navigate to the Scheduler section and click Create Appointment. Alternatively use the shortcut Ctrl + S to display the Appointment Details window.
- Fill out the remainder of the Appointment Details according to the Appointments section.
Cancel Appointment
- A patient and appointment time slot must be selected within the Scheduler
 on the Accuro Navigation bar.
- Through the Accuro Start Menu navigate to the Scheduler section and click Cancel Appointment or alternatively use the Ctrl + D shortcut.
- Type in a cancellation reason or click the
 and select a cancellation reason from the list displayed.
- Click OK. The appointment has now been cancelled.
Find Next Available Appointment
- Selecting the Find Available Appointment in the Scheduler category of the Accuro Start Menu will display the following window:
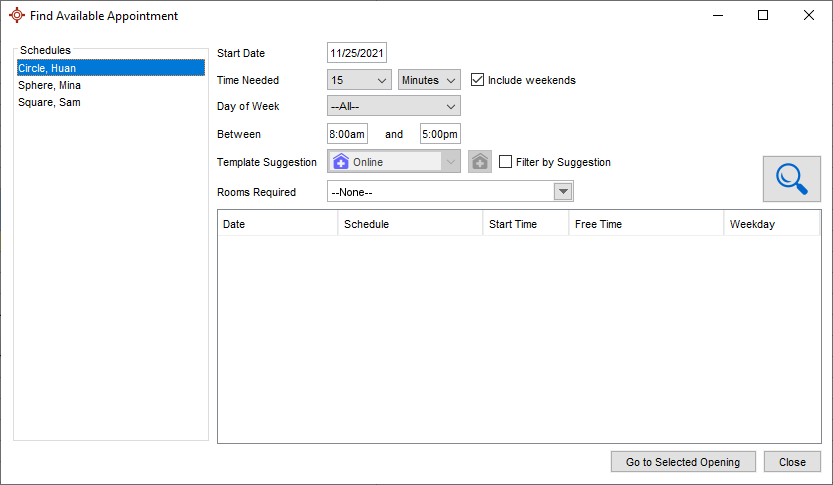
- Click to select the appropriate Provider.
- Select the Time Needed from the two dropdown lists. This is the minimum time required for the appointment.
- Select the Day of the Week from the dropdown list if the appointment is required on a specific day. Click the Include Weekends checkbox to include weekends in the search.
- Select the times Between which the appointment must occur.
- If appointment types are set up, click the arrow to the right of Template Suggestions and select the appointment type from the list displayed.
- Select Rooms Required, if applicable.
- Click the Search button
 to run the search. A list of available appointments is displayed:
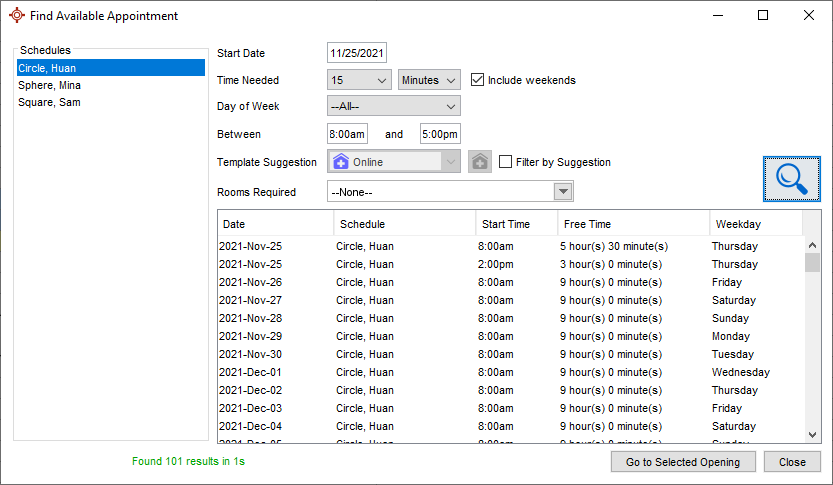
- Click to select the appropriate appointment.
- Click Go to Selected Opening button. The Scheduler opens at the selected date and time.
For more help on making appointments see Create an Appointment.
Copy Appointment
- An appointment must be selected within the Scheduler
 on the Accuro Navigation bar.
- Through the Accuro Start Menu navigate to the Scheduler section and click Copy Appointment. Alternatively right-click on the appointment and select Copy Appointment.
Cut Appointment
- Click the Scheduler button
 on the Accuro Navigation bar.
- Through the Accuro Start Menu navigate to the Scheduler section and click Scheduler and select Cut Appointment from the list displayed. Alternatively right-click on the appointment and select Cut Appointment.
Paste Appointment
- An appointment must previously have either been copied or cut.
- Select the desired time block within the Scheduler
 on the Navigation bar.
- In the Accuro Start Menu, in the Scheduler category select Paste Appointment. Alternatively right-click in the desired time block and select Paste Appointment from the list displayed.
The appointment details are now copied/moved into the new appointment slot.
Manage Programs
Program Management can be accessed through the Accuro Start Menu, Scheduler and then select Manage Programs. The Program Management window is displayed:
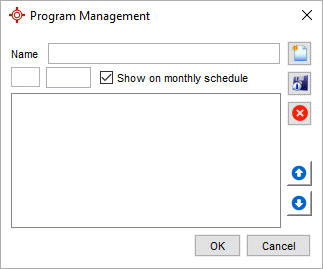
For more information on navigating this section see Manage Programs in the Scheduler section.
Cancellation List
Access the Cancellation List through the Accuro Start Menu, Scheduler, and then select Cancellation List.
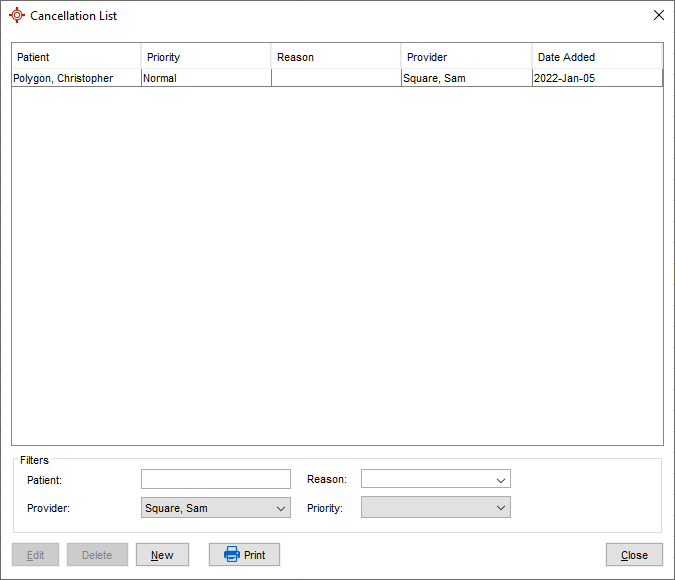
The Cancellation List is used to record patients requesting short-notice appointments. These appointments usually become available as a result of another patient cancelling an appointment. See the Cancellation List in the Scheduler section for an overview on this feature.
Manage Rooms
Users can Manage Rooms through the Accuro Start Menu, Scheduler, and then selecting Manage Rooms.The manage room window will appear.
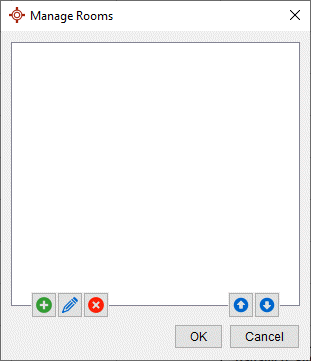
Add a Room
- Click the Add button
 to open the Edit Room window:
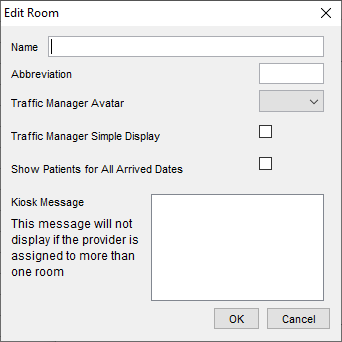
- In the Name text box type in the room name.
- Type a letter abbreviation in the Abbreviation text box, up to three characters can be used.
- Select a Traffic Manager Avatar from the dropdown list, if required.
- Click the Traffic Manager Simple Display checkbox, if required.
- Click OK to save.
Edit a Room
- Press and release the Alt key, click Scheduler and select Manage Rooms from the list displayed.
- Click to select a room.
- Click the Edit button
 .
.
- Make any necessary changes and click OK to save.
Delete a Room
- Press and release the Alt key, click Scheduler and select Manage Rooms from the list displayed.
- Click to select a room.
- Click the Delete button
 .
.
- Click Yes to confirm the deletion.
Organizing Rooms
- Click Scheduler on the Accuro Start Menu and select Manage Rooms from the list displayed.
- Click to select a room and use the Arrow buttons
 to move rooms up and down on the list.
- Click OK to save any changes.
For more information on rooms and their functionality see the Traffic Manager section.

 to run the search. A list of available appointments is displayed:


 to open the Edit Room window:
 .
. .
. to move rooms up and down on the list.