Appointments
Create an Appointment
- Click the Scheduler button
 on the Accuro Navigation bar.
- If a patient has not been loaded, select a patient with the Search Tool in the upper-right corner.
- Point to the time slot the appointment begins in.
- Click and drag to the time slot the appointment ends in.

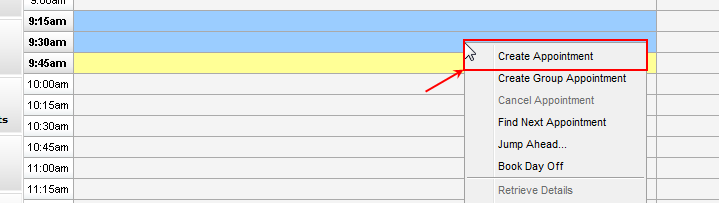
- Right-click within the highlighted space and select Create Appointment.
Note: Use the following shortcut keys to make an appointment for the patient currently selected: Shift+Enter, Ctrl+S, or on the Accuro Navigation bar, click Scheduler and select Create Appointment.
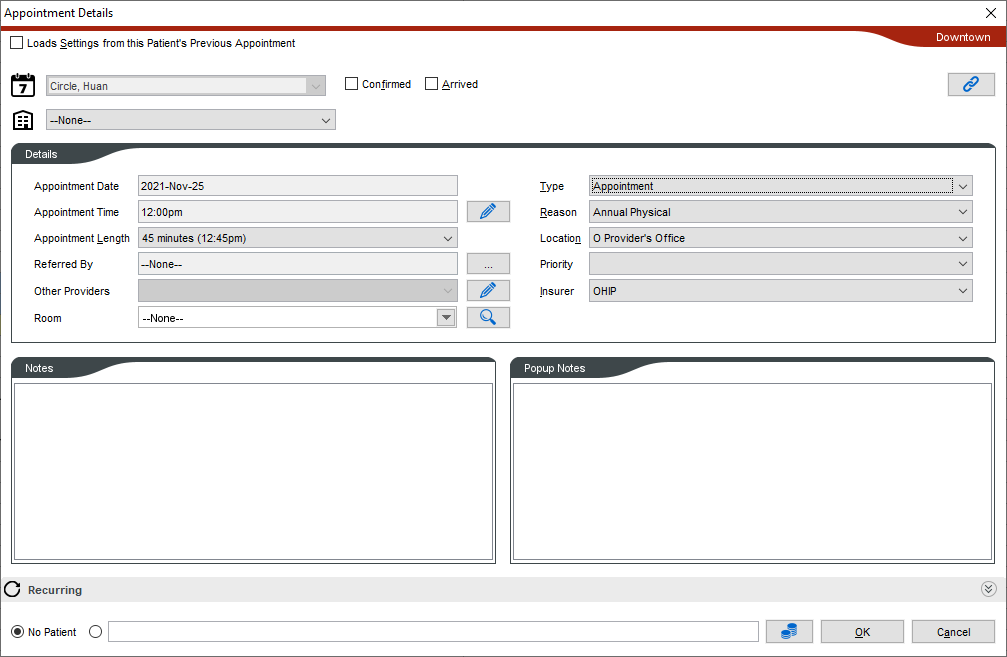
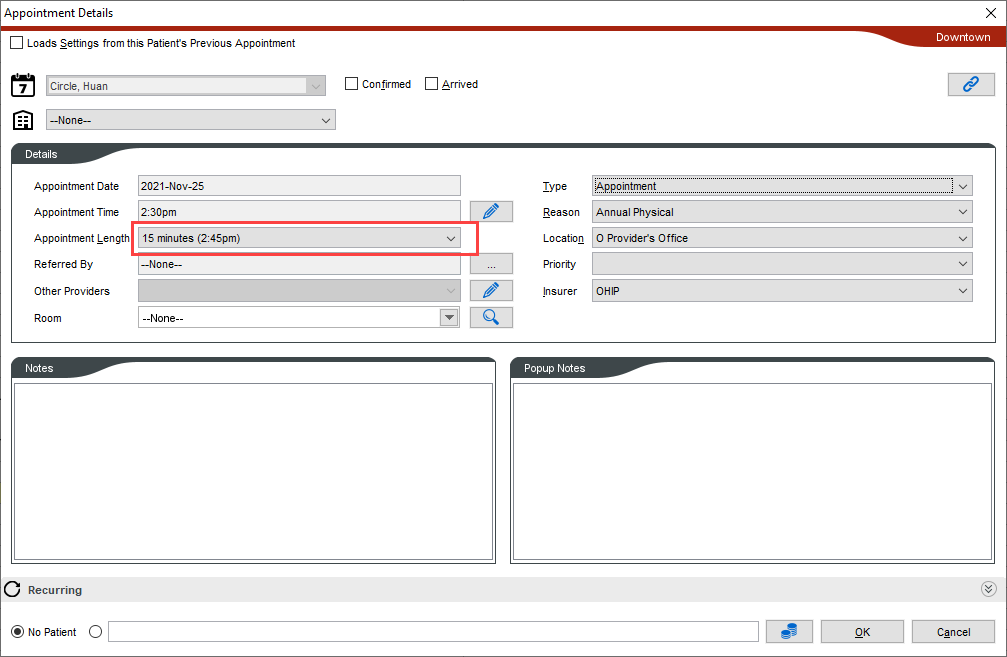
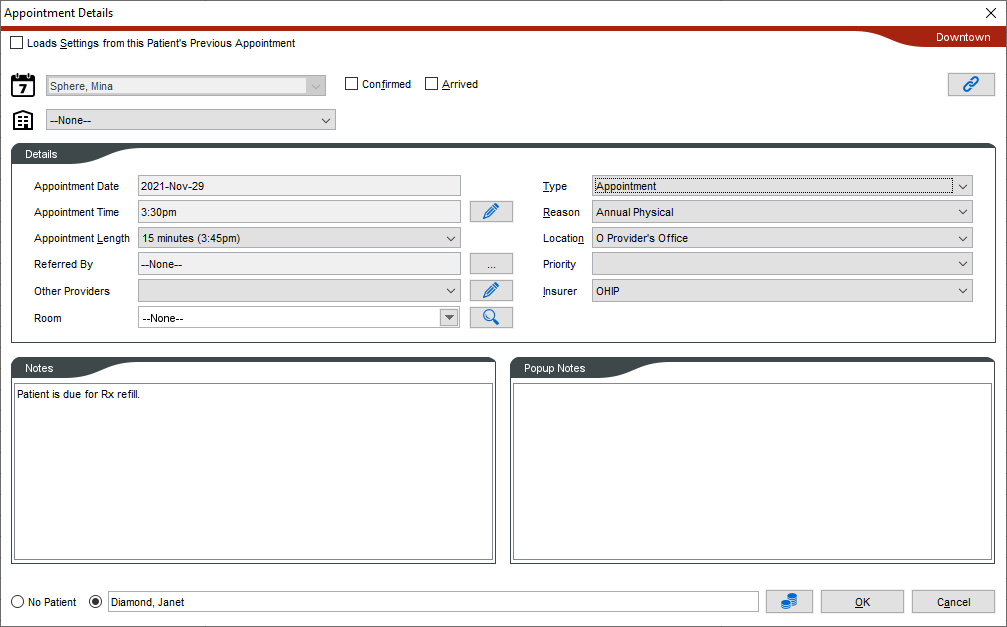
- The Appointment Details window is displayed:
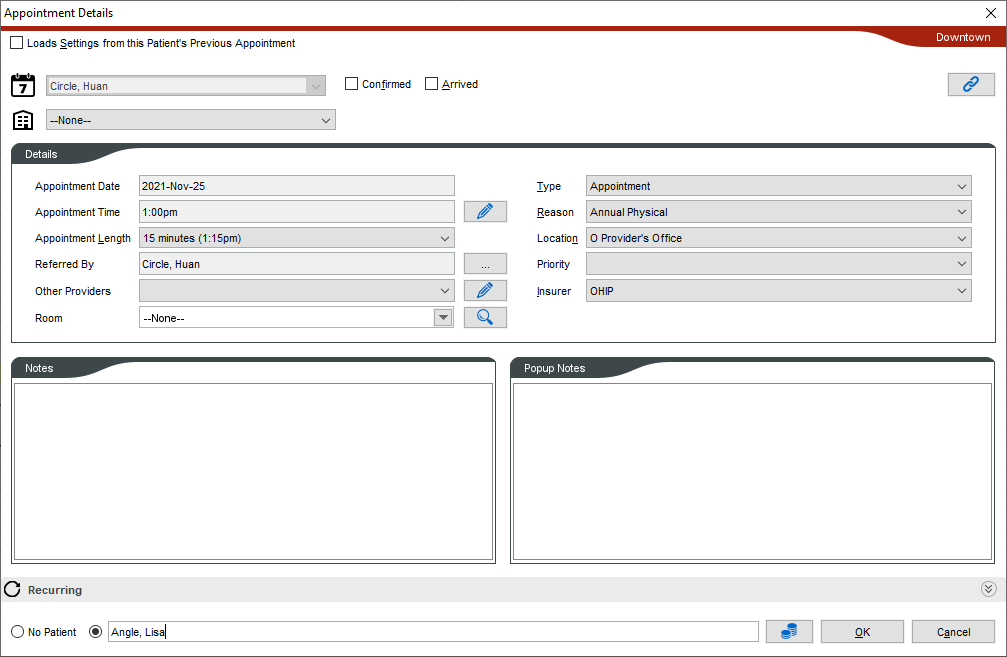
- Select or change the Insurer, Type, Reason, Location and Priority from the appropriate dropdown lists, if required.
- Click the dropdown list
 to the right of Other Providers and select from the list displayed. To add a Provider click the Edit button
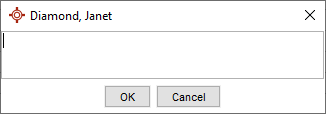
  . Click the Add button
  , type in the provider name and click Select to add them to the other provider's list. Click OK to get back to the main Appointment Details window.
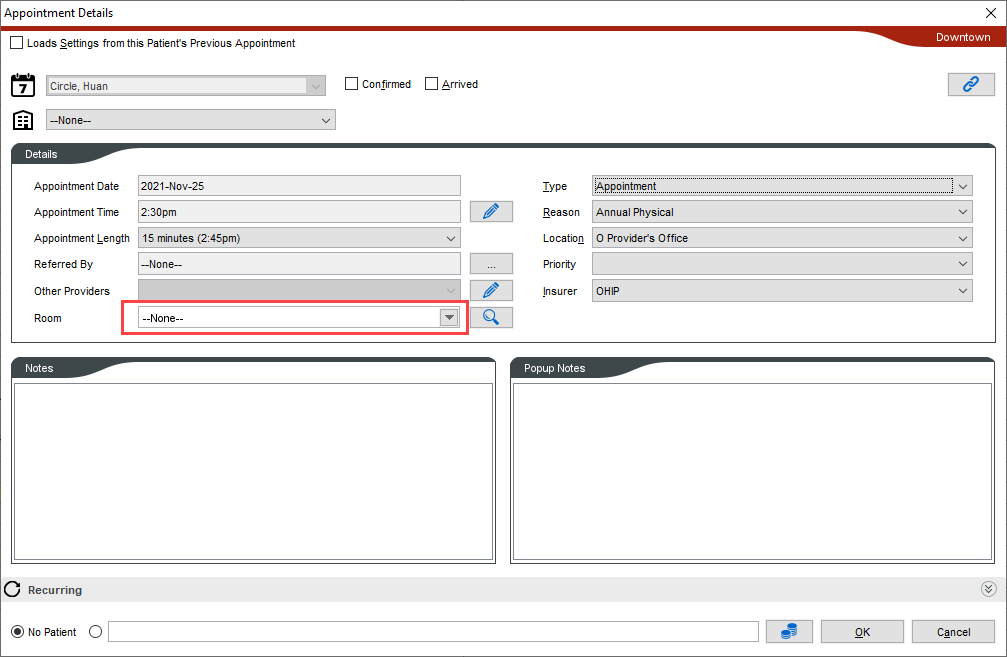
- To select a Room, click the arrow and select from the dropdown list displayed:

If a treatment room is selected that has already been booked, a warning message is displayed:
- To view the rooms schedule, click the View Rooms Schedule button. A list of which patients are booked into each treatment room is displayed. Click Cancel when finished viewing this information.
- The Load Settings from this Patient's Previous Appointment checkbox is not selected by default. If this is required, click the checkbox to select.
- To change the Referred by practitioner, click the Ellipses button
 . Type in the name of the provider in the Provider Search window. When the correct referrer is displayed, click Select. A confirmation message is displayed, click Yes.
- To link a diagnosis to the appointment, click the Diagnosis Linking button
 . Select the diagnosis from the list displayed, click and add the Onset Date, Status and Symptoms. Type in a note, of required. Click Save and Link to save details to the appointment currently selected.
- If this is a recurring appointment, click Recurring and select the days, until and provider from the information displayed. Click Simulate. A list of dates is displayed, click Run to book the appointments listed.
- Select the Arrived or Confirmed checkbox if required.
- Type any additional notes about the appointment into the Notes field or the Popup Notes field.
- Click OK to save changes.
Group Appointments
Group appointments are displayed in Quick Patients Appointment View (F4) and in Encounter Notes (EMR > Encounter Notes tab). An indicator has been added to show that an appointment is a group appointment.
In the Day Sheet (Claims > Day Sheet) an indicator  is next to an entry, in the Appointment Icon column, to indicate that it is a group appointment and each patient is listed (on a separate line) in the group appointment.
Group appointments can be copied and pasted, the appointment length can be edited, patient cohorts can be added when adding patents in a group appointment and the Arrived/Confirmed/No Show now indicates a count of how many of the group it is applicable to (e.g. [A 5/10]).

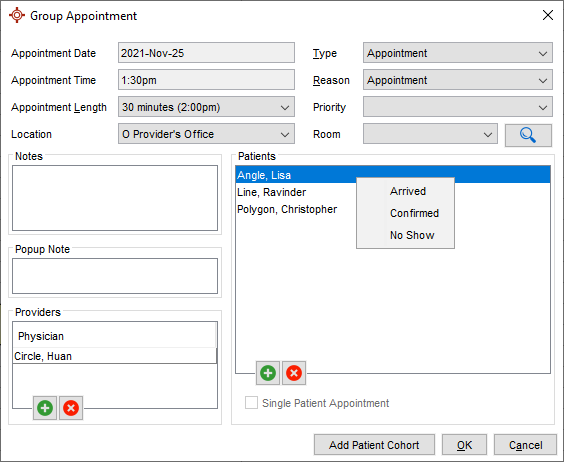
Patients can be arrived in multiples from within the group appointment window (double-click on the appointment slot to display), right-click and select from Arrived, Confirmed or No Show.
Create a Group Appointment
- Click the Scheduler button on the Accuro Navigation bar.
- Point to the time slot you want the appointment to begin at.
- Click and drag to the time slot you want the appointment to end in.

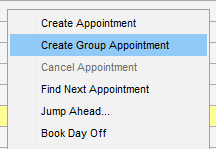
- Right-click within the highlighted space and select Create Group Appointment.
The Group Appointment window is displayed:
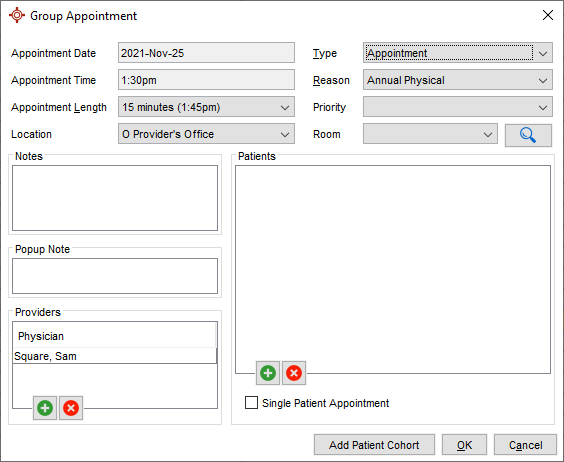
- Click the Add button to add patients to the appointment.
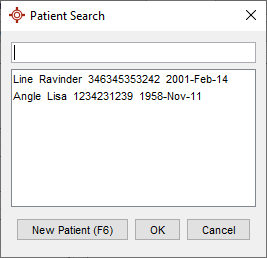
- Type in the name of a patient, click to select and add to the group appointment.
Repeat steps 5 and 6 until you have added all patients for the group appointment.
- Click the arrow to the right of Location and select the Location for the appointment.
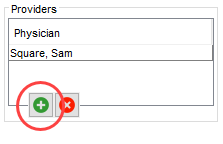
- If there is to be any other providers present (in addition to the one already selected), click the Add button to add Providers to the appointment:
- Click the arrow to the right of Reason and select the reason for the appointment.
- Click the arrow to the right of Priority and select the priority from the dropdown list displayed.
- To select a Room, click the arrow and select from the dropdown list displayed.
If a treatment room is selected that has already been booked, a warning message is displayed:
- To view the rooms schedule, click the Search button
 . A list of which patients are booked into each treatment room is displayed. Click Cancel.
- Type any additional notes about the appointment into the Notes field or the Popup Notes field.
- Click OK to make the appointment. The appointment is displayed in the following format:

Remove Patients From a Group Appointment
- Click the Scheduler button on the Accuro Navigation bar.
- Double-click on the appropriate appointment. The Group Appointment window is displayed:
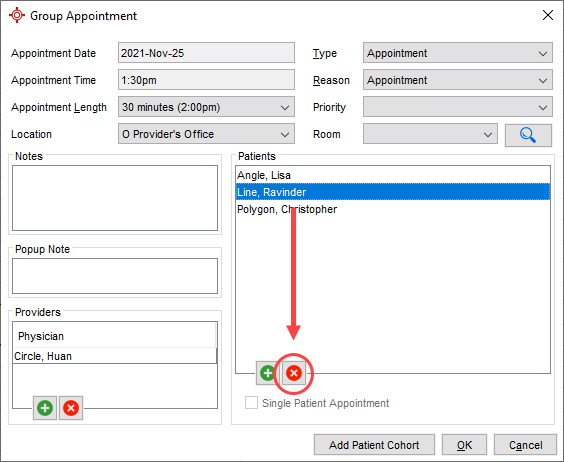
- Click to select the patient being deleted and click the Delete button
 . A message asking if you want to remove this patient is displayed:
- Click Yes to continue.
- Click OK to save your changes.
Create an Appointment Without a Patient
- Click the Scheduler button on the Accuro Navigation bar.
- Point to the time slot you wish the appointment to begin in.
Note: If you have a patient selected, the patient can be removed when we make the appointment.
- Click and drag to the time slot you wish the appointment to end in.

- Right-click within the highlighted space and select Create Appointment.

Note: You can also use the following shortcut keys to make an appointment for the patient currently selected: Shift+Enter, Ctrl+S, or on the Menu bar, click Scheduler and select Create Appointment.
The Appointment Details window is displayed:
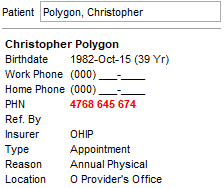
- Click the No Patient radio button (highlighted in the screen shot above) and the patient's details have been removed.
- Type any additional notes about the appointment into the Notes field or the Popup Notes field.
- Click OK to save.
Create a Recurring Appointment
Note: If a user creates a recurring appointment where the number of appointments being created is more than 10, a warning message is displayed that tells the user how many appointments they are about to create. Users then have the option to continue and create all the appointments or to cancel and not create the recurring appointments. This is because a user can create recurring appointments easily, but they have to be deleted individually which can take a considerable amount of time.
- Click the Scheduler button on the Accuro Navigation bar.
- If a patient has not been loaded, select a patient with the Search Tool in the upper-right corner.
- Point to the time slot you wish the appointment to begin in.
- Click and drag to the time slot you wish the appointment to end in.
- Right-click within the highlighted space and select Create Appointment.
Note: You can also use the following shortcut keys to make an appointment for the patient currently selected: Shift+Enter, Ctrl+S, or on the Menu bar, click Scheduler and select Create Appointment.
The Appointment Details window is displayed:
- Select or change the Insurer, Type, Reason, Location, Priority, and Room from the appropriate dropdown lists, if required.
- The Load Settings from this Patient's Previous Appointment checkbox is selected by default. If you do not want this, click the checkbox to deselect.
- To change the Referred by practitioner, click the Ellipses button . Type in the name of the provider in the Provider Search window. When the correct referrer is displayed, click Select. A confirmation message is displayed, click Yes.
- To link a diagnosis to the appointment, click the Diagnosis Linking button . Select the diagnosis from the list displayed, click and add the Onset Date, Status and Symptoms. Type in a note, of required. Click Save and Link to save details to the appointment currently selected.
- Click Recurring, this can be seen highlighted in the screen shot above. The following is displayed:

- Select every how many days the patient is to be seen.
- Double click the date field and select the until date from the calendar displayed.
- Click the dropdown list to the right of provider and select a different provider, if required.
- Select the Arrived or Confirmed checkbox if required.
- Type any additional notes about the appointment into the Notes field or the Popup Notes field.
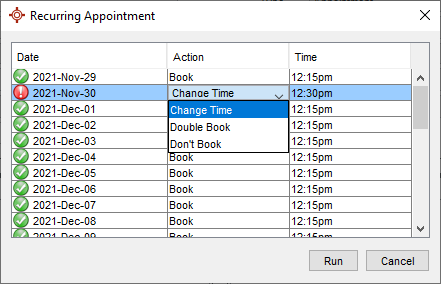
- Click Simulate. A list of dates is displayed. If there is a conflict with another appointment already booked, an exclamation mark and change time note are displayed:
- If you have lots of warnings, click Cancel, go back and select a different time.
OR
In the dropdown select to either Change Time, Double Book, or Don't Book. If "Change Time" is selected, select the new time in the dropdown list of the "Time" column.
- Click Run to book the appointments listed. A confirmation message will be displayed when over 30 recurring appointments are being booked.
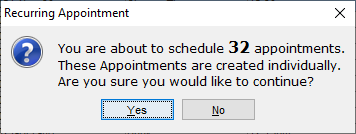
- Click Yes to confirm.
Jump Ahead
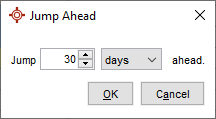
Jump ahead is a tool in the scheduler that allows you to move forward a specified number of days. For example if a provider says he wants to see a patient in 30 days, rather than having to work out when 30 days is you can use the jump ahead tool.
- Click the Scheduler button on the Accuro Navigation bar.
- Right-click on any appointment slot and select Jump Ahead from the list displayed.
- Type in the number of days to jump ahead and click OK.
The scheduler is now open on the day that you need to make the follow-up appointment.
Find Next Available Appointment
- Selecting the Find Available Appointment in the Scheduler category of the Accuro Start Menu will display the following window:
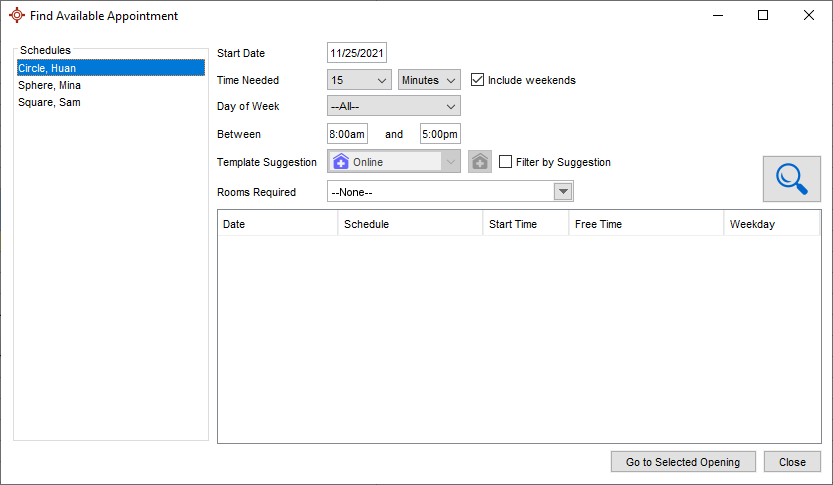
- Click to select the appropriate Provider.
- Select the Time Needed from the two dropdown lists. This is the minimum time required for the appointment.
- Select the Day of the Week from the dropdown list if the appointment is required on a specific day. Click the Include Weekends checkbox to include weekends in the search.
- Select the times Between which the appointment must occur.
- If appointment types are set up, click the arrow to the right of Template Suggestions and select the appointment type from the list displayed.
- Select Rooms Required, if applicable.
- Click the Search button
 to run the search. A list of available appointments is displayed:
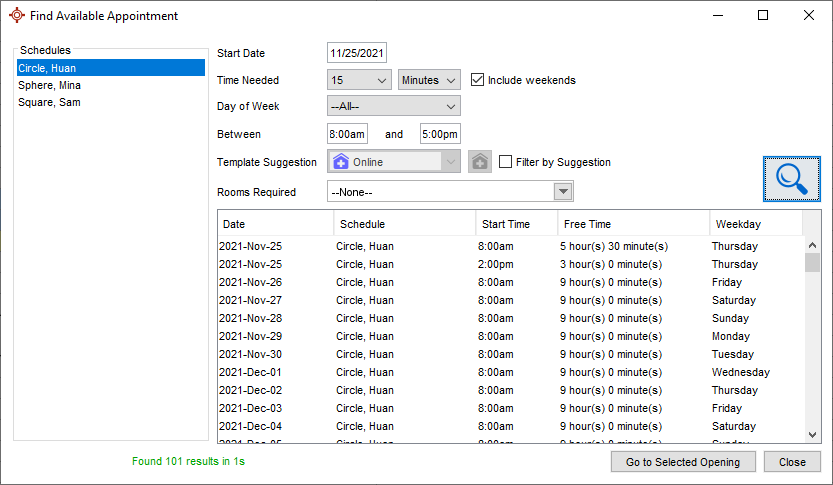
- Click to select the appropriate appointment.
- Click Go to Selected Opening button. The Scheduler opens at the selected date and time.
For more help on making appointments see Create an Appointment.
Select a Room for an Appointment
If a room wasn't selected when the appointment was made, it is possible to edit the appointment and select a treatment room:
- Click the Scheduler button on the Accuro Navigation bar.
- Double-click the appointment for which you want to assign a treatment room.
The Appointment Details window is displayed:
- To select a Room, click the arrow and select from the dropdown list displayed: If a treatment room is selected that has already been booked, a warning message is displayed:
- To view the rooms schedule, click the View Rooms Schedule button. A list of which patients are booked into each treatment room is displayed. Click Cancel when you have finished viewing this information.
- Click OK to save changes.
Change an Appointment Date
- Click the Scheduler button on the Accuro Navigation bar.
- Right-click on the appropriate appointment and select Cut Appointment from the drop-list displayed.
- Browse the scheduler to find the new appointment date, right-click and select Paste Appointment from the drop-list displayed. The appointment is now saved into the new slot.
Change an Appointment Time
- Click the Scheduler button on the Accuro Navigation bar.
- Right-click on the appropriate appointment and select Cut Appointment from the drop-list displayed.
- Browse the scheduler to find the new appointment time, right-click and select Paste Appointment from the drop-list displayed. The appointment is now saved into the new appointment slot.
Change an Appointment Length
- Click the Scheduler button on the Accuro Navigation bar.
- Double-click the appointment for which you want to change the appointment length.
The Appointment Details window is displayed:
- To change the appointment length, click the arrow and select from the dropdown list displayed:
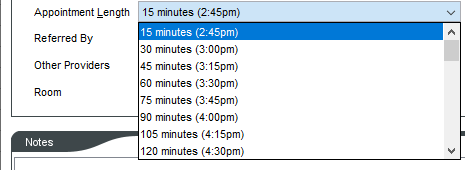
- Click OK to save the new appointment length.
Note: Where there are appointments booked after the one you are trying to extend, Accuro only allows you to select as much time as there is available:

Select a Different Patient for the Appointment you are Currently Making
It is only possible to select a different patient for an appointment while you are in the process of creating the appointment. Once the appointment has been made, you must cancel the first appointment for 'patient a' and then make a new appointment for 'patient b'.
- Highlight the Patient's Name in the text-box at the bottom of the screen.
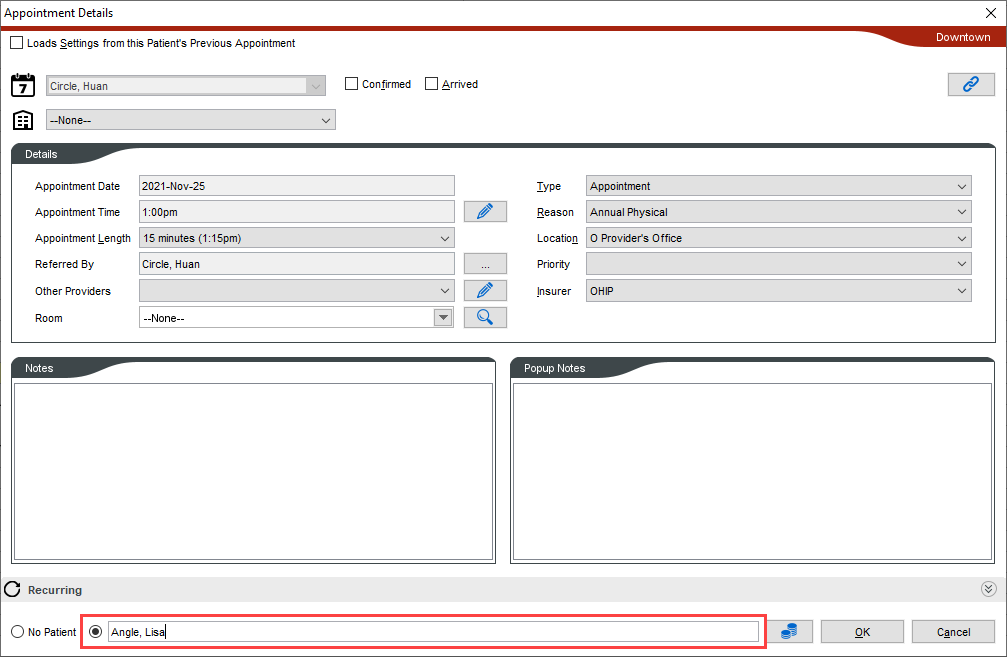
- Type in part of the new patient's name.
- Press Enter on the keyboard. This brings up the Patient Search window.
Note: You must press Enter on the keyboard. If you type in the new patient's name and click the OK button, the patient is not updated.
- Click the correct patient from the list displayed. The patient name is updated in the Appointment Details window
For more help on creating appointments see Create an Appointment.
Load Same Appointment Settings as for Previous Appointment
The Load Settings from this Patient's Previous Appointments checkbox is selected by default when you make an appointment. If you deselected this when you made the appointment and would now like to change it back, Accuro lets you do this:
- Click the Scheduler button on the Accuro Navigation bar.
- Double-click the appointment for which you want to load settings from patient's previous appointment.
The Appointment Details window is displayed:
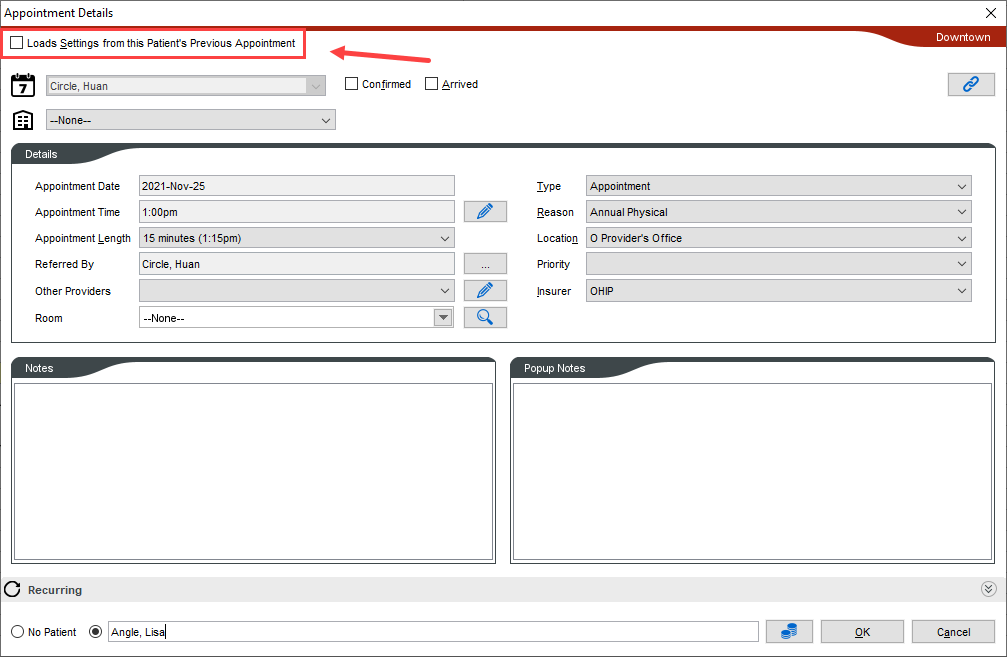
- Click the Load settings from this Patient's Previous Appointment checkbox. A tick appears in the checkbox.
- Click OK to save your changes.
For more help on creating appointments see Create an Appointment.
Edit an Appointment
- Click the Scheduler button on the Accuro Navigation bar.
- Double-click the appointment being edited. The appointment details window is displayed:
- Edit the details as required.
Note: The Appointment Date or the Provider cannot be edited. If either of these details needs to be changed you have to cancel and re-make the appointment.
Cancel an Appointment
- Click the Scheduler button on the Accuro Navigation bar.
- Right-click the appointment and select Cancel Appointment.
Note: The following shortcut key can be used to cancel an appointment Ctrl+D, or press and release the Alt button on the keyboard, click Scheduler and select Delete Appointment.
- Click Yes to confirm the cancellation.
- Type in a cancellation reason or click the dropdown list and select a cancellation reason from the list displayed.
- Click OK. The appointment has now been cancelled.
Note: When an appointment is cancelled that is tied to the Wait List the user is asked to change the Wait List status. Once the appointment is cancelled, a window is displayed where a users can select between the consult or surgical Wait List and in the associated dropdowns they are given the option of changing the Wait List status to one of the following: Booked, Cancelled, Completed, Deceased, Re-Book, Tentatively Booked or Waiting.

Cancel Multiple Appointments
If a patient has multiple appointments that need to be cancelled, these can all be cancelled at the same time. This is not actually done in the scheduler, it is done in the Quick Patient Appointment View (F4)
- Press F4 (Quick Patient Appointment View).
- Click the Appointment History tab.
- Use Ctrl+click or Shift+ click to select the appropriate appointments, right-click and select Cancel Appointment.
- Select the appropriate radio button to either Cancel the Appointment or Delete the appointment.
- Select a reason from the dropdown.
- Click OK to confirm.
Add a Cancellation Reason
Note: You are doing this in order to update the Manage Cancellation Reason list. If you do not want to cancel the appointment, click Cancel at the end.
- Click the Scheduler button on the Accuro Navigation bar.
- Right-click on an appointment and select Cancel Appointment.
Note: The following shortcut key can be used to cancel an appointment Ctrl+D, or on the Accuro Start Menu, click Scheduler and select Delete Appointment.
- Click Yes to confirm the cancellation.
- Click the dropdown list and select Manage from the list displayed. The Appointment Cancellation Reason window is displayed.
- Click the Add button .
- Type in the New Appointment Cancellation Reason and click OK.
- Click OK
- Click Cancel to exit the appointment without cancelling.
Edit a Cancellation Reason
Note: You are doing this in order to update the Manage Cancellation Reason list. If you do not want to cancel the appointment, click Cancel at the end.
- Click the Scheduler button on the Accuro Navigation bar.
- Right-click on an appointment and select Cancel Appointment.
Note: The following shortcut key can be used to cancel an appointment Ctrl+D, or on the Accuro Start Menu, click Scheduler and select Delete Appointment.
- Click Yes to confirm the cancellation.
- Click the dropdown list and select Manage from the list displayed. The Appointment Cancellation Reason window is displayed.
- Click to select the reason being edited.
- Click the Edit button .
- Update the cancellation reason and click OK.
- Click OK.
- Click Cancel to exit the appointment without cancelling.
Delete a Cancellation Reason
Note: You are doing this in order to update the Manage Cancellation Reason list. If you do not want to cancel the appointment, click Cancel at the end.
- Click the Scheduler button on the Accuro Navigation bar.
- Right-click on an appointment and select Cancel Appointment.
Note: The following shortcut key can be used to cancel an appointment Ctrl+D, or on the Accuro Start Menu, click Scheduler and select Delete Appointment.
- Click Yes to confirm the cancellation.
- Click the dropdown list and select Manage from the list displayed. The Appointment Cancellation Reason window is displayed.
- Click to select the reason being deleted.
- Click the Delete button .
- A confirmation message is displayed, click Yes to continue. The appointment cancellation reason has been deleted.
- Click OK.
- Click Cancel to exit the appointment without cancelling.
Move an Appointment
- Click the Scheduler button on the Accuro Navigation bar.
- Right-click on the appropriate appointment and select Cut Appointment from the drop-list displayed.
- Browse the scheduler to find the new appointment date and time, right-click in the slot and select Paste Appointment from the drop-list displayed. The appointment is now saved into the new slot.
Note: Users can cut or copy appointments from the appointment history tab in the Quick Patient Appointments View window (F4) and paste directly into the scheduler. This feature is to allow users to copy multiple appointments (that may be with different providers and on different days) at the same time, rather than having to keep going backwards and forwards in the scheduler.
Paste an Appointment
Paste appointment is used after you have cut an appointment (to move an appointment date and/or time) or copied an appointment (copying the details from one appointment slot into another).
To paste an appointment you must have selected Cut Appointment or Copy Appointment first. It is therefore assumed in this procedure that you are already within the Scheduler.
- Browse the Scheduler to find the new appointment time, click to select the slot.
- Right-click and and select Paste Appointment from the list displayed. The appointment details are now copied/moved into the new appointment slot.
Mask an Appointment
To mask an appointment:
- Select the appropriate appointment.
- Hold down the Alt key and click to select the appointment. The Configure Mask window is displayed.
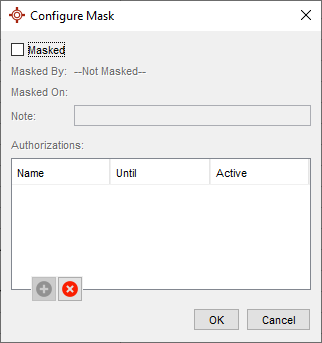
- Click the Masked checkbox.
- Type in a Note, if required.
- Click the Add button to authorize other users to view the masked appointment.
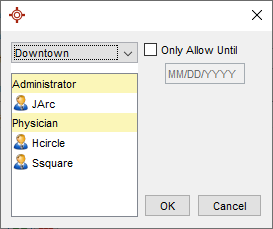
- Select the user to be authorized.
- If there is a date that the appointment can be viewed until before it is masked for this user select the Only Allow Until checkbox.
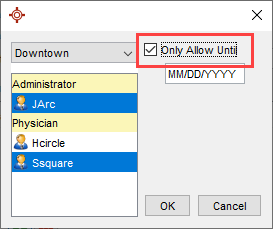
- Double-click the Date field to display the calendar. Select the date from which this appointment will be masked for the selected user.
- Click OK to save.
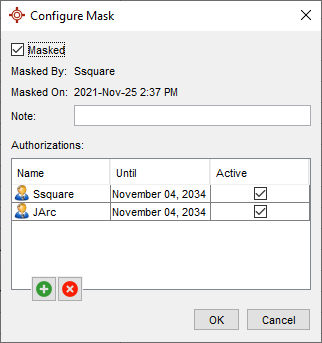
- The appointment is masked.
- Repeat this procedure from step 5 to allow other users to access this masked appointment. When all users have been added click OK to save the details and mask the appointment.
A blue triangle in the corner of the appointment block indicates it is masked. You can only see the appointment details if you have been granted access.

Note: Not all users have access to this feature. Masking and un-masking is managed in the Feature Access section of Manage Security.
Unmask an Appointment
To unmask an appointment:
- Hold down the Alt key and click to select the appointment. The Configure Mask window is displayed.
- Click to deselect the Masked checkbox.
- Click OK. The Remove Mask window is displayed.
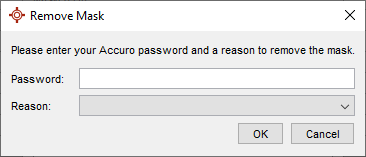
- Type in your Password.
- Click the dropdown list to the right of Reason and select the reason for unmasking the appointment.
- Click OK. The appointment is unmasked.
Note: Not all users have access to this feature. Masking and un-masking is managed in the Feature Access section of Manage Security.
Mark a Patient as Arrived
- Click the Scheduler button on the Accuro Navigation bar.
- Click to select the appropriate patient's appointment.
- Press and release the Alt button on the keyboard, click Scheduler and select Patient Arrived from the list displayed.
Note: A shortcut is right-click on the appropriate appointment and select Arrived from the dropdown list displayed.
An [A] appears next to the patient's name on the appointment indicating to other users that the patient has arrived.
Mark a Patient as No Show
- Click the Scheduler button on the Accuro Navigation bar.
- Right-click on the appropriate appointment and select No Show from the dropdown list displayed.
A [NS] appears next to the patient's name on the appointment indicating to other users that the patient was a no show.
Mark a Patient as No Charge
- Click the Scheduler button on the Accuro Navigation bar.
- Right-click on the appropriate appointment and select No Change from the dropdown list displayed.
A [NC] appears next to the patient's name on the appointment indicating to other users that the patient is a no charge.
Recall a Patient
- Click the Scheduler button on the Accuro Navigation bar.
- Right-click on the appropriate appointment and select Recall Patient. The New Task window is displayed:
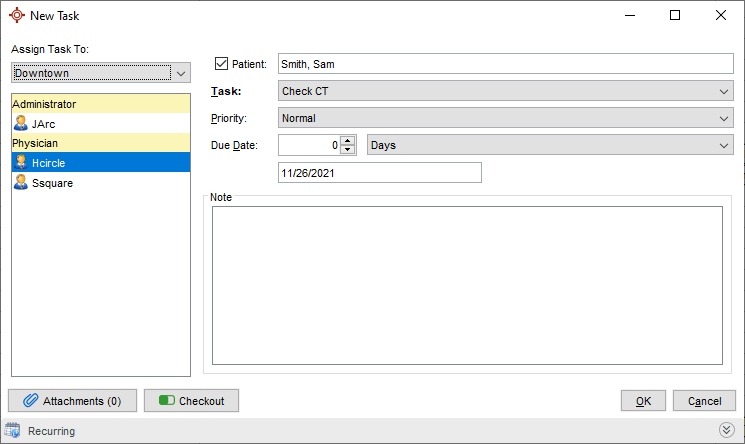
- Click the arrow to the right of Task and select the task from the dropdown list displayed.
- Select the priority from Normal, Urgent and Very Urgent.
- Type in the number of days in which a recall or call back is required. Alternatively, double-click the date field below and select a date from the calendar displayed.
- Type in a note if there is anything specific relating to the recall or call back task.
- Click to select the person to whom the task is being assigned.
- To make this task recurring, click Recurring or click
 . The screen expands to show the following:
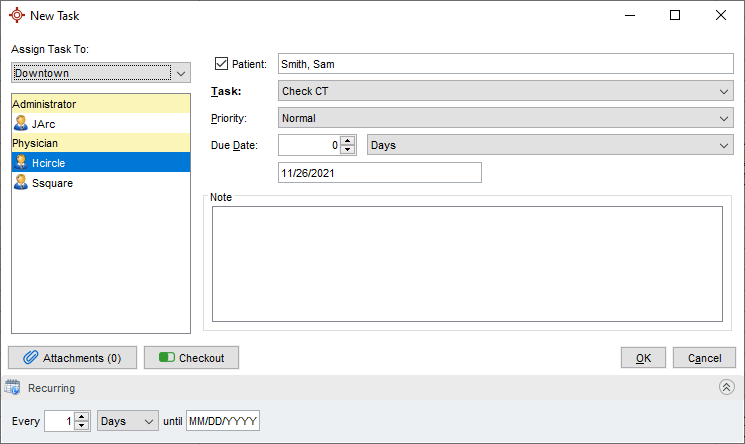
- Type in the number of days for which this event is to recur. Double-click the date field and using the calendar select the date when this recurring task ends.
- Click OK. A task for this patient shows up in the Tasks mailbox of the person to whom it was assigned.
View Appointment Details
- Click the Scheduler button on the Accuro Navigation bar.
- Right-click the appropriate appointment and select Retrieve Details from the dropdown list displayed.
Note: You can also click the appointment, press and release the Alt button on the keyboard, click Scheduler and select Retrieve Details from the dropdown list displayed.
The Appointment Details window is now displayed:
Note: The Other Providers field allows the user to enter multiple providers. The purpose of this feature is to record additional providers who are involved with the care of the patient (for a specific appointment) so they are auto-populated as CC'd when generating a letter for the appointment.
Add Other Providers to an Appointment
The Other Providers field allows the user to enter multiple providers. The purpose of this feature is to record additional providers who are involved with the care of the patient (for a specific appointment) so they are auto-populated as CC'd when generating a letter for the appointment.
- Click the Scheduler button on the Accuro Navigation bar.
- Right-click the appropriate appointment and select Retrieve Details from the dropdown list displayed.
Note: You can also click the appointment, select Scheduler on the Menu bar and select Retrieve Details from the dropdown list displayed.
The Appointment Details window is now displayed:
- Click the Edit button to add other providers. The other Appointment Providers window is displayed.
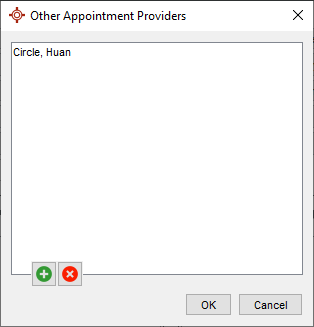
- To add a provider to the list click the Add button and search for the required provider. Repeat as necessary.
- Click OK to save.
Remove Other Providers From an Appointment
The Other Providers field allows the user to enter multiple providers. The purpose of this feature is to record additional providers who are involved with the care of the patient (for a specific appointment) so they are auto-populated as CC'd when generating a letter for the appointment.
- Click the Scheduler button on the Accuro Navigation bar.
- Right-click the appropriate appointment and select Retrieve Details from the dropdown list displayed.
Note: You can also click the appointment, select Scheduler on the Menu bar and select Retrieve Details from the dropdown list displayed.
The Appointment Details window is now displayed:
- Click the Edit button to remove providers. The Other Appointment Providers window is displayed.
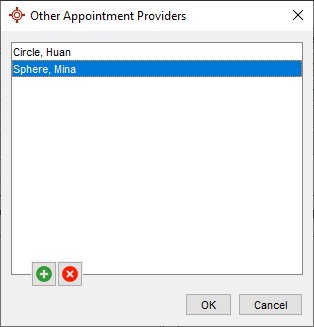
- To remove a provider from the list click the Remove button . A confirmation message is displayed.
- Click OK to delete.
- Click OK to save any changes.
Set an Appointment Note
When you use the Set Note option in Scheduler, the note created is displayed in the Notes section of Appointment Details.
- Click the Scheduler button on the Accuro Navigation bar.
- Right-click the appropriate appointment and select Set Note from the dropdown list displayed.
Note: You can also click the appointment, press and release the Alt button on the keyboard, click Scheduler and select Set Note from the dropdown list displayed.
The Note window is now displayed:
- Type in the note, as required and click OK to save.
When viewing the Appointment Details the added note is displayed in the notes section:
Double Booking Appointments
Double booking occurs when more than one patient or event is scheduled for the same time slots with the same provider. By default, each day and each provider is shown with one booking column. To double book appointments, create a second column for a provider.
- Click the Scheduler button on the Accuro Navigation bar.
- Right-click on the header of the provider who wants to double book, select Bookings and the Add Bookings from the dropdown list displayed.
A second column has now been added under this provider.
Remove Double Booking Column
Double booking occurs when more than one patient or event is scheduled for the same time slots with the same provider. By default, each day and each provider is shown with one booking column. To double book appointments, create a second column for a provider.
- Click the Scheduler button on the Accuro Navigation bar.
- Right-click on the header of the provider who wants to remove the double booking column, select Bookings and the Remove Bookings from the dropdown list displayed.
The second column has now been removed for this provider.
Note: A column can only be removed if it has no outstanding appointments. If there are still appointments listed then these need to be moved or cancelled.
Appointment Conflict
When a new appointment is booked, Accuro checks to see if there is already an appointment booked in that slot. If the slot is already booked, a Double Book window is displayed:
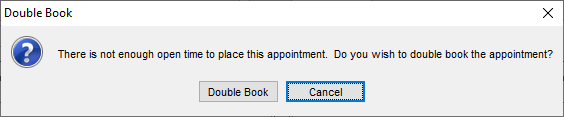
Select Double Book to create a second column to allow for double booking once all appointment details are filled in click OK. Selecting cancel will revert the selected appointment time to an available time slot.
When you Create a Recurring Appointment,where a conflict occurs an exclamation mark is displayed next to the specific appointment(s).
In the dropdown select to either Change Time, Double Book, or Don't Book. If "Change Time" is selected, select the new time in the dropdown list of the "Time" column.
Find a Patient's Next Appointment
- Click the Scheduler button on the Accuro Navigation bar.
- If a patient has not been loaded, select a patient with the Search Tool in the upper-right corner.
- The date and time of the current patient's next appointment is displayed in the Next Appointment button e.g.:
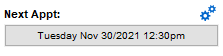
- To go to the next appointment in the scheduler, click the Next Appointment button.
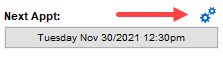
- Configure the Next Appointment search by clicking on the Configure button above the Next Appointment button.
- Click a radio button to select the next appointment after today or the next appointment after the date you are displaying in the Scheduler.
- To include appointments on the date selected, click the appropriate checkbox.
- To show previous appointments, click the appropriate checkbox.
- Click OK to save your changes.
Display a Patient's Previous Appointment Button
If the Previous Appointment button does not appear, check the Show Previous Appointment checkbox is selected in the Next Appointment configuration window. To do this:
- Click the Scheduler button on the Accuro Navigation bar. If a patient has not been selected, the Next Appointment button will be blank. You do not need a patient selected to proceed.
- Click the Configure button
 .
.
- Click the Show Previous Appointment checkbox.
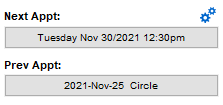
- Click OK to save. The Previous Appointment button is now displayed:
Find a Patient's Previous Appointment
- Click the Scheduler button on the Accuro Navigation bar.
- If a patient has not been loaded, select a patient with the Search Tool in the upper-right corner.
- The date of the current patient's previous appointment is displayed in the Next Appointment button e.g.:
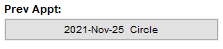
- To go to the previous appointment in the scheduler, click the Previous Appointment button.
- Configure the Next Appointment search by clicking on the Configure button above the Next Appointment button.
Note: If the Previous Appointment button does not appear, check the Show Previous Appointment checkbox is selected. If you are unsure how to do this, for more help see Display a Patient's Previous Appointment Button.
Print a Day Sheet / Selected Column
- Click the Scheduler button on the Accuro Navigation bar.
- Click a time slot of the provider whose day sheet you are printing.
- Click the Print button. The day sheet for the selected provider is displayed.
Note: You can also right-click anywhere in a provider's column and select Print Selected Column. This also displays the day sheet for a provider.
- Click the Print button
 .
.
- Select your printer and click OK.
Save a Day Sheet
- Click the Scheduler button on the Accuro Navigation bar.
- Click a time slot of the provider whose day sheet you are saving.
- Click the Print button. The day sheet for the selected provider is displayed.
- Click the Save button
 .
.
- Browse to where you want to save the file and click OK.
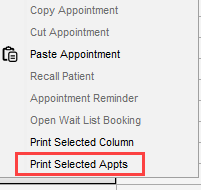
Print Selected Appointments
- Click the Scheduler button on the Accuro Navigation bar.
- Click the time slot where printing the selected appointment is to begin.
- Click and drag to the time slot you want the printed appointment to end.
- Right-click within the highlighted space and select Print Selected Appointments.
- The appointments you selected are displayed in a Day Sheet format.
- Click the Print button .
- Select your printer and click OK.
Archive / Unarchive an Appointment
Archive an Appointment is an option that your clinic can use if the feature permission is enabled.
Archive/Unarchive an Appointment in the Scheduler:
- Click the Scheduler button on the Accuro Navigation bar.
- Select the appropriate appointment, right-click and select Archive or Unarchive, as required.
Archive/Unarchive an Appointment in Quick Patient Appointments View:
- Press F4, the Quick Patient Appointments View window is displayed for the selected patient.
- Select the Appointment History or the Archived Appointment History tab, as required.
- Right-click the appointment and select either Archive or Unarchive.
View Monthly Schedule for Providers
- Click the Scheduler button on the Accuro Navigation bar.
- Hold the Shift key and click the Print button at the same time. The Monthly Schedule is displayed.
- Use the arrow buttons to browse the months as required.
- Click the Print button .
- Select your printer and click OK.
Book Day Off
Book Day Off allows you to book a day off for a provider from within the scheduler. In order to book a day off there must be no appointments booked for that provider on the day they are booking off. Appointments have to be moved to another provider or re-scheduled before you can proceed.
- Click the Scheduler button on the Accuro Navigation bar.
- Right-click in the appropriate provider's column and select Book Day Off from the list displayed.
- The column for the selected provider is cleared and replaced with the text, "Day Off."
Cancel Book Day Off
If you have marked a provider as Day Off in the scheduler using Book Day Off and you want to remove this, this is how to cancel the day off.
- Click the Scheduler button on the Accuro Navigation bar.
- Right-click in the provider's column where it says Day Off and select Cancel Appointment from the list displayed.
- Click Yes to confirm you are cancelling the day off. The column reverts back to how it was before the day off was booked.