Query Definitions
The workflow for creating a query is as follows:
- A definition is created (i.e. name the query).
- Add the rules.
- Run the report on the query (all rules in the definition run concurrently).
- The results of the query are displayed.
Create an Alert Definition
- Press and release the Alt key, click Reports and select Query Builder (Alerts) from the list displayed. The Alert Definitions window is now displayed.
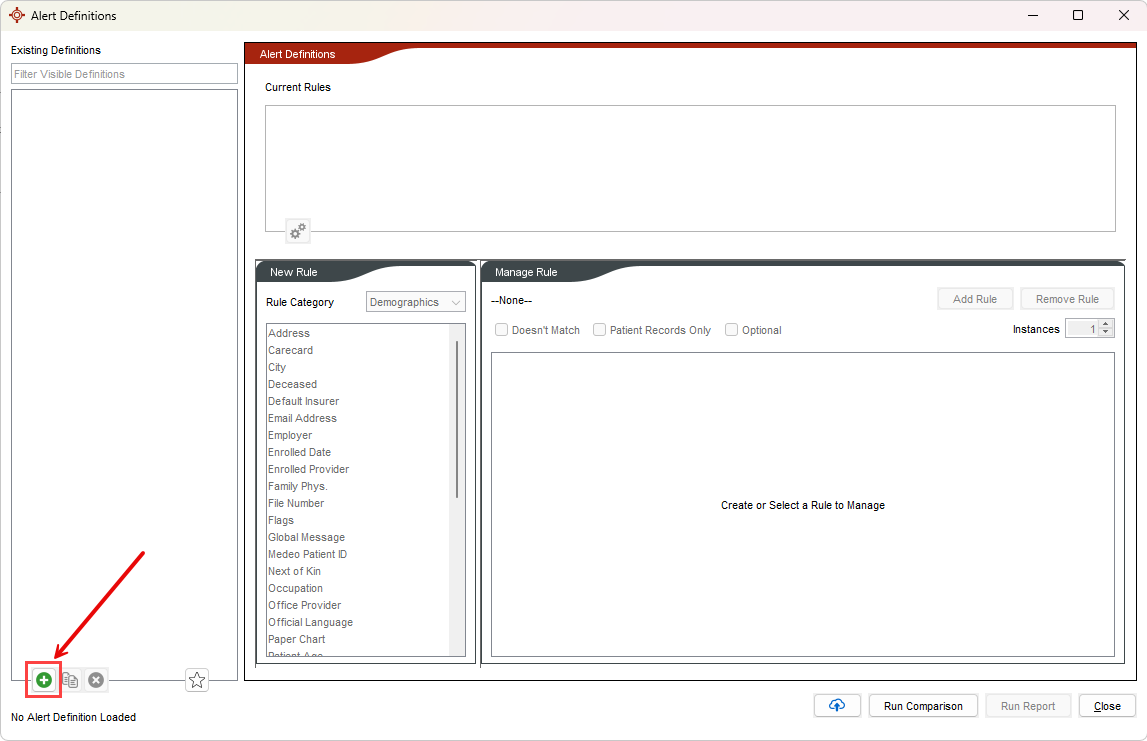
- Click the Add button
 in the bottom-left corner under Definitions.
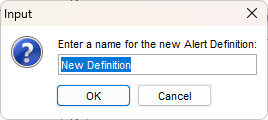
- Type in the name of the definition and click OK.
Add Rules to an Alert Definition
- Press and release the Alt key, click Reports and select Query Builder (Alerts) from the list displayed. The Alert Definitions window is now displayed.
- Click to select a Definition.
- Click the dropdown list
 and select a Category from the list displayed.
- Click to select the appropriate item from the list displayed:
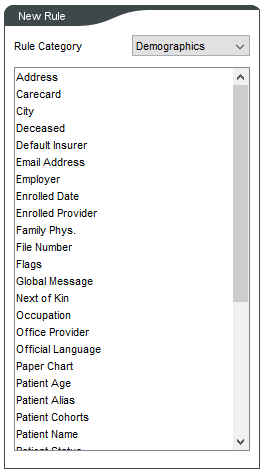
- Complete the fields displayed, for example:

- Click the Add Rule button to add the rule to the Current Rules for the definition.
- Repeat as necessary until all the rules have been created.
Alert Definition Options
Alert Definition Options can be found within the Query Builder and allows the user to further customize a query.
To access this function of the Query Builder:
- Navigate through the Accuro Start Menu
 , select Reports, then select Query Builder (Alerts).
- Once a query is selected or created in the Alert Definition window, select the Configuration button
 .
.
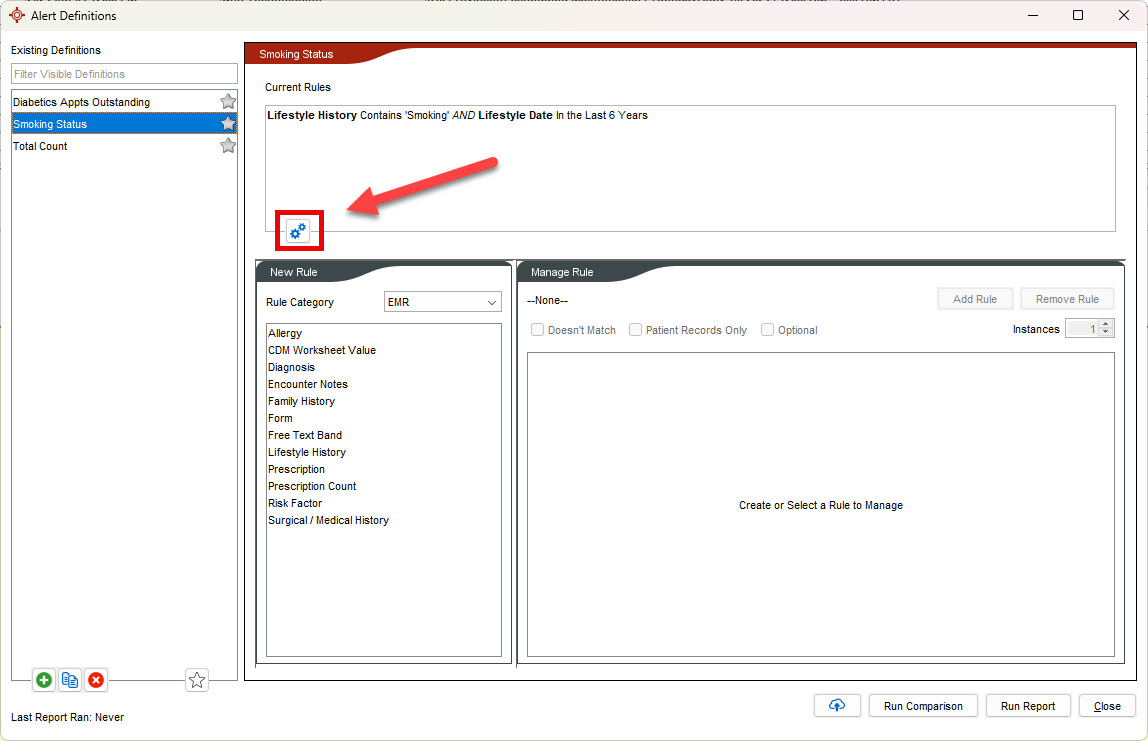
- The Alert Definition Option window will display.
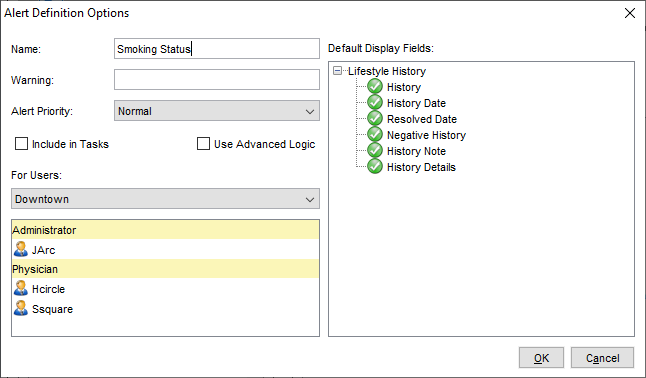
Alert Definition Options Fields
Name: The name of the Query is displayed.
Warning: The name of a warning to display in the Patient Tasks (F7) window. If left blank, the Query Name will be displayed instead.
Include in Tasks: When enabled, if a patient meets the criteria of the Query, an alert icon  will display in the demographics status bar as well as in the Patient Tasks (F7) window under the Alerts section. Note: For larger databases, it is recommended to run the query, assign a patient flag through the available actions in the Query Builder results, and then manually delete the patient flag once the action is complete.
Use Advanced Logic: When enabled, in the Alert Definition window beside "Advanced Logic", users can enter the number corresponding to a rule to refer to it and can combine different rules using "OR" or "AND".
For Users: In the dropdown list  select the office for which the respective users within to be displayed in the field below. Click to select a user or hold the Crtl key + click to select multiple users to whom the include in tasks alert will display for. Alert will appear for all users in the respective office if left blank.
Default Display Fields: Fields that will be displayed once the Query has been run. This can be overridden when Run Report is selected as the Fields to Display is available here as well.
Run a Report on an Alert Definition
- Press and release the Alt key, click Reports and select Query Builder (Alerts) from the list displayed. The Alert Definitions window is now displayed.
- Click to select a Definition.
- Click the Run Report button. The Check for Alert Matches window is displayed.
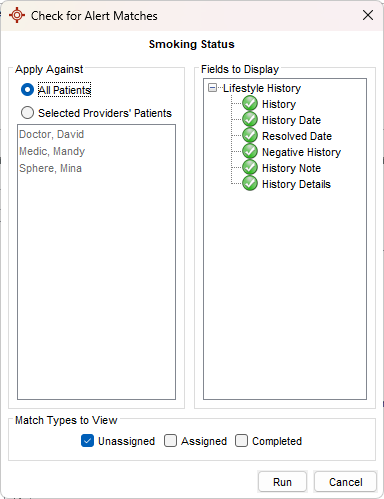
- Click to select All Patients or Selected Provider' Patients and select the appropriate Provider from the list displayed.
- Click to select the checkboxes for Unassigned, Assigned, and/or Completed, as required.
- Click the Run button. The Alert Matches window with the report results is displayed.
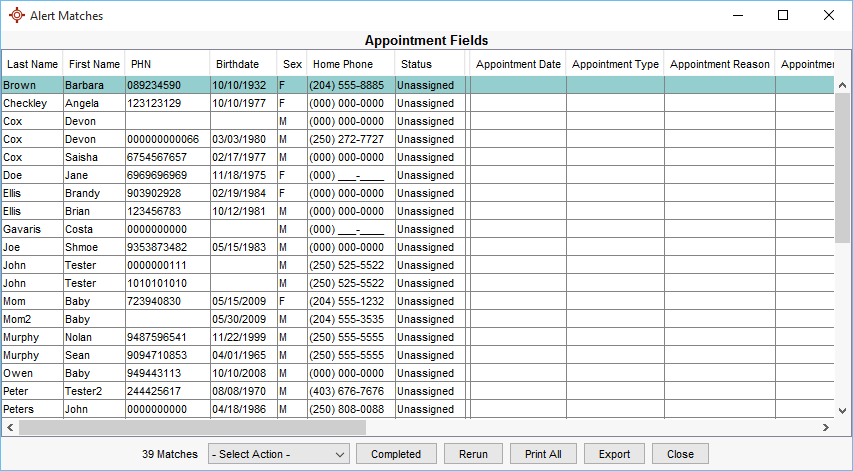
- Click the dropdown list
 and select the action from the list displayed. The selection made determines what is displayed next.
Note: Right-click on any of the alert matches to access the same action menu options.
- When finished with the Alert Matches, click the Completed button or Close if completion of the query is not required at this time.
Query Builder Example: Total Count of Patients
For this example we are going to create a query for all current (active) patients with a PCode of 00981 and a DCode of 0088. PCodes and DCodes are province specific, so these should be changed to suit your requirements.
- Press and release the Alt key, click Reports and select Total Count Query Builder (Alerts) from the list displayed. The Alert Definitions window is displayed.
- Click Add in the Definitions section.
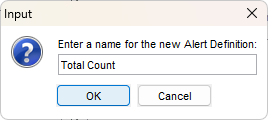
- Type in the name of the Query being built. In this example it is called "Total Count", click OK.
- Next the rules need adding. The first rule is that the patients must be active. Click the down-arrow to the right of Category and select Demographics, click to select Patient Status.
- Click the Add Rule button.
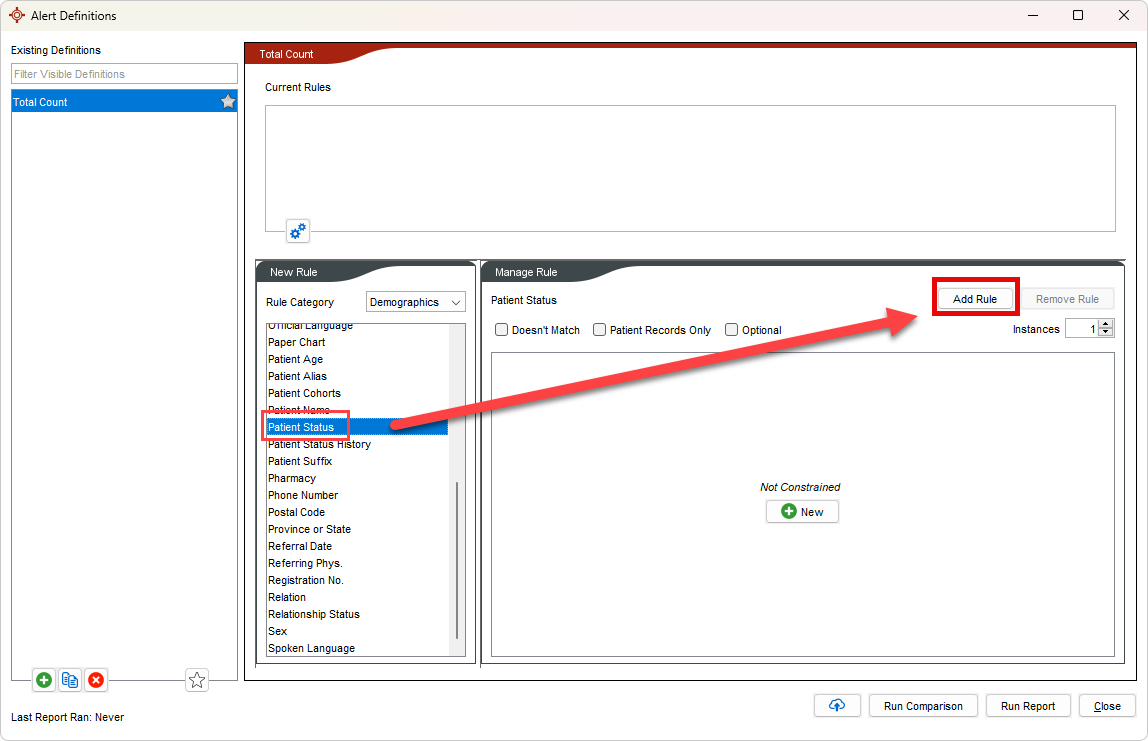
- Click New in the middle of the Patient Status window.
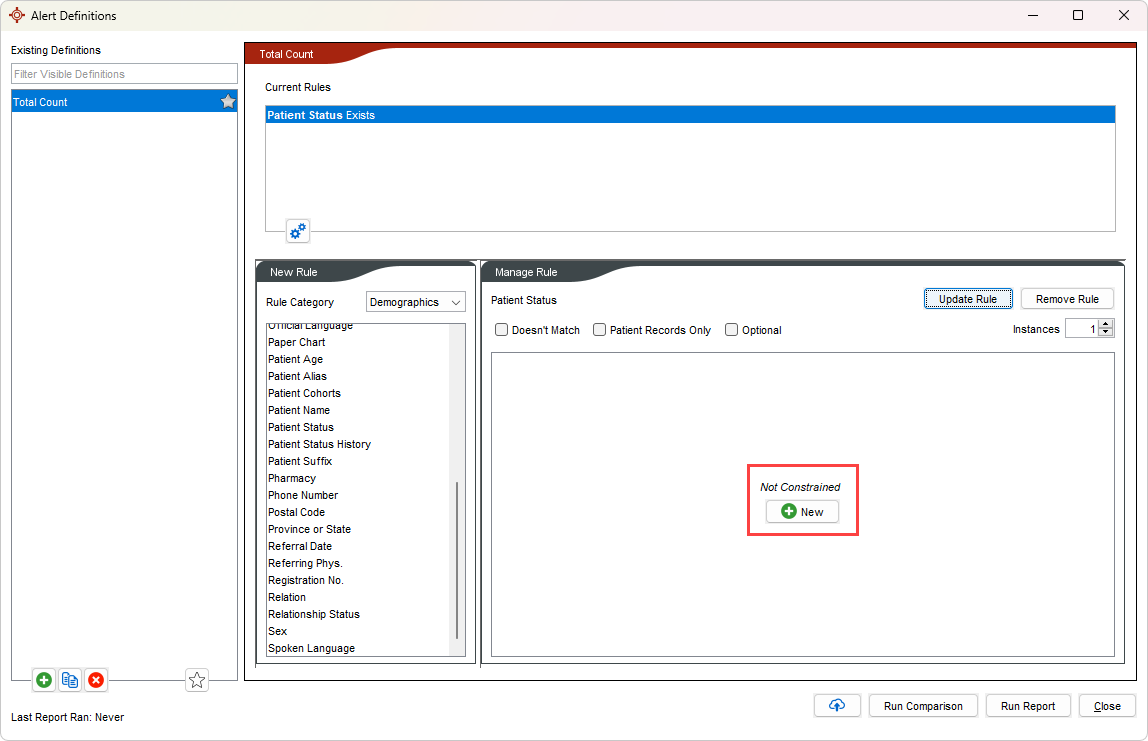
- Click the down-arrow to the right of Status and select Equals. Click the arrow at the extreme right and select Active.
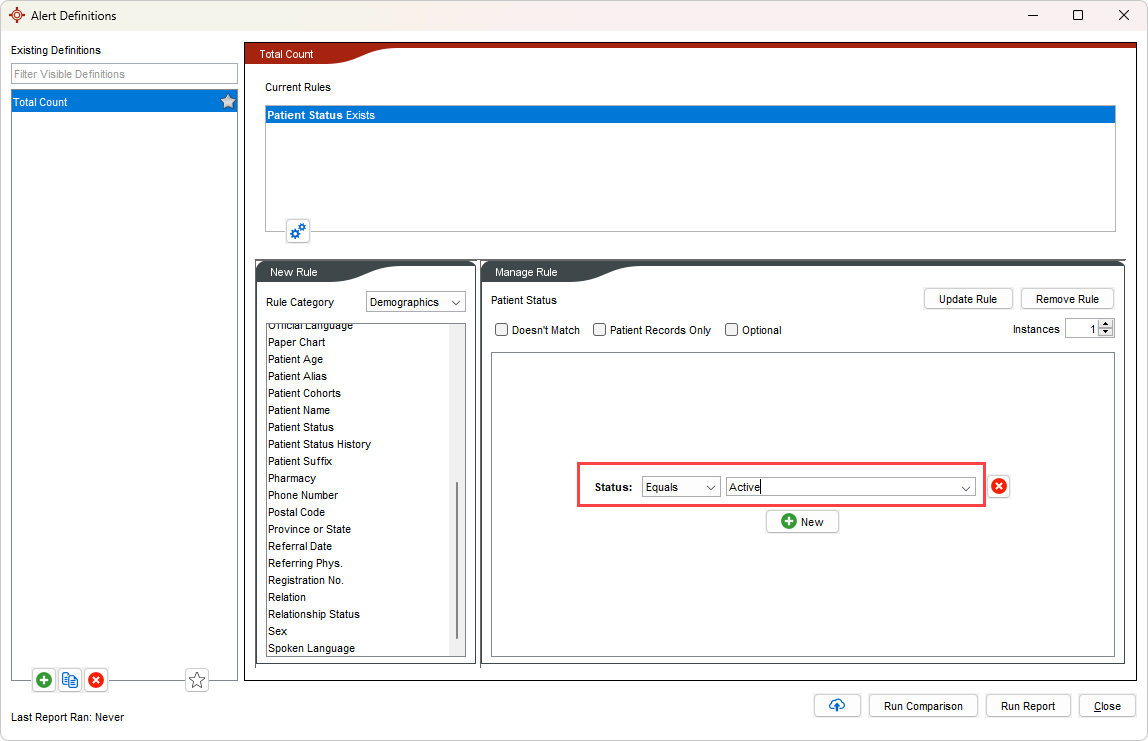
- Click the Update Rule button.
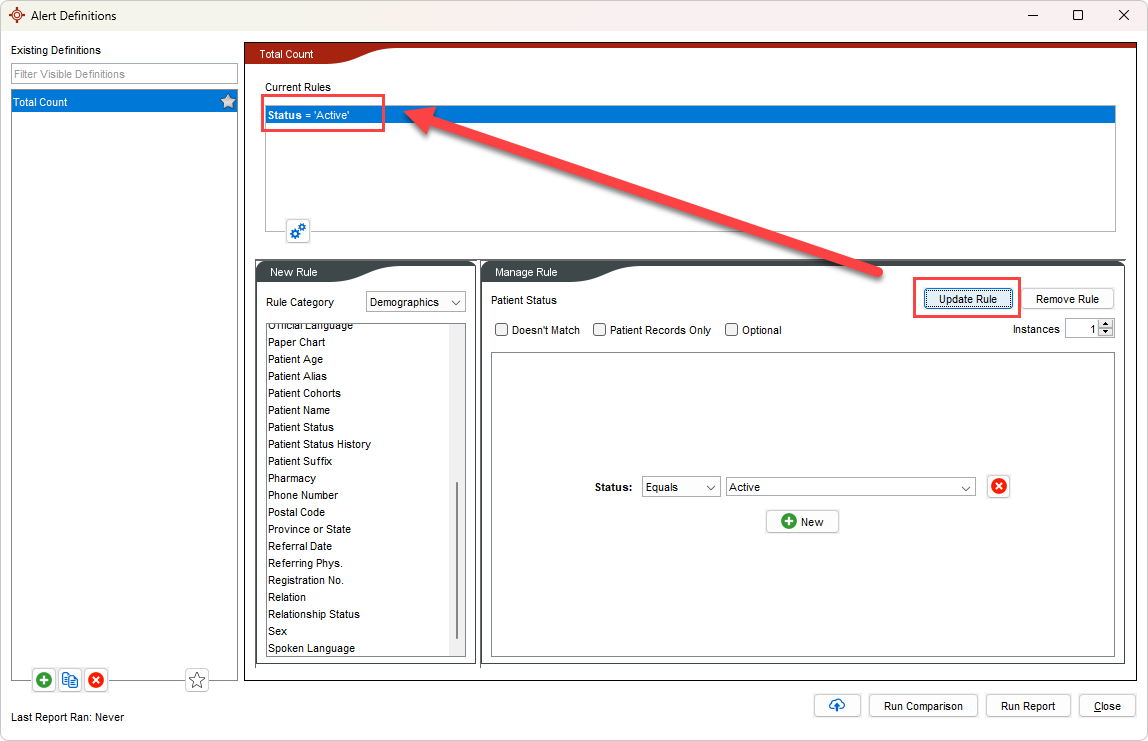
The rule status is active has been added.
- Next the Diagnosis Code and Procedure Code need to be added. These are linked to Billing, so select the category of Billing and select Bill.
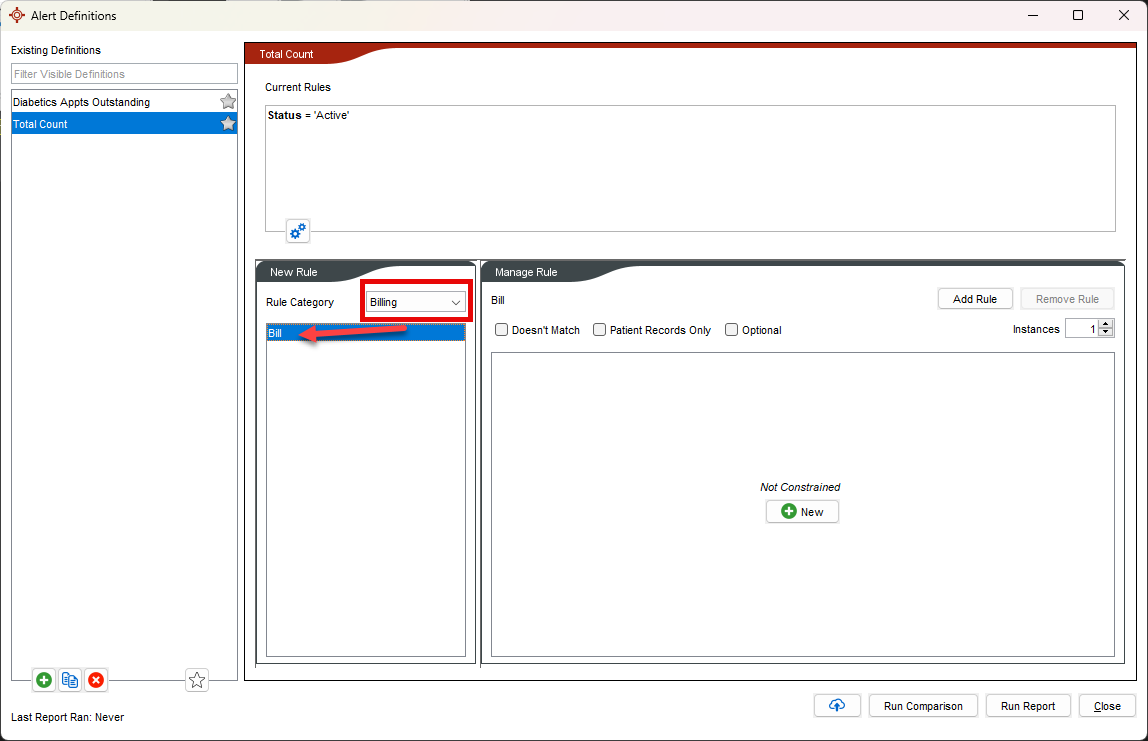
- Click the New button in the Manage Rules section.
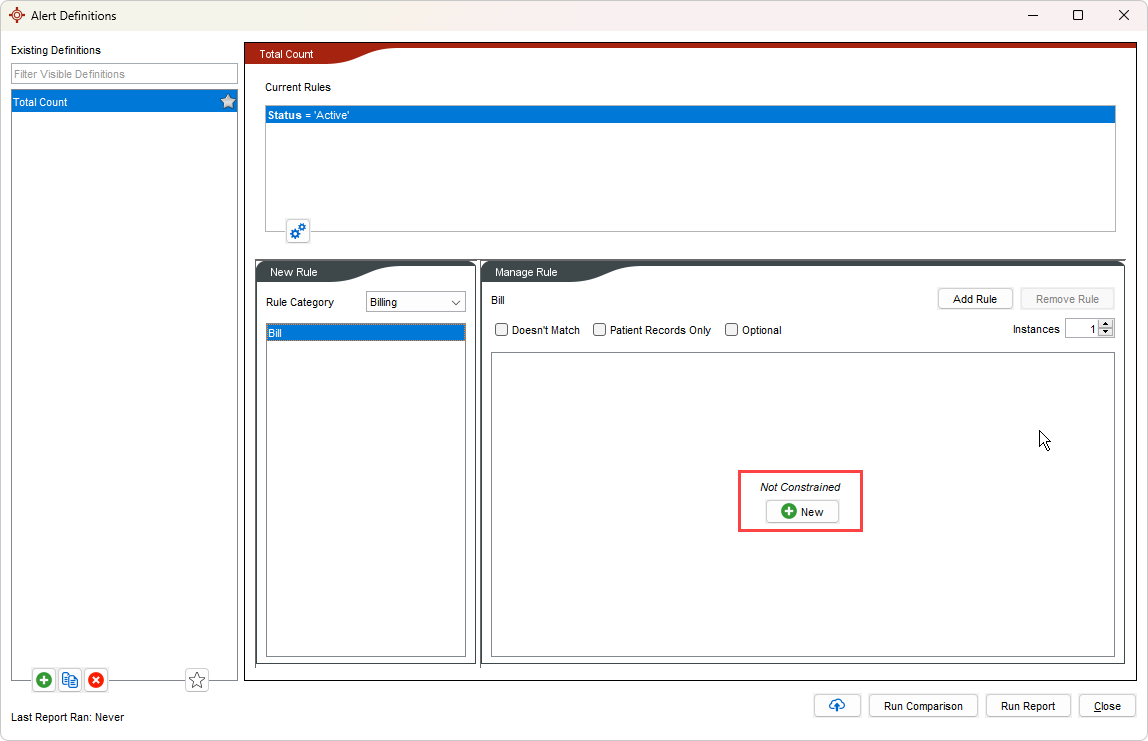
- Click the down-arrow and select Diagnosis Code.
- Select Equals and type in the Diagnosis Code.
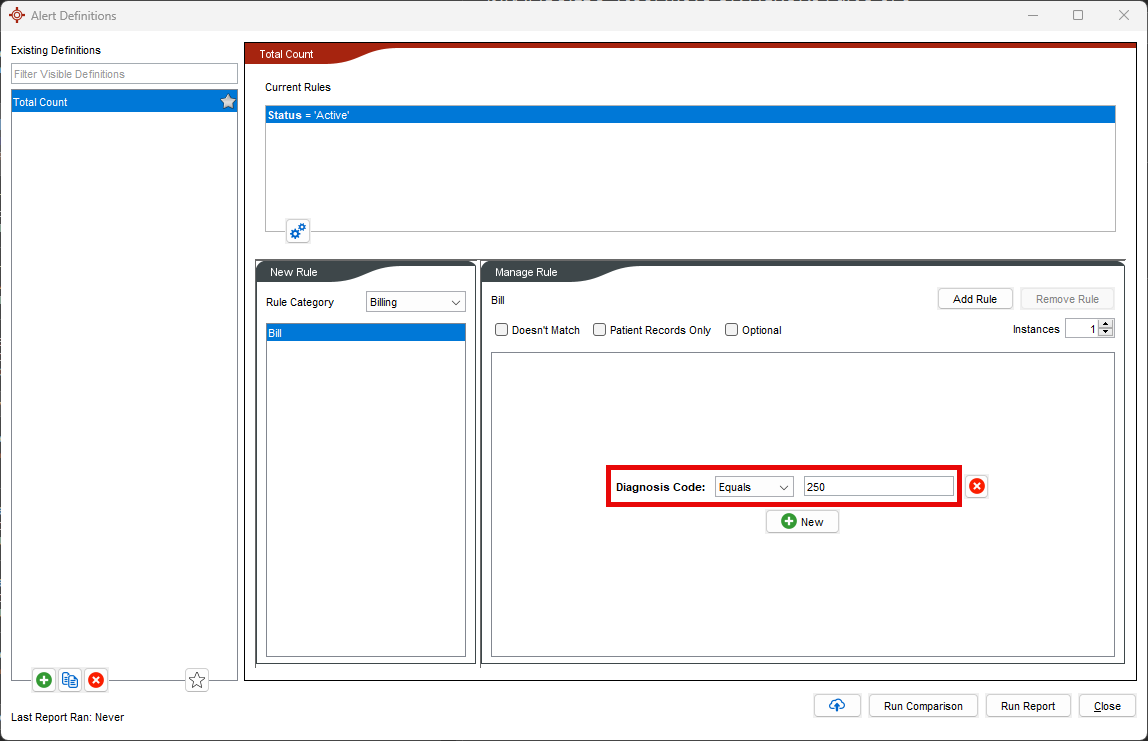
- Click the New button again and select Procedure Code from the drop list.
- Type in the Procedure Code. Click the Add Rule button.
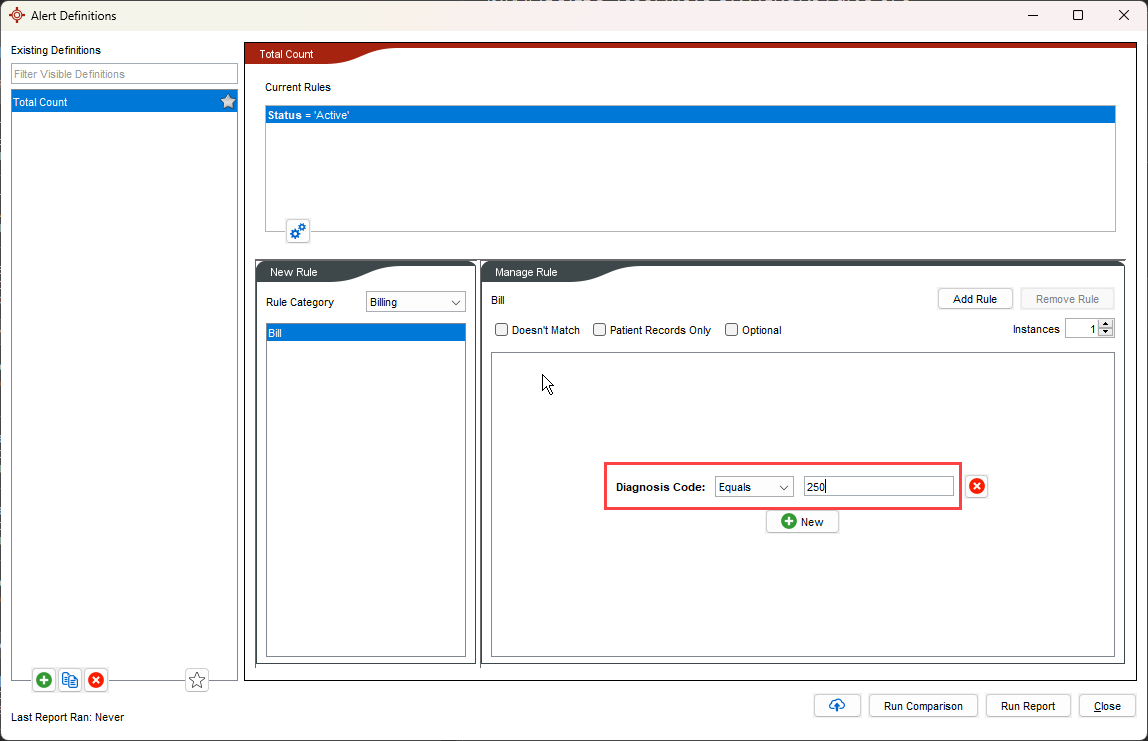
The Diagnosis and Procedure Codes have been added.
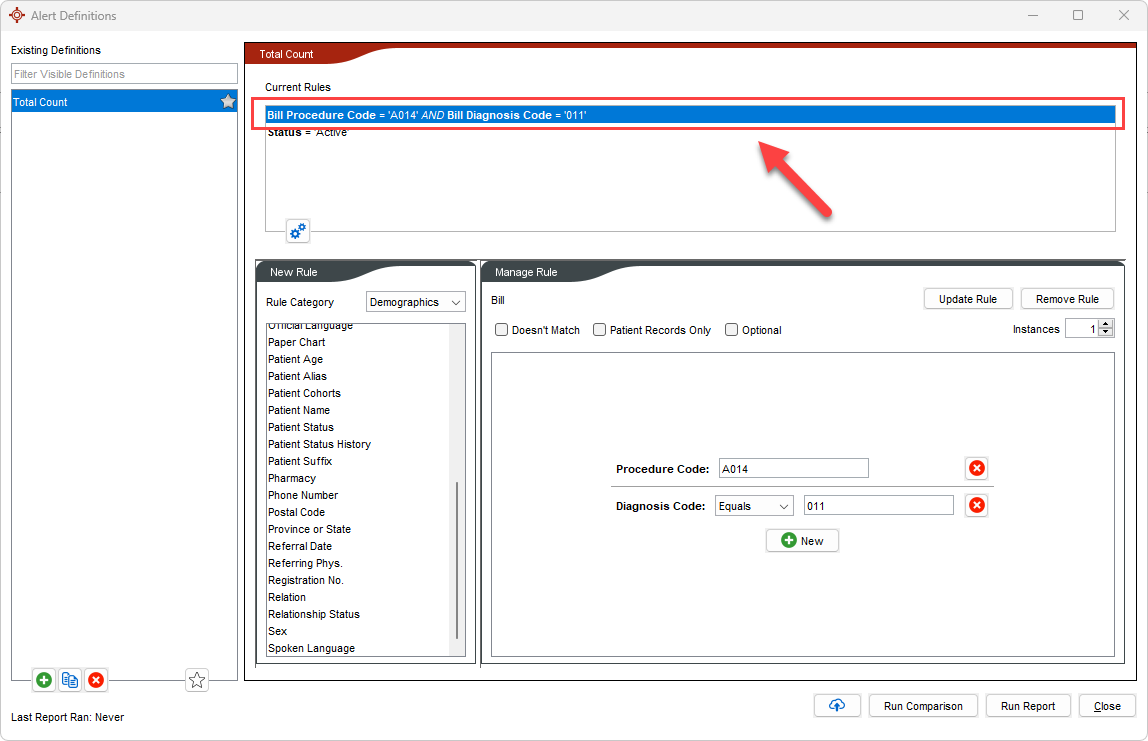
- To run this query click the Run Report button at the bottom-right of the window. This query now creates a report of all active patients where a bill contains the procedure and diagnostic codes we entered.
Query Builder Example: Diabetic Patients Not Had an Appointment in the Last 3 Months
For this example we want current patients, diagnosed with diabetes who have not had an appointment with the doctor in the last 3 months.
- Press and release the Alt key, click Reports and select Query Builder (Alerts) from the list displayed. The Alert Definitions window is now displayed.
- Click Add in the Definitions section.

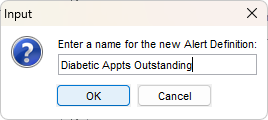
- Type in the name of the Query being built. In this example it is called "Diabetic Appts Outstanding", click OK.
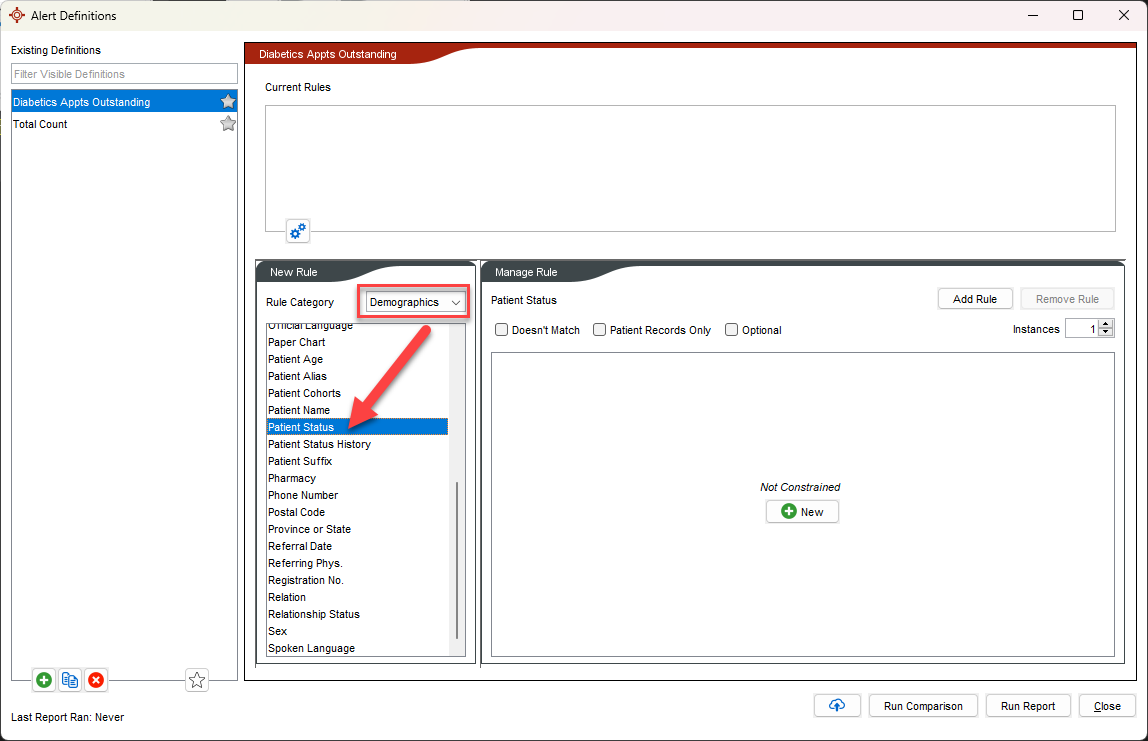
- Next the rules need adding. The first rule is that the patients must be active. Click the down-arrow to the right of Category and select Demographics, click to select Patient Status.
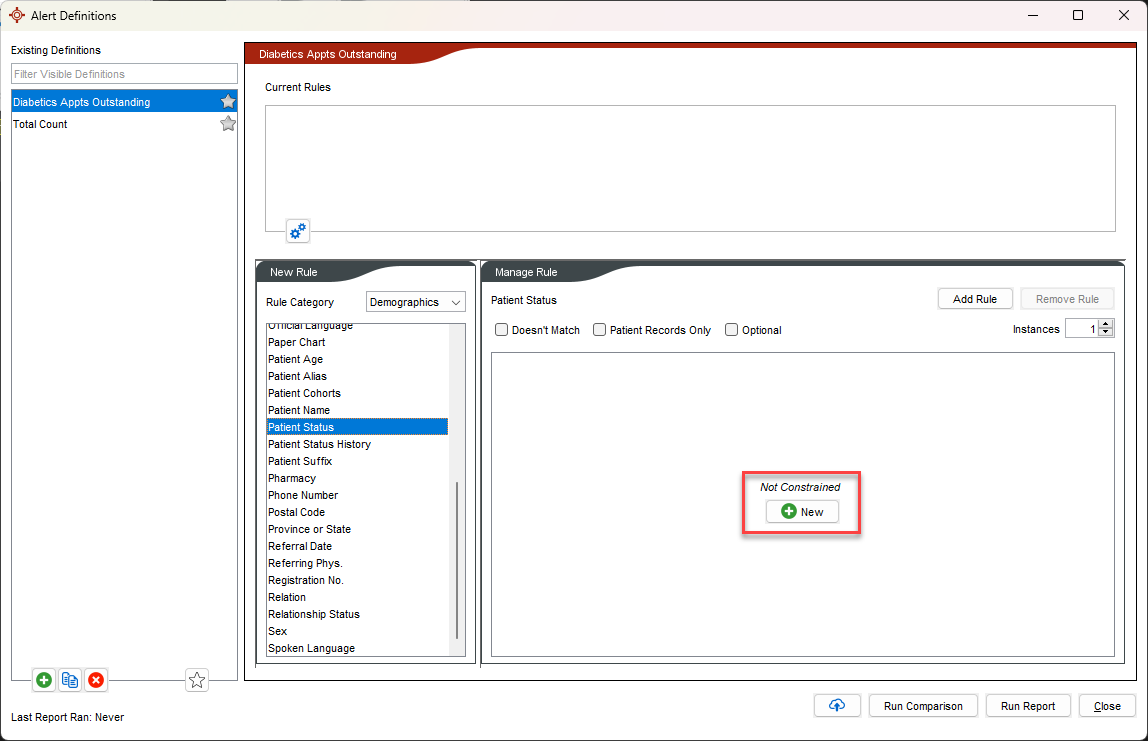
- Click the New button.
- Select Equals and Active.
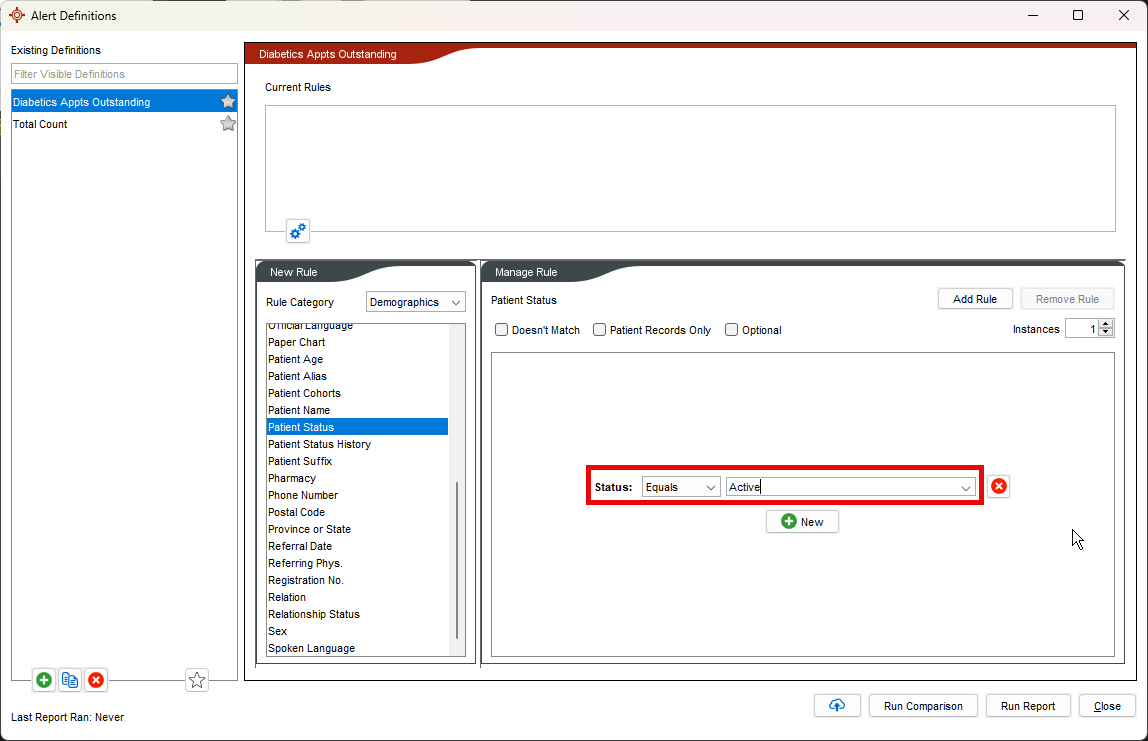
- Click the Add Rule button. The rule is added to the list of current rules.
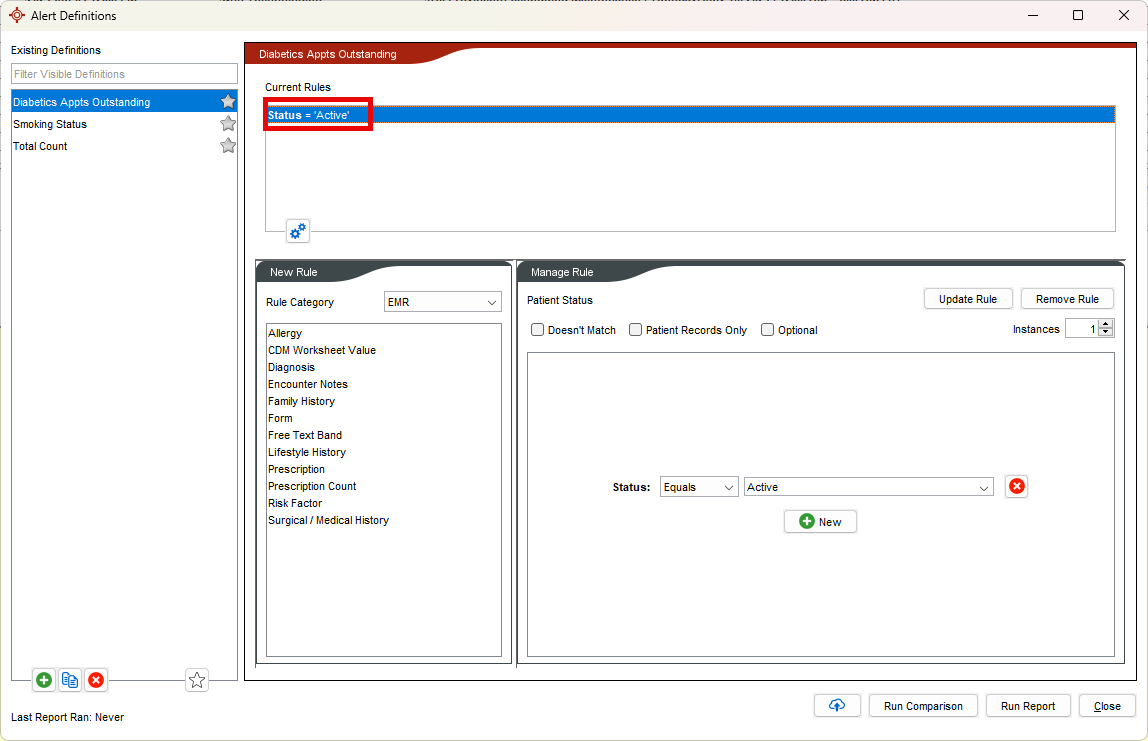
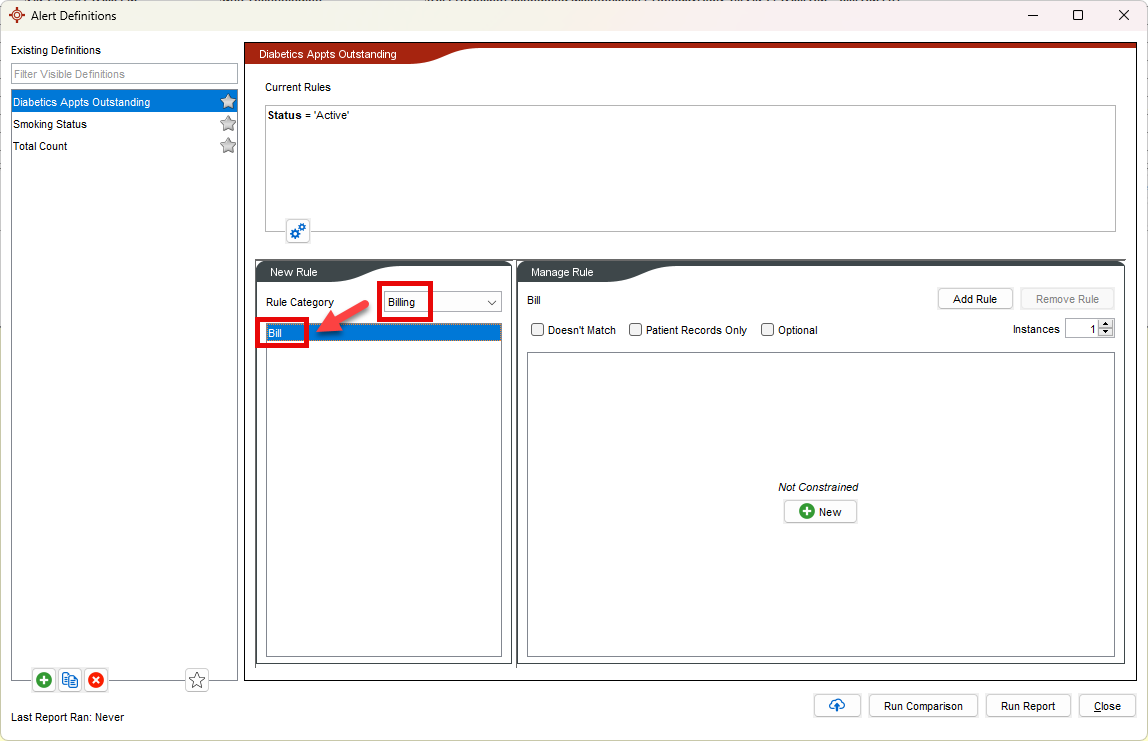
- Next we need to add patients with diabetes. Select Billing and highlight Bill.
- Click on the New button.
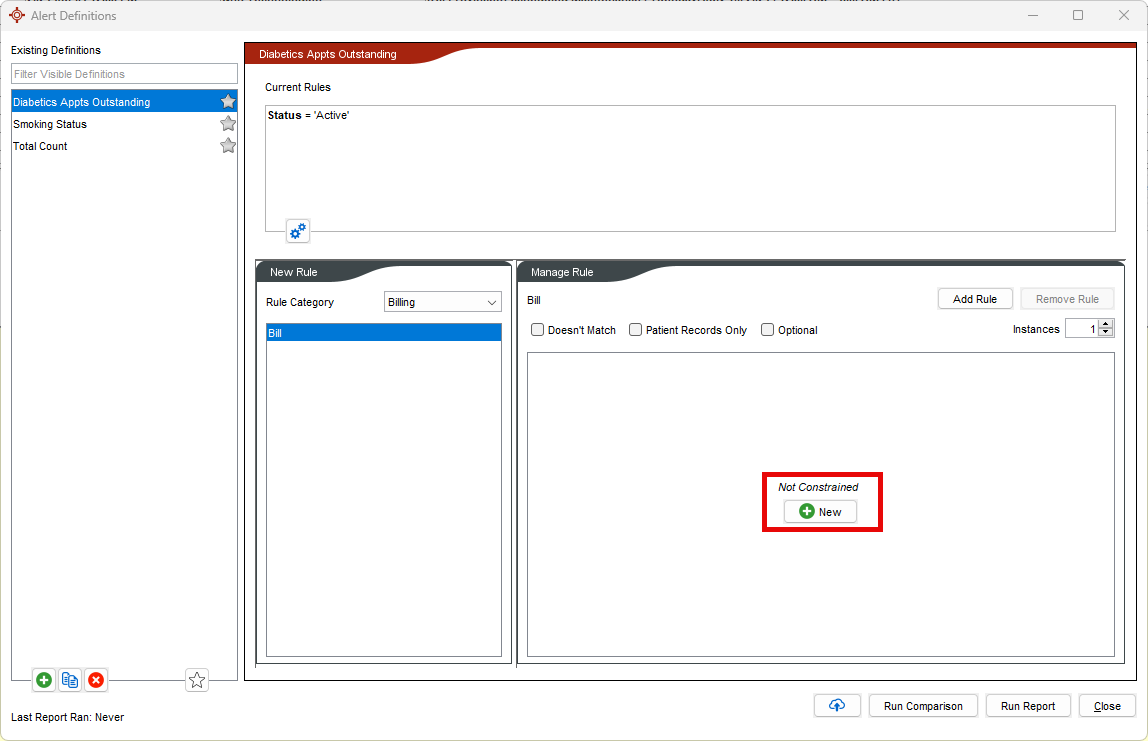
- Select Diagnosis Code.
- Type in the code for diabetes. If you are unsure of the code the word diabetes can be typed in. Select the main entry for diabetes in this example 250 and select starts with (that way the whole family of diabetes codes are included in the query).

- Click the Add Rule button.
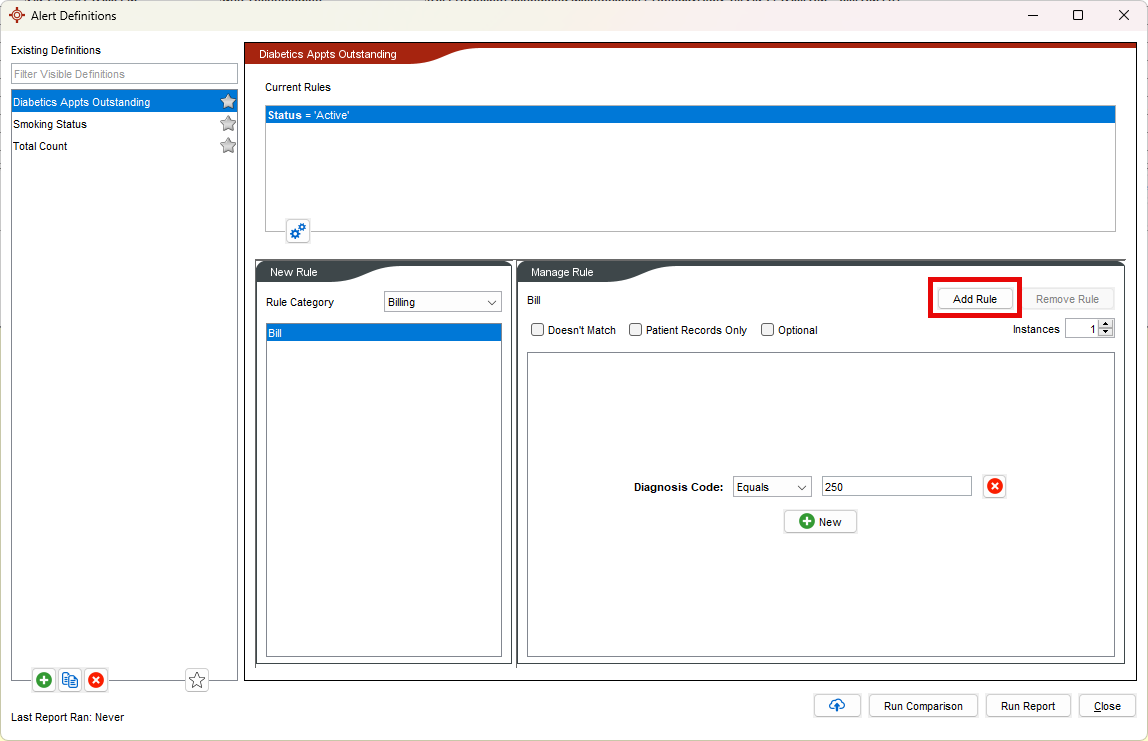
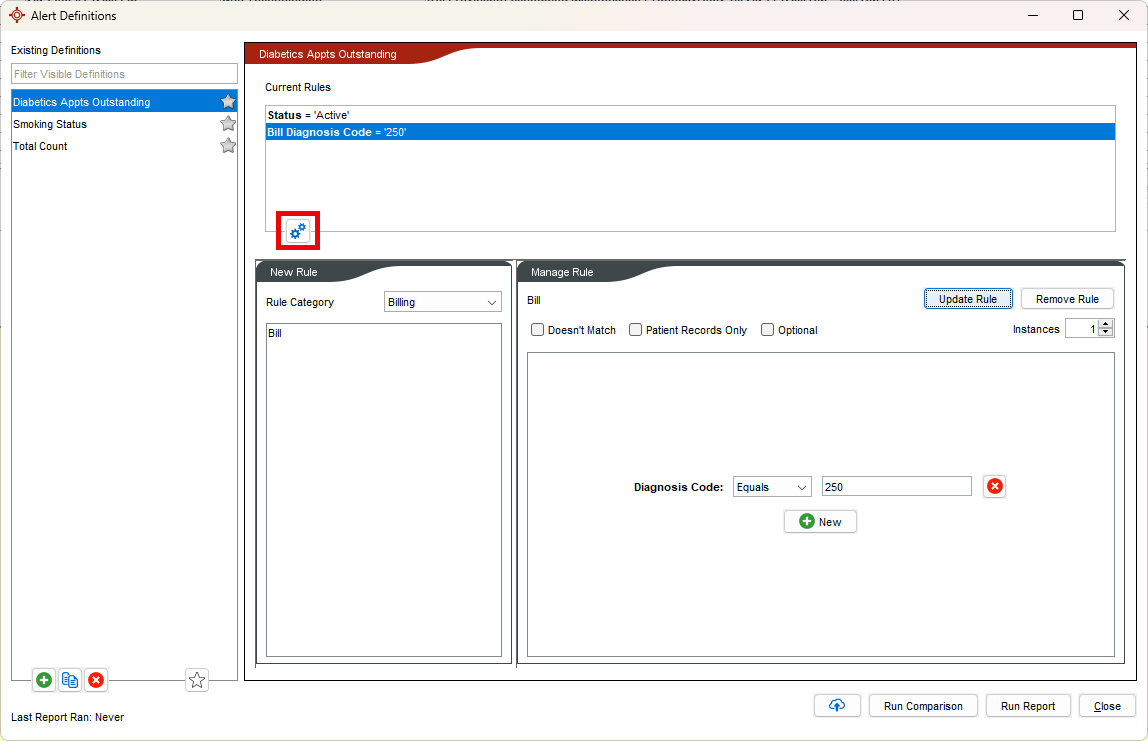
- Next we need to add patients who have not seen the doctor in the last 3 months. To turn on the advanced features click the Options button
 and click the Use Advanced Logic checkbox.
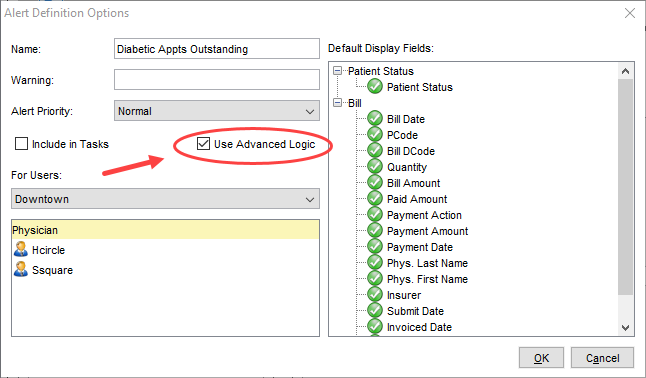
- Click OK.
- Select the category of Appointments and select Appointment in the List.
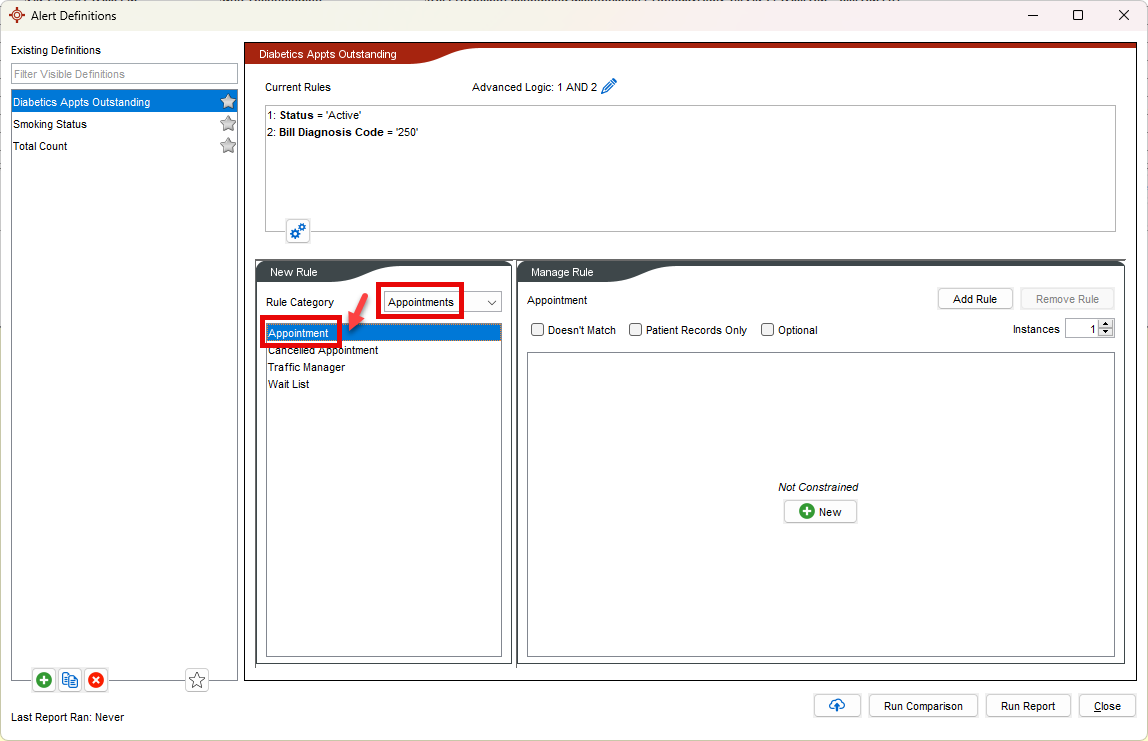
- Click the New button.
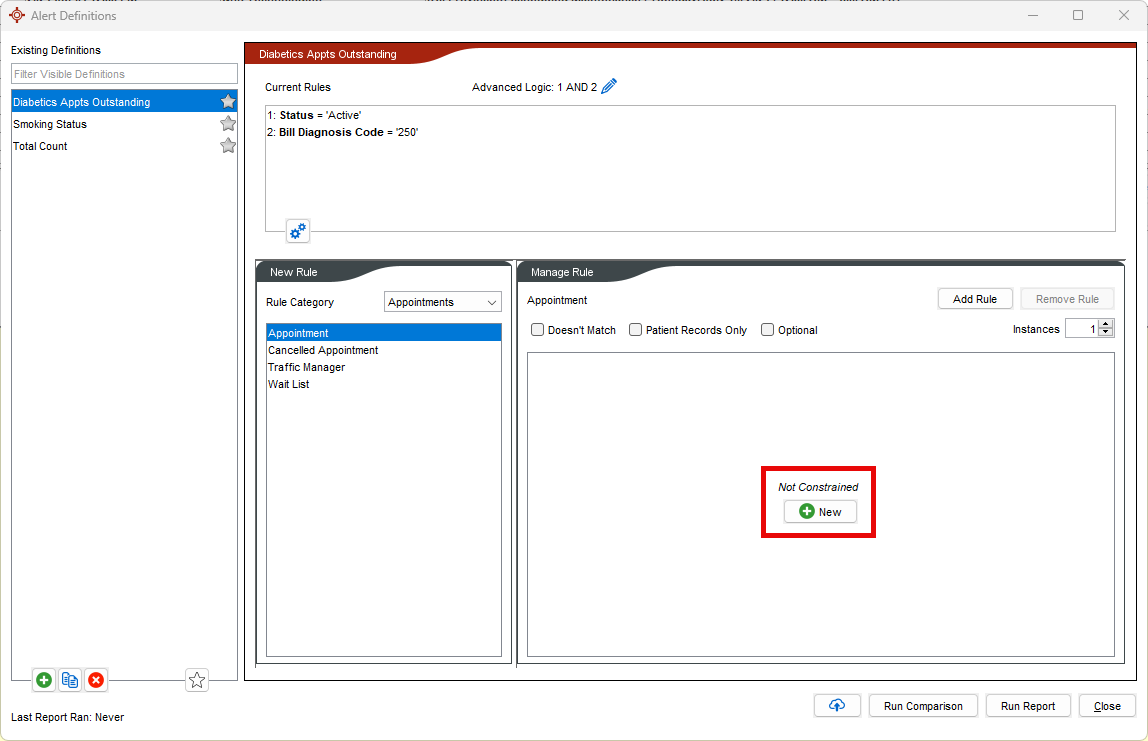
- Select Date from the list and select In the Last and 3 months.
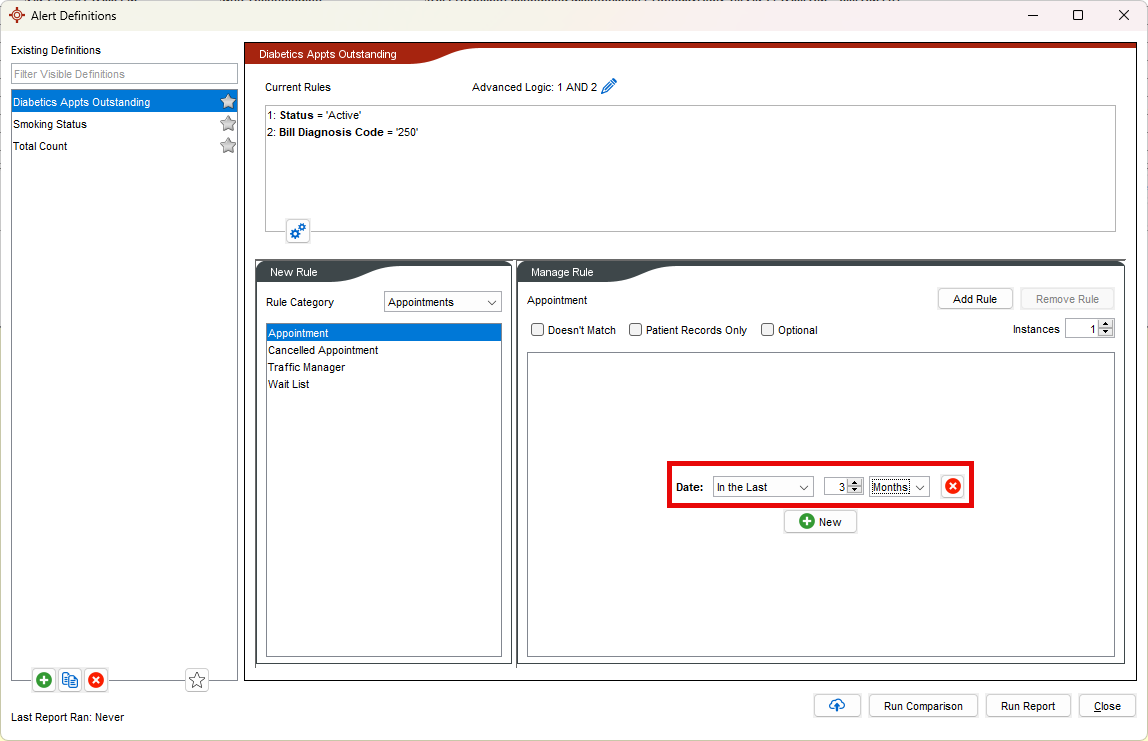
- Now the appointment reason of diabetes needs to be added (the patient may have had appointments for other things in the last 3 months).
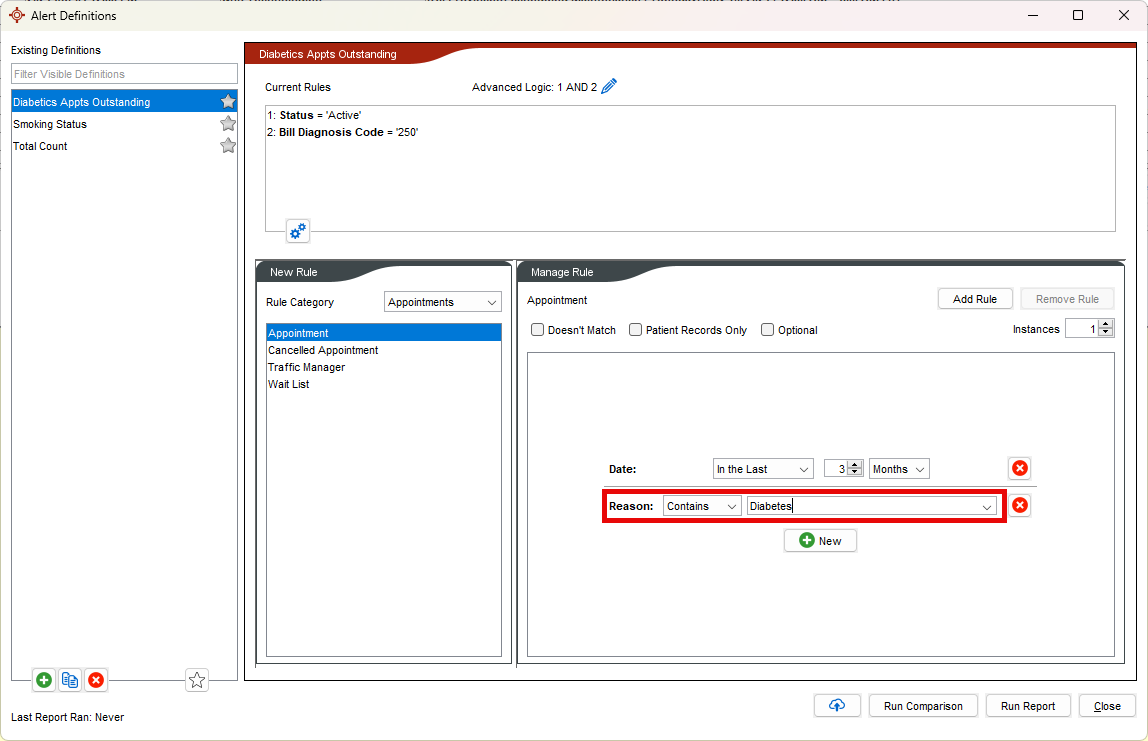
Click New and select Reason. Then select Contains and type in the word Diabetes.
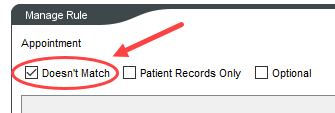
- Click the Doesn't Match checkbox.
- Click Add Rule.
The third rule appointment in the last 3 months with the reason diabetes is highlighted red to indicate does not match.
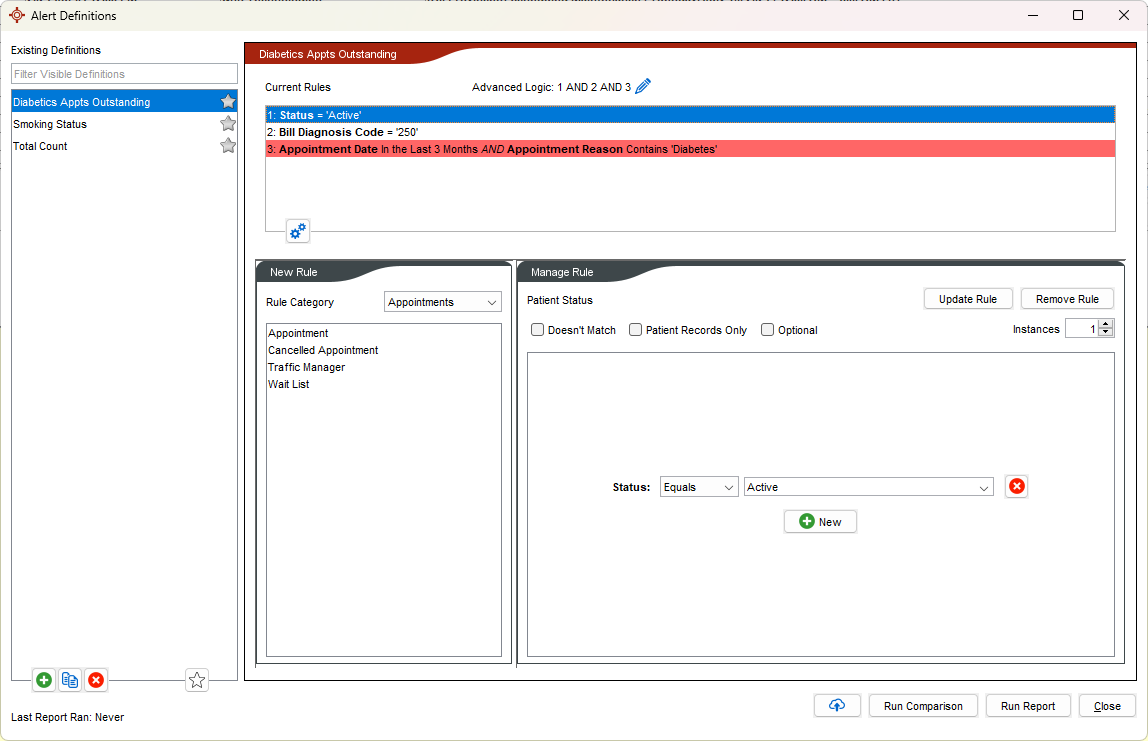
- Click Run Report to run this query.
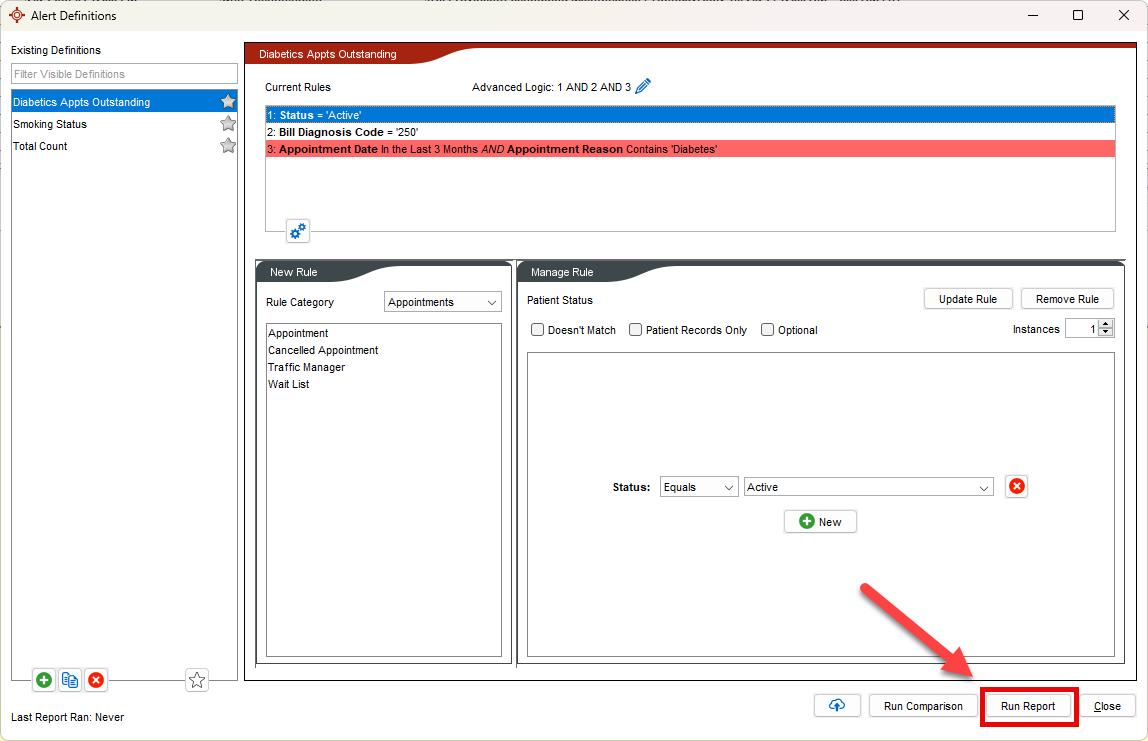
- The Check for Alert Matches window is displayed. Amend the fields that are displayed in the results, as required.
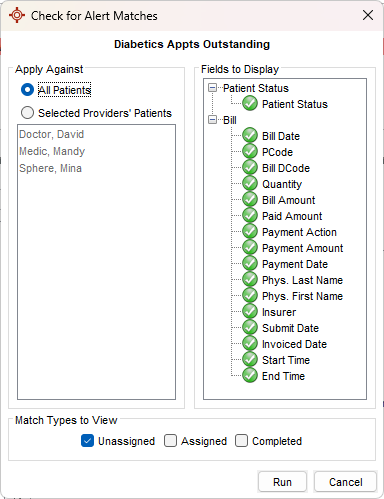
- Click Run. The Alert Matches window is displayed and contains any patients who match your search criteria.
 in the bottom-left corner under Definitions.
 in the bottom-left corner under Definitions.


 , select Reports, then select Query Builder (Alerts).
 .
.

 will display in the demographics status bar as well as in the Patient Tasks (F7) window under the Alerts section. Note: For larger databases, it is recommended to run the query, assign a patient flag through the available actions in the Query Builder results, and then manually delete the patient flag once the action is complete.
 select the office for which the respective users within to be displayed in the field below. Click to select a user or hold the Crtl key + click to select multiple users to whom the include in tasks alert will display for. Alert will appear for all users in the respective office if left blank.


 and click the Use Advanced Logic checkbox.


