Wait List
The Wait List is a powerful tool that can be enabled to help you organize and prioritize patients waiting for appointments and/or surgical procedures for which there is no immediate availability. In order to use the Wait List effectively, there are several items that will need to be configured.
Overview of Wait List
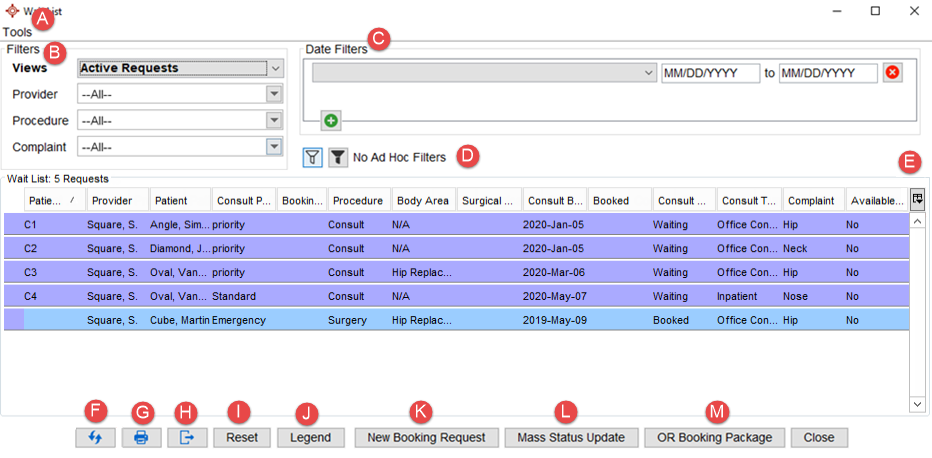
- Tools
- Filters
- Date Filters
- Ad Hoc Filters
- Column Options
- Refresh Button - The Refresh button updates to show any changes that have been made since the wait list was opened. This is important as more than one person can be in the Wait List at any time.The instructions in this section assume that you are already in the wait list.
- Print Button - Print generates a document based on your current filter settings. If you want to print the complete Wait List, remember to remove all the filters. Note: If the wait list is shorter than you expected or you cannot see entries you were expecting to see, clear the filers to view and print the complete list.
- Export Button
- Reset Button - This button removes any of the applied Filters.
- Legend Button
- New Booking Request
- Mass Status Update
- OR Booking Package
Add the Wait List Module
To enable the Wait List Module, a System Administrator can do the following:
-
Click on the Accuro start menu, search Modules and select Configure Modules.
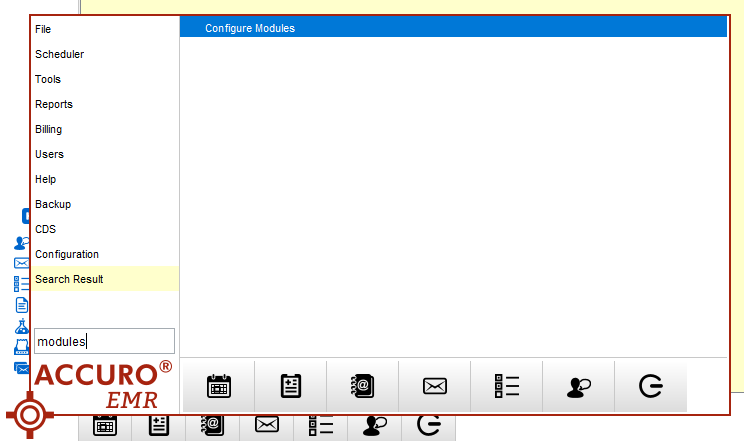
- Check off Surgical Wait List and click Save Settings.

- To see this change, log out of Accuro and log back in. The Wait List
 section will then be available.
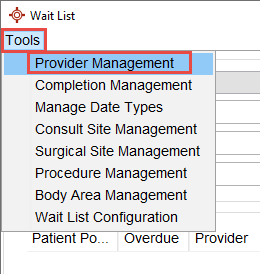
Tools
Add a Provider to the Wait List - Provider Management
-
Click the Wait List button on the Accuro Navigation bar.
-
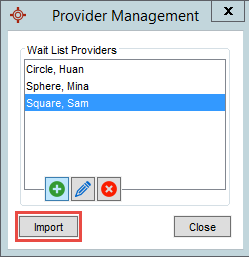
In the Wait List, click Tools and select Provider Management.
- To add a Provider that is already based in your clinic, select Import and the desired Provider, and then
 .
.
- Click
 once all information is entered in the Wait List Provider Editor.
Note: The Payee Number and Phone number are optional.
- Repeat steps 2 and 3 for all desired providers and click
 once complete.
Note: Use  only if a Provider that does not have an active instance in your Accuro needs to be added to the Wait List. Clicking
  will allow you to search the Address Book to add that Provider.
Edit a Provider on the Wait List - Provider Management
-
Click the Wait List button on the Accuro Navigation bar.
-
In the Wait List, click Tools and select Provider Management.
-
Click to select the appropriate Provider and then click the Edit button.
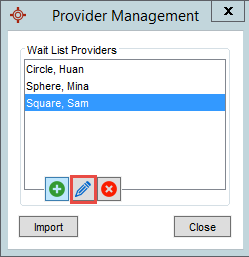
-
Amend the Provider details, as required and click OK to save changes.
-
Click Close.
Remove a Provider from the Wait List - Provider Management
When selecting to remove a Provider it removes all their patients from the wait list and also removes them as an option in wait list requests. A warning message is displayed prior to removing a Provider form the wait list that also warns if patients need to be contacted or the user wants to print a list of patients for this Provider as it must be done before the Provider is removed from the wait list.
-
Click the Wait List button on the Accuro Navigation bar.
-
In the Wait List, click Tools and select Provider Management.
-
Click to select the appropriate Provider and then click the Edit button.
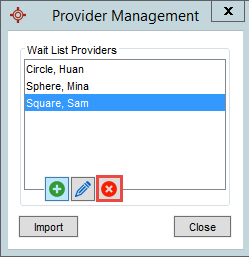
-
Click to select the appropriate Provider.
-
Click the Remove button  .
.
-
A warning message is displayed.

Click Yes to confirm removing the Provider from the wait list.
Note: All patients associated with this Provider will also be removed from the wait list. If patients need to be contacted, referred elsewhere or the user wants to print a list of all patients associated with this Provider this must be done before removing the Provider from the wait list.
-
Amend the Provider details, as required and click OK to save changes.
-
Click Close.
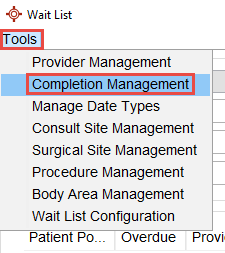
Add a Completion Option to the Wait List - Completion Management
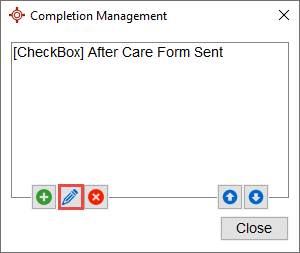
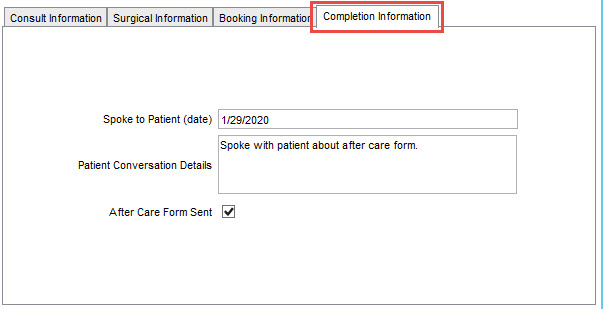
In the Completion Management section, you can customize and select options for fillable fields under the Completion Information Tab on the Wait List Booking Request.
- Click the Wait List button on the Accuro Navigation bar.
- Navigate to the Tools menu option and select Completion Management.
- Select the to create more fields to be available. Create fields asking for information that will be helpful once a patient has been marked as complete on the Wait List.
- Create a Title and select a Type of either Text Field, Text Area, or Checkbox.
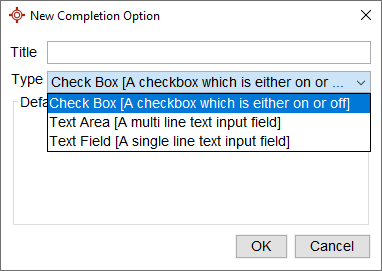
- Click OK and then Close.
For example, if you would like to send an After-Care form to every patient after their appointment, you can create a checkbox with the title “After Care Form Sent”. This will now show under the Completion Tab as an item to check off.
Edit a Completion Option on the Wait List - Completion Management
- Click the Wait List button on the Accuro Navigation bar.
- Navigate to the Tools menu option and select Completion Management.
- Select the desired completion option you wish to remove and click
 .
.
- Make the desired changes, click OK and then Close.
Remove a Completion Option from the Wait List - Completion Management
- Click the Wait List button on the Accuro Navigation bar.
- Navigate to the Tools menu option and select Completion Management.
- Select the desired completion option you wish to remove and click .

- Click Yes on the pop-up and then Close.
Add a Date Type to the Wait List - Manage Date Types
In the Manage Date Types section, all the date fields that are relevant to a patient’s time on the Wait List can be changed from the defaults. This must be done by a System Administrator. Using this configuration is mandatory for reporting features.
- Click the Wait List button on the Accuro Navigation bar. The Wait list window is displayed.
- Click Tools at the top of the Wait list window and select Manage Date Types.
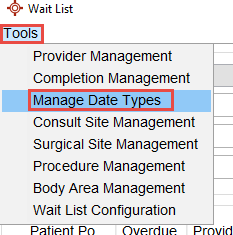
- Select Manage Date Types from the list displayed. This opens the Manage Booking Request Dates window.
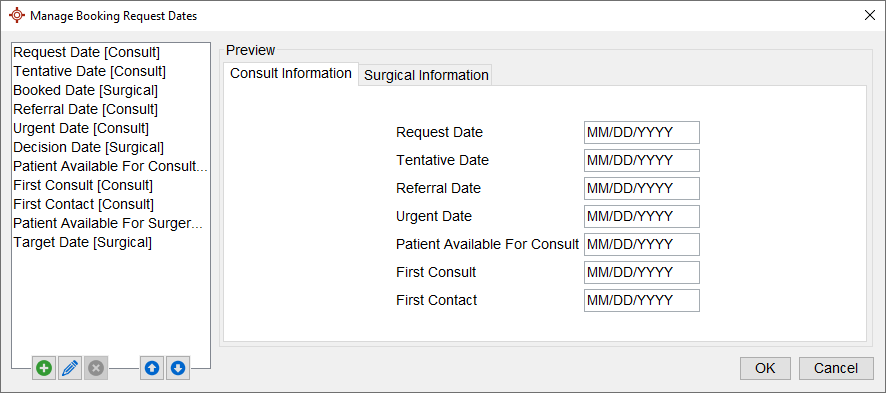
- Click the Add button . This opens the Add Request Date window.
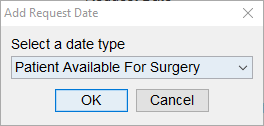
Note: Request Date [Consult], First Consult [Consult], Decision Date [Surgical], Booked Date [Surgical] must be used to use Data Analytics Reporting.
- Click OK.
- See step 8 and onward on Edit Wait List Dates Displayed- Manage Date Types to modify this date type.
- To change the order of how these appear, select the date type and click
 .
.
Edit a Data Type in the Wait List - Manage Date Types
- Click the Wait List button on the Accuro Navigation bar. The Wait list window is displayed.
- Click Tools at the top of the Wait list window and select Manage Date Types.
- Select Manage Date Types from the list displayed. This opens the Manage Booking Request Dates window.
- Click the Pencil button to add a description, status, or to change the section you would like the date to appear in.
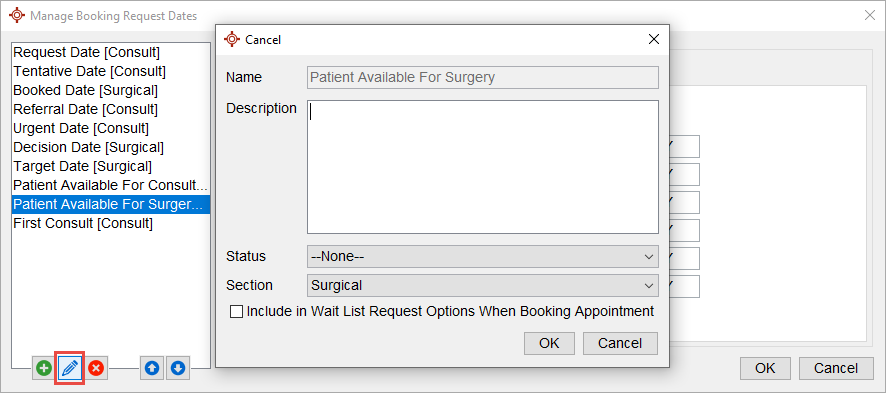
-
- Status: When a date is entered in this field, it will update the Wait List request to the Status you choose in this configuration window. It is recommended to have the Status as Booked for both the First Consult and Booked dates.
- Section: Which tab, Consult or Surgical, would you like this date to appear in
- Checkbox: The “Include in Wait List Request Options when Booking Appointment” checkbox allows you to have the date field you are editing appear in the reconciliation window. If you do not enable this option, it will not appear on the Wait List Request window.
- Click OK when completed.
Remove Data Type from Wait List - Manage Date Types
- Click the Wait List button on the Accuro Navigation bar. The Wait list window is displayed.
- Click Tools at the top of the Wait list window and select Manage Date Types.
- Select Manage Date Types from the list displayed. This opens the Manage Booking Request Dates window.
- Click to select the date type and click the Remove button .
- Click OK to save your changes.
Add a New Consult Site to Wait List - Consult Site Management
In the Consult Management section, all the locations where a Consult Appointment may take place must be added.
- Click the Wait List button on the Accuro Navigation bar. The Wait list window is displayed.
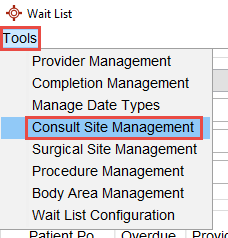
- Click Tools at the top of the Wait list window and select Consult Site Management.
-
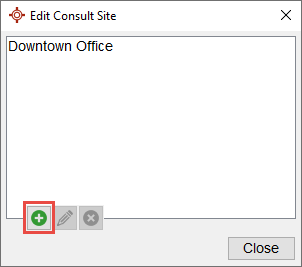
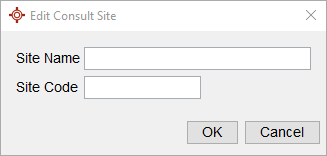
Click and fill in the Site Name and Site Code information. If the code is unknown, this can be left blank.
-
Click OK and Close once finished.
Edit a Consult Site in the Wait List - Consult Site Management
- Click the Wait List button on the Accuro Navigation bar. The Wait list window is displayed.
- Click Tools at the top of the Wait list window and select Consult Site Management.
- Select the desired site. Click and edit the Site Name and Site Code information. If the code is unknown, this can be left blank.
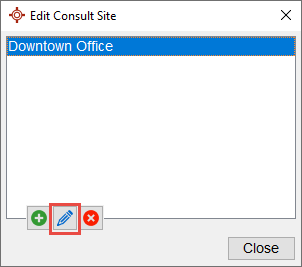
- Click OK and Close once finished.
Remove a Consult Site from the Wait List - Consult Site Management
- Click the Wait List button on the Accuro Navigation bar. The Wait list window is displayed.
- Click Tools at the top of the Wait list window and select Consult Site Management.
- Select the desired site. Click .
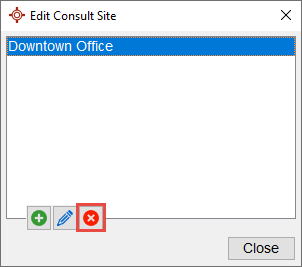
- Click OK and Close once finished.
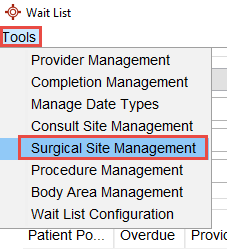
Add a Surgical Site to the Wait List - Surgical Management
In the Surgical Management Section, all the locations where surgery may take place must be added.
- Click the Wait List button on the Accuro Navigation bar. The Wait list window is displayed.
- Click Tools at the top of the Wait list window and select Surgical Site Management.
- Click and fill in the Site Name and Site Code information. If the code is unknown, this can be left blank.
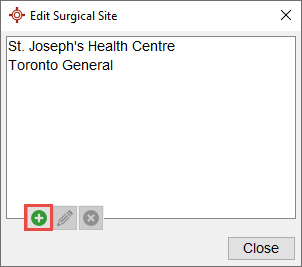

- Click OK and Close once finished.
Edit a Surgical Site in the Wait List - Surgical Management
- Click the Wait List button on the Accuro Navigation bar. The Wait list window is displayed.
- Click Tools at the top of the Wait list window and select Surgical Site Management.
- Select the desired site. Click the Edit button and edit the Site Name and Site Code information. If the code is unknown, this can be left blank.
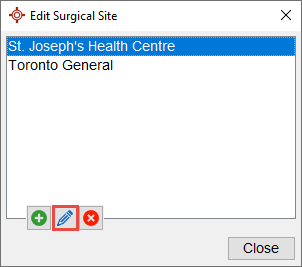
- Click OK and Close once finished.
Remove a Surgical Site from the Wait List - Surgical Management
- Click the Wait List button on the Accuro Navigation bar. The Wait list window is displayed.
- Click Tools at the top of the Wait list window and select Surgical Site Management.
- Select the desired site. Click .

- Click OK and Close once finished.
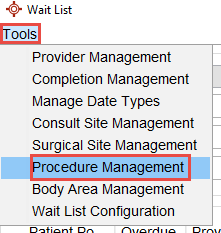
Add a Procedure to the Wait List - Procedure Management
In the Procedure Management section, all procedures a patient is on the Wait List for must be added. Using this configuration is mandatory for populating any reporting features and for calculating wait times.
- Click the Wait List button on the Accuro Navigation bar. The Wait list window is displayed.
- Click Tools at the top of the Wait list window and select Procedure Site Management.
- Click and fill in the Procedure and Code information. If the Code is unknown, this can be left blank.
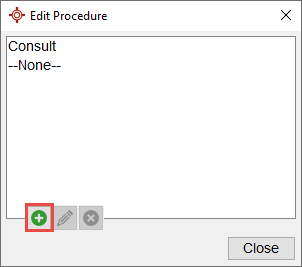
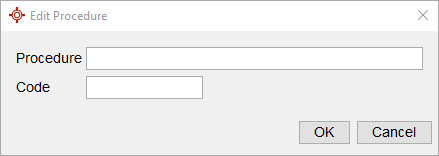
- Click OK and Close once finished.
Edit a Procedure in the Wait List - Procedure Management
- Click the Wait List button on the Accuro Navigation bar. The Wait list window is displayed.
- Click Tools at the top of the Wait list window and select Procedure Site Management.
- Select the desired procedure. Click and edit the Procedure and Code information. If the code is unknown, this can be left blank.

- Click OK and Close once finished.
Remove a Procedure from the Wait List - Procedure Management
- Click the Wait List button on the Accuro Navigation bar. The Wait list window is displayed.
- Click Tools at the top of the Wait list window and select Procedure Site Management.
- Select the desired procedure. Click .
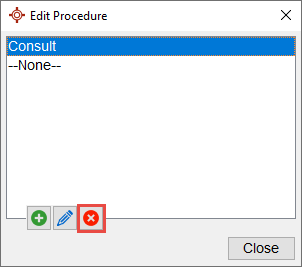
- Click OK and Close once finished.
Add a Body Area to the Wait List - Body Area Management
In the Body Area Management section, all the areas of the body that a procedure relates to must be added. Using this configuration is mandatory for using any reporting features.
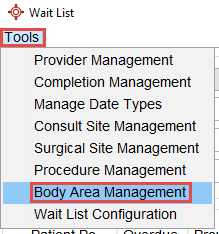
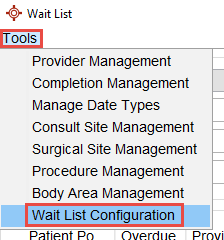
- Click the Wait List button on the Accuro Navigation bar. The Wait list window is displayed.
- Click Tools at the top of the Wait list window and select Body Area Management.
- Click and fill in the New Wait List Body Area information.
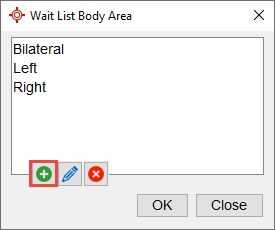
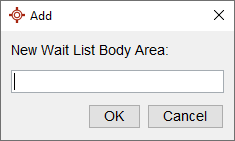
- Click OK and Close once finished.
Edit a Body Area in the Wait List - Body Area Management
- Click the Wait List button on the Accuro Navigation bar. The Wait list window is displayed.
- Click Tools at the top of the Wait list window and select Body Area Management.
- Select the desired body area. Click and edit the information.
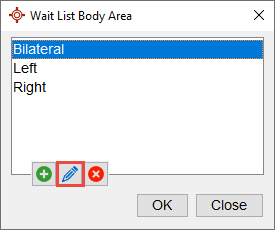
- Click OK and Close once finished.
Remove a Body Area from the Wait List - Body Area Management
- Click the Wait List button on the Accuro Navigation bar. The Wait list window is displayed.
- Click Tools at the top of the Wait list window and select Body Area Management.
- Select the desired body area. Click .
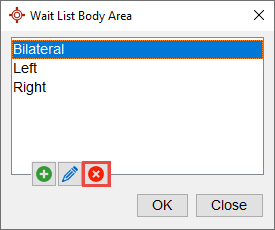
- Click OK and Close once finished.
Edit the Wait List Configuration
In the Wait List Configuration section, defaults for Priority, Type, and Status of New Booking Requests can be chosen. If any of these sections are left blank, they will need to be manually selected for every new request.
- Click the Wait List button on the Accuro Navigation bar. The Wait list window is displayed.
- Click Tools at the top of the Wait list window and select Wait List Configuration.
- Choose the following:
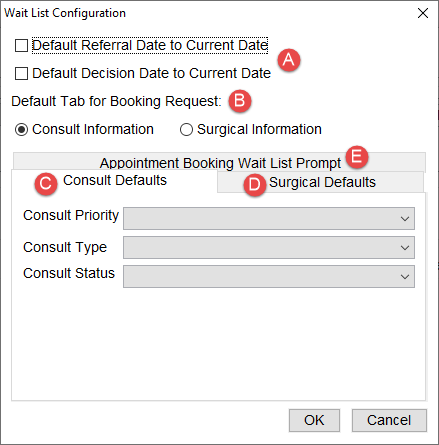
- Choose if you would like the Referral and Decision Dates to default to the Current Date the request is being added to the Wait List
- Chose the default tab you would like a New Booking Request to open to – either Consult or Surgical.
- Under the Consult Defaults tab, choose the default from the dropdown for Consult Priority, Consult Type, and Consult Status. It is recommended to choose Waiting for the Consult Status as this will prompt a Wait List Reconciliation when booking an appointment for a patient on the Wait List.
- Under the Surgical Defaults tab, choose the default from the dropdown for Surgical Priority, Surgical Type, and Surgical Status. It is recommended to choose Waiting for the Surgical Status as this will prompt a Wait List Reconciliation when booking an appointment.
- Under the Appointment Booking Wait List Prompt select which procedures will trigger reconciliation against the requests. This means if there is a procedure on the Wait List that you do not want a reconciliation prompt for, enter them here.
Filters
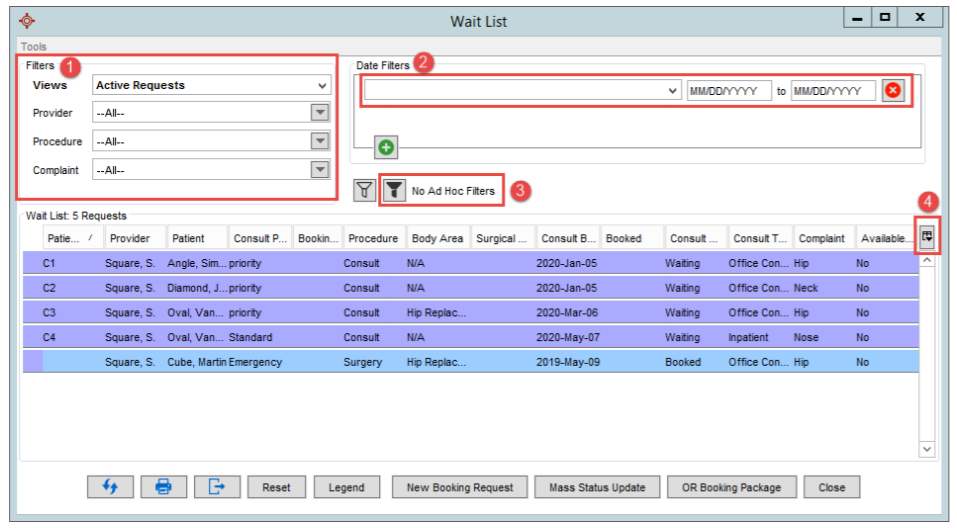
- Filters: The filters here allow you to see the Wait List requests by View, Status, Provider, Procedure, and Complaint, or any combination of the four that you would like to see. Note: To clear all Filters, click the Reset button.
- Views allow you to customize, per user, how you would like to see the Wait List and save it for future use. You may want a separate view for each type of request that you book on the Scheduler (ie. Shoulder Consults or Hip Consults).
Navigate to the Views dropdown and select Manage. This will bring up the Manage Wait List Views window. Where you can create, edit or copy Views.
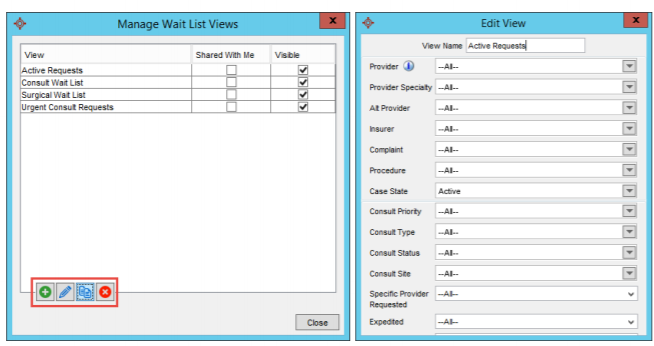
Using the dropdowns, select whichever options you would like to see on your custom Wait List View.
Tip: Views can be shared between users within the same database. See here for more information of how to do this.
- Provider allows you to view requests by the the Provider that is on the request.
- Procedure allows you to view only selected Procedures a patient is waiting for.
- Complaint allows you to view requests by the Complaint listed on the request.
- Date Filters: The Date Filters allow you to choose which type of date you would like to filter the requests by and between which two dates. For example, if you want to find all requests in the last 6 months you would choose ‘Request Date’ and enter in the date 6 months ago to today.
| Request Date |
Date the referral was accepted onto the Wait List |
| Tentative Date |
Date booked, but not confirmed |
| Booked Date |
Date booked for next appointment or surgery |
| Referral Date |
Date the referral was made |
| Urgent Date |
Date the referral became Urgent |
| Decision Date |
Surgical Decision Date (Use Type to select Surgical vs. Non-Surgical) |
| Patient Available For Consult |
Date patient is available if not immediately available |
| First Consult |
Date of first consultation appointment |
| First Contact |
Date the patient or referring Provider was contacted with the appointment date |
| Patient Available for Surgery |
Date patient is available for surgery |
| Target Date |
Date to aim surgery for |
| Case Close Date |
The date the case is closed |
- Ad Hoc Filters: The Ad Hoc Filters allow you to see a list of patients by a very specific option you might use on the fly instead of saving an entire View for the future. For example, Provider Specialty . Remove this Ad Hoc filter by click on the outline to the left of the black (filled in) Filter Button.
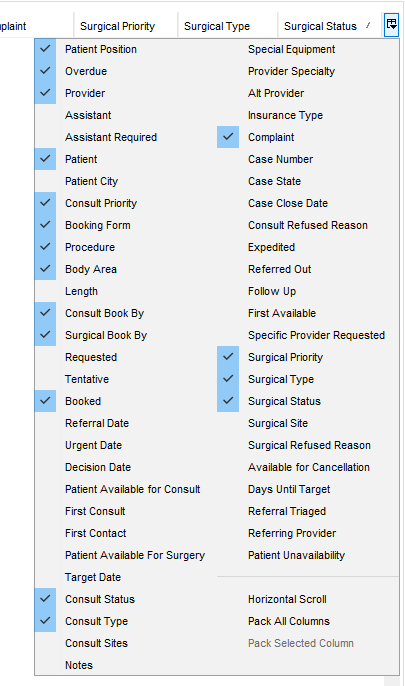
- Column Options Button: The Column Options Button allows you to choose columns you would like to see in your main Wait List view. For example, if your office does not use the Available to be Canceled option, you can remove it from view. The selection window will stay open until all selections are complete. The columns you choose to see are applied to the currently selected View from the Views dropdown. You may want to set the columns for each view that you have created. For example, if you have your Consult Wait List view selected you will likely not need to see the Surgical date fields so you would deselect those column options.Column headers will be remembered when switching between Views.
Sorting Wait List Requests
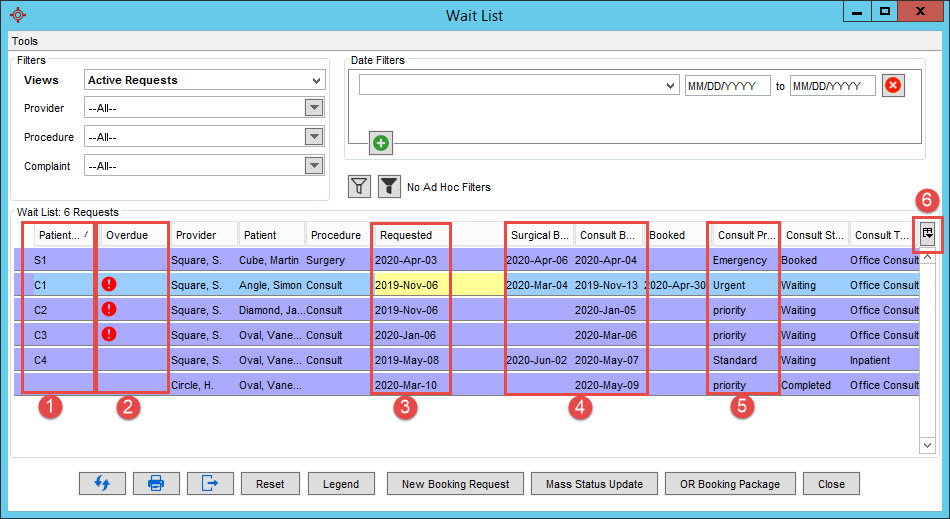
- Patient Position: Patient Position, which is automatically assigned, will show the order in which a patient should be booked by on each the Surgical (S) or Consult (C) Wait List. This is calculated based on the Requested Date, Priority and how long total the patient can wait for. Accuro takes the requested date as the date the patient was added to the Wait List and then adds the number of days we said they could wait based on their Priority on the Wait List to calculate a Booked By date. It will then order the patients on your list according to this. However, the patients with shorter waiting times (Urgent (7 days) vs. Regular (180 days) will have a higher patient position.
Once the patient is booked, or the status changes from Waiting, the number will no longer be present and the other patient's who are waiting will automatically be rearranged to reflect their new place in the order. This number is then remembered and if the patient is changed from Booked back to Waiting, they will assume their previous position and number in the order and all other patient's will automatically rearrange themselves accordingly. For Surgical rankings, the status must be Waiting and have the Decision Date filled out.
- Overdue flag: This icon will show if a patient is past the date you had indicated they should have their appointment or surgery booked by.
- Requested Date: This will show the date that they were entered on the Wait List
- Consult and Surgical Book by: This will show the date the request must be booked by. This date is calculated by taking the Request Date and adding the max number of days as indicated by the Priority that we said the patient can wait. For example, if a patient’s Request date was January 1 and the Priority indicated a max wait time of 7 days, the Booked By date would be Jan 8.
- Patient Priority: This will show the Priority you chose for this patient request.
- Column Option Button: This window’s columns can be configured with the Column Options Button in the top right corner that allows you to view only columns that are relevant to what you want to see. These selections can be configured per Wait List view selected.
- Other Customizable Options: Click the column heading to sort by that column and click that heading again to reverse the order. You will be able to tell by the triangle that appears next to the name which order, ascending or descending, you are viewing.
Using options 1-4 and any other stipulations you have in your office, you can decide which patient should be booked next.
Sharing Wait List Views
To share Wait List Views, the role/user needs to have the appropriate permissions:
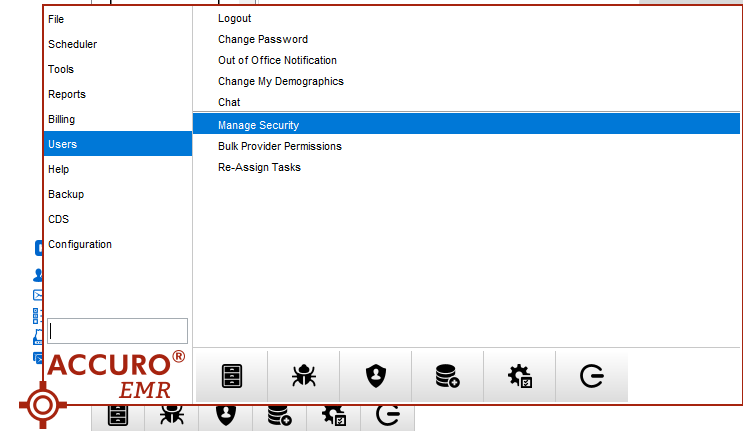
- A System Admin can click the Accuro Start Menu
 and navigate to Users and then Manage Security.
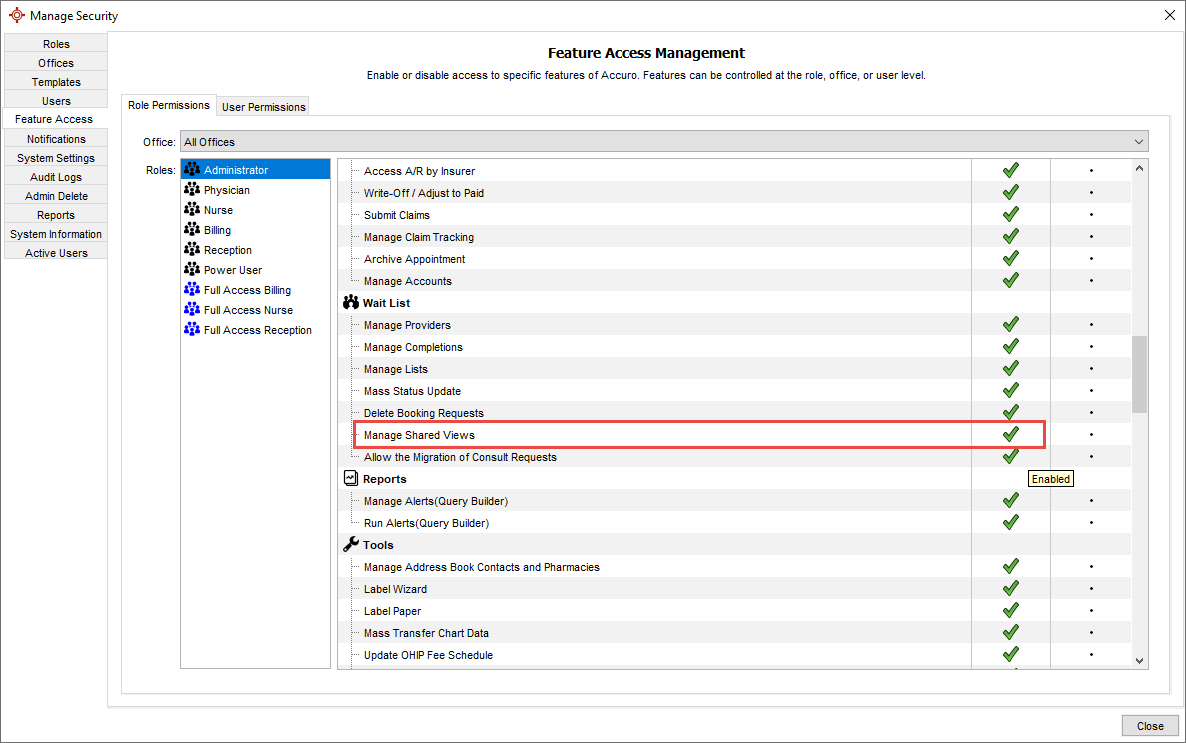
- In Feature Access, either select the Role Permissions or User Permissions tab. If Role Permissions is selected, this will modify the permissions for all users with the selected role whereas User Permissions is for a particular user.
- After selecting the desired role or user, navigate to the Wait List header and enable (check-off) Manage Shared Views.
Once the role/user has permissions, they can share Wait List Views:
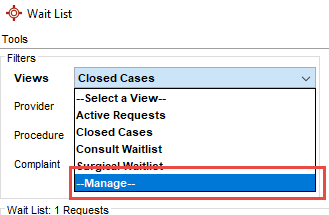
- Click the Wait List button on the Accuro Navigation bar.
- In the Views dropdown, select Manage.
- To add a new View, click and fill out the desired information.
OR
To modify an existing View, click .
- To share this View, select the desired office to share to from the Share to Office dropdown.
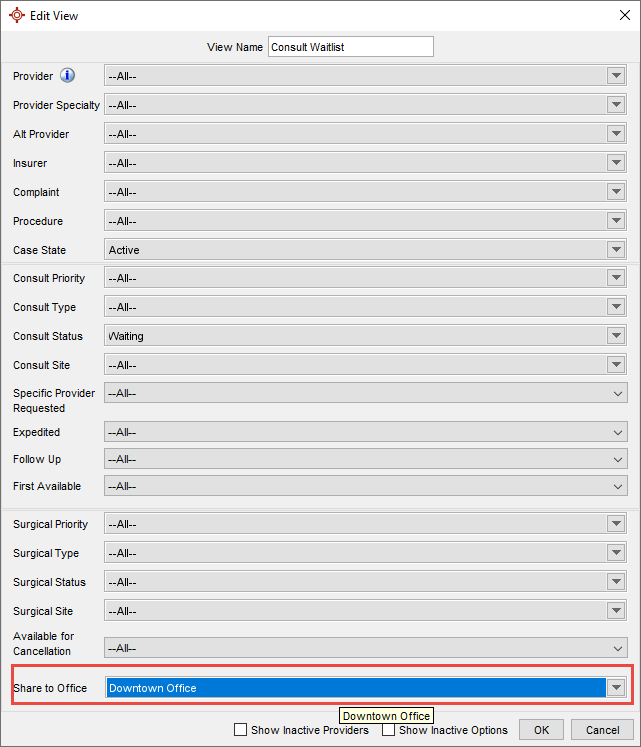
- Click once finished.
Customizing the Colour of Legends in Wait List
The colors of the different legends can be customized to suit your office needs. When choosing different colors than the defaults, consider that the text displayed on the color is black. Legends available are: Booked, Cancelled, Completed, Deceased, Re-Book, Tentatively Booked and Waiting.
- Click the Wait List button on the Accuro Navigation bar. The Wait List window is displayed.
- Click Legend.
- The Status Colours Window is displayed:
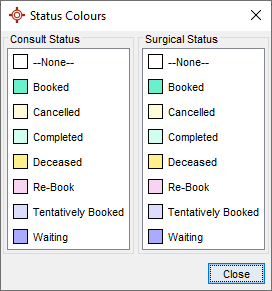
- Consult Status colors are displayed in the left-hand column and Surgical Status colors are displayed in the right-hand column.
- Click to select the legend you want to change.
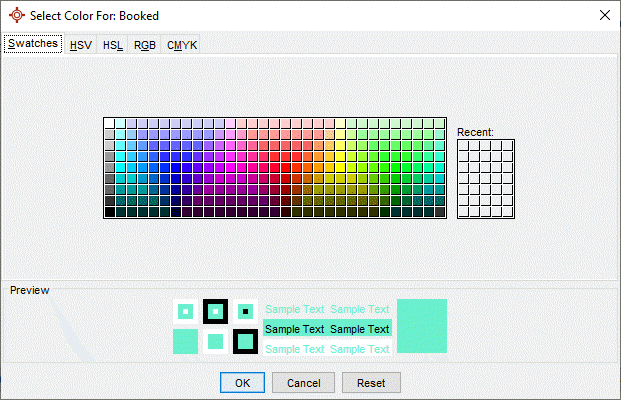
- Select the new color from the palette displayed and click OK.
Note: Repeat this procedure for as many legends as you want to change.
New Booking Request Overview
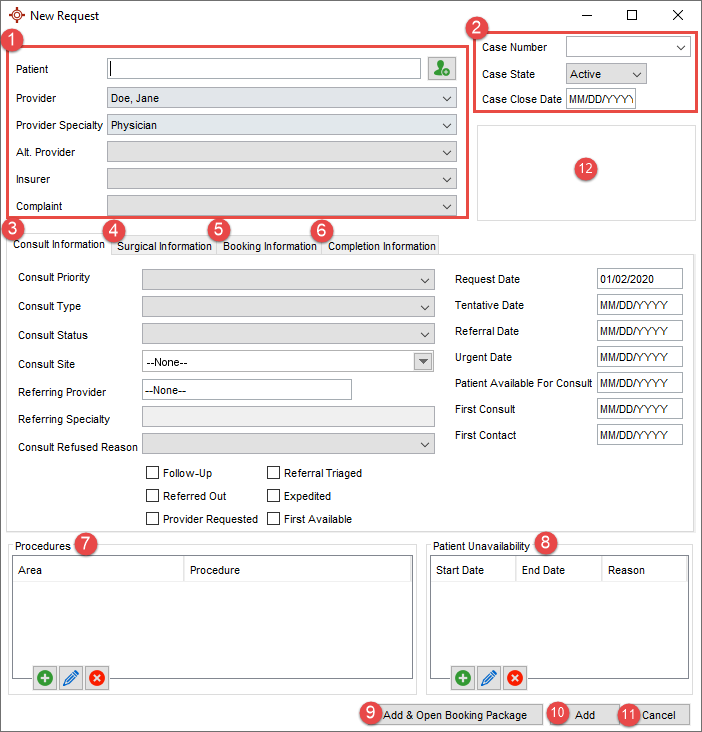
1. The fields at the top of the window are for capturing information on the referral including the Complaint (otherwise known as the Reason for the Referral).Referrals are first seen in consult, then only some are decided as surgical. In some clinics that are not surgical, only the consult tab may need to be used. Users have the option to use just the fields that apply to their clinic.
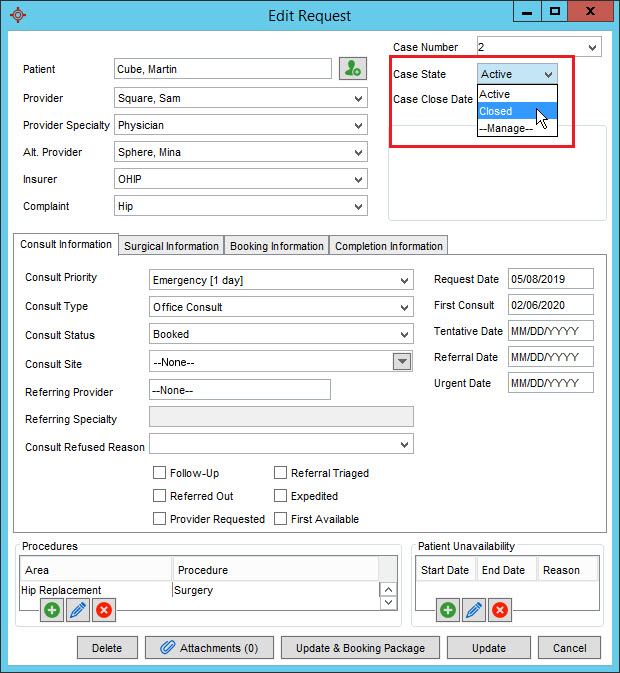
2. Case Fields:
Case Number:This is auto-assigned, but also lets you overwrite the number to case number system you may already be using.
Case State: This is intended to allow you to mark the wait list item as Closed, Cancelled, Accepted, or even add your own states by selecting the Manage option in the selection list. Once you start using this, you have these items show or not show from you main wait list screen.
Case Close Date: For closing items and recording the date you did this.
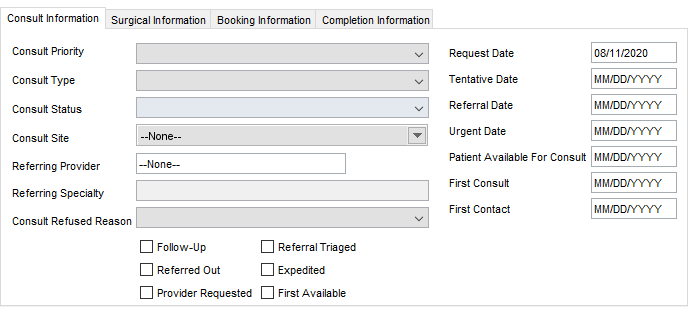
3. Consult Information tab:
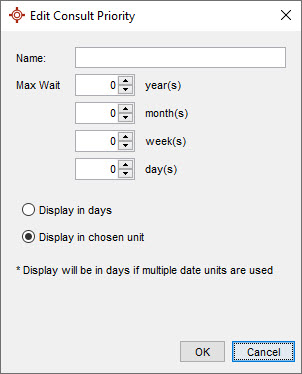
- Consult Priority - Select Manage and to add any additional Priorities, to remove Priorities, or to edit Priorities.
- Consult Type - The recommended Type at this point is Office Consult. Select Manage and to add any additional Types, to remove Types, or to edit Types.
- Consult Status - The recommended Status at this point is Waiting. Select Manage and to add any additional Statuses, to remove Statuses, or to edit Statuses.
- Consult Site - see Consult Site Management.
- Referring Specialty - Referring providers' specialty.
- Consult Refused Reason - Select Manage and to add any additional Reasons, to remove Reasons, or to edit Reasons.
When you receive a referral, the most important fields are the date fields. You will likely only be able to fill out two of them at this point.
- Request Date: The date you are adding this referral in to Accuro.
- Referral Date: The date on the referral letter.Once the dates are filled, you can choose optionally to use the other fields. Priority can be set, or some people create and use a priority of "Unassigned" at first, then select a priority later. Others don’t use this for normal referrals and only select a higher priority for urgent ones.
There are some checkboxes below. Here is what they mean:
- Follow-up: A follow-up appointment is required.
- Referred Out: You have referred this patient to another clinic.
- Specific Provider Requested: Referral or Patient has asked for only a certain Provider, not just any Provider at the clinic
- Expedited: This request is to be treated special and expedited through the booking wait list.
- First Available: Request is for the first available Provider. This can also be added as a column and/or ad hoc filter. In addition, First Available can be included in a CSV export of the Wait List. This checkbox can also be populated onto OR Forms.
Now that the referral is recorded in the system, keep accessing this single booking request on the patient and filling out more dates and information as they move through the process in your clinic.
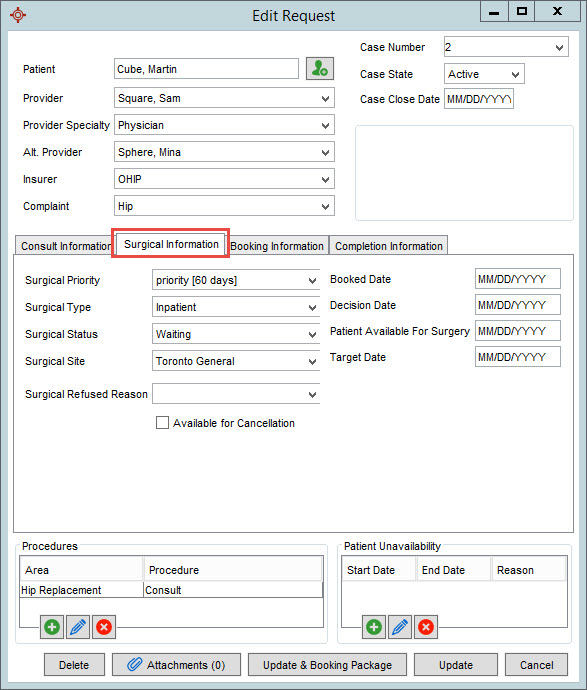
4. Surgical Information tab:
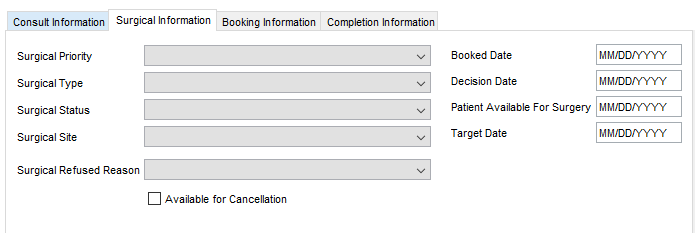
The Surgical Information tab is meant to track at the point of a decision for surgery. The decision date is the start of this. If the decision is non-surgical, you can still record the decision date, but them set the type to non-surgical and use the case status at the top of the screen to Closed if you are not longer want the patient on your wait list.
If it is a surgical decision, the Procedures can be entered at the bottom of the screen as always.
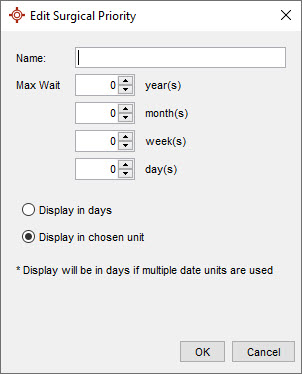
- Surgical Priority - Select Manage and to add any additional Priorities, to remove Priorities, or to edit Priorities.
- Surgical Type - The recommended Type at this point is Inpatient or Daycare. Select Manage and to add any additional Types, to remove Types, or to edit Types.
- Surgical Status - The recommended Status at this point is Waiting. Select Manage and to add any additional Statuses, to remove Statuses, or to edit Statuses.
- Surgical Site - The location where the procedure will take place (e.g. clinic or hospital). See Surgical Site Management.
- Surgical Refused Reason - Select Manage and to add any additional Reasons, to remove Reasons, or to edit Reasons.
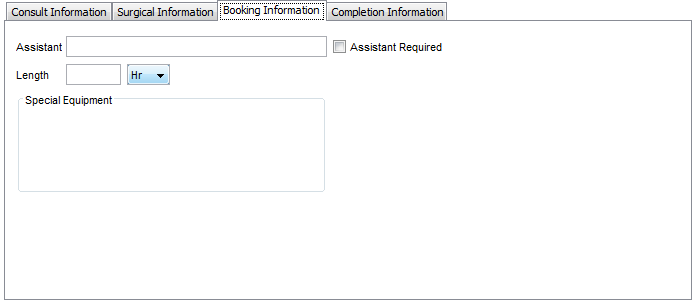
5. Booking Information tab:
6. Completion Information tab: This will show items you have configured in the Tools - Completion Management option.
The below is an example:
7. Procedures:
8. Patient Unavailability:
The other new information is the ability to record any time spans that the patient is unavailable. Use these on the right as an option, or type the unavailability details in the notes.
9. Add & Open Booking Package
10. Add
11. Cancel
12. Note section: This is a free text box in which an additional notes regarding the Booking Request can be added. Macros (right-click > Find Macro) and Time Stamps (F12 on PC; Fn + F12 on Mac) can be used in this section.
Wait List Workflow Overview
Step 1: Receiving a Referral
When you receive a referral into the Documents section  , the recommended steps are to add the patient to your wait list for the scheduling of the First Consult:
- If the patient does not already exist in Accuro, add the Patient into Accuro using F6.
- File the document to the patient chart or send to a Provider to review.
- If you didn’t just add the Patient to Accuro, click F4 and navigate to the Wait List History tab to confirm that the patient is not already on the Wait List for the same reason.
- Press CTRL+L to bring up the New Booking Request.
- Fill in as many (or few) of the fields as you like. Recommended:
- Priority Date
- Request Date
- Referral Date
- Procedures: Area and Procedure
- Patient Unavailability
- Complaint
- Status: Waiting
Step 2: Booking the First Consult
Book the appointment in the Scheduler or from the Wait List, and when you do you will see a pop-up indicating the patient was on the wait list (from Step 1). Select "First Consult" from the selection list at the bottom then press OK.
Step 3: Surgical Decision
Once seen in consult, the Wait List record continues. In the Booking Request screen you will see a Surgical Information tab. In here you can enter a decision date, Type, patient availability, priority, and status (see Move Patient to Surgical Wait List for more information). What is great about this change to Accuro is that your consult information stays in the consult tab, and the surgical information goes in the surgical tab.
At the bottom of the screen, you will still have your Procedure area which you can fill in anytime.
If the patient is non-surgical, then you can select this as it’s Type. At the top of the screen, there is an overall state which allows you to close the entire request.
Once scheduled for surgery, you can either manually enter the Booked Date in the Surgical Information tab, or book the appointment and it will prompt you to select Booked Date.
Step 4: Completion
Once the surgery is complete, the Booking Request is ready to be closed in Accuro (see Complete a Wait List Request for a Patient for more information).
Create a New Booking Request
-
Click the Wait List button on the Accuro Navigation bar or hit Ctrl + L on your keyboard.
-
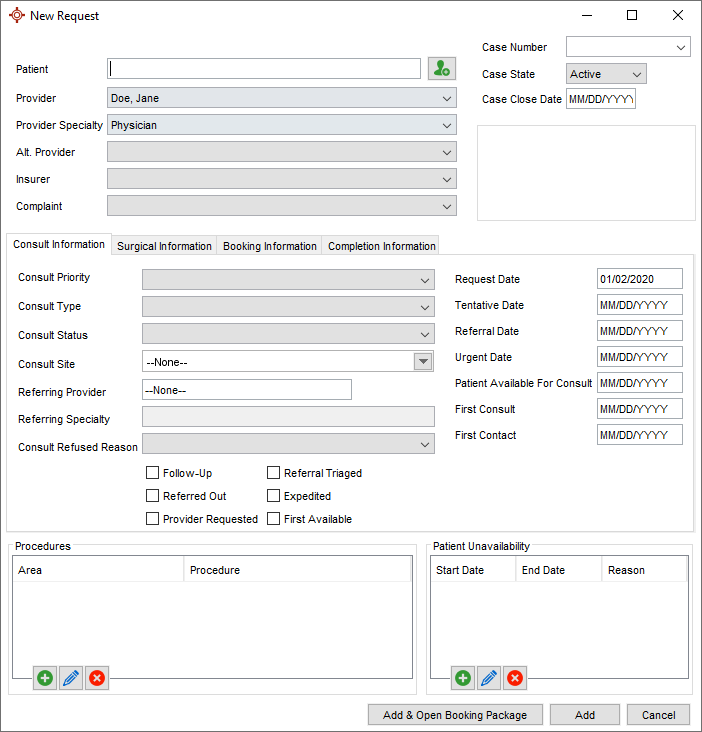
Click the New Booking Request button. This opens the New Request window.
-
Use the Patient Search tool to load a patient. If the patient is not already registered with your clinic click the Edit Patient Demographics button  and add the patient.
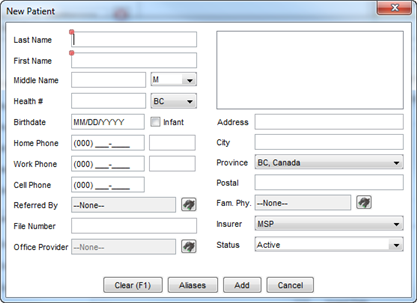
-
Type in the patient's details and click Add.
-
Click  and select a Provider from the dropdown list.
-
Click and select a Provider Specialty from the dropdown list.
-
Click and select a Alternate Provider from the dropdown list, if applicable.
-
Click and select an Insurer from the dropdown list.
-
Click and select a Complaint (i.e. what is wrong with the patient) from the dropdown list.
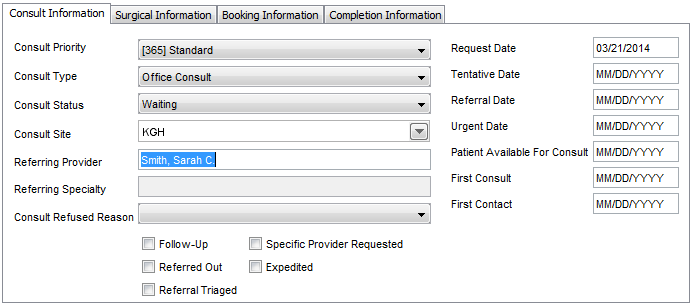
In the Consult Information tab:
-
Click and select the Consult Priority level. See Consult Priority to manage this field.
-
Click and select the Consult Type of booking.See Consult Type to manage this field.
-
Click and select a Consult Status from the dropdown list. See Consult Status to manage this field.
-
Click and select a Consult Site from the dropdown list. See Consult Site Management to manage this field.
-
Select a Request Date, Tentative Date, Booked Date, Referral Date, Urgent Date, Decision Date, Patient Available Date, First Consult or First Contact Date as applicable.
-
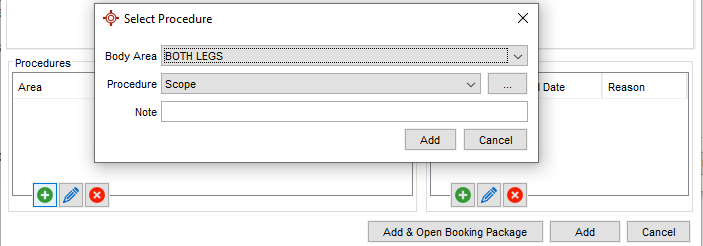
Enter the Procedures associated with the operation:
To add: Click to open the Select Procedure window. Select the Body Area, Procedure, and Note (if desired). Then click Add.
To remove: Select an existing Procedure and click .
-
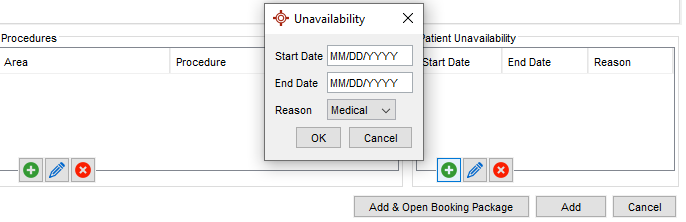
Enter in the Patient's Unavailability.
To add: Click to open the Unavailability window. Select the Start Date, End Date, and Reason. Then click OK.
To remove:Select an existing Unavailability and click .
-
Click Add or Add & Open Booking Package (OR Booking Package) to save the Booking Request to the Wait List.
OR Booking Package
- Click the Wait List button on the Accuro Navigation bar. The Wait List window is displayed.
- Click to select the appropriate patient.
- Click the OR Booking Package button. The OR Booking Package Envelope will open with any OR Forms you have set.

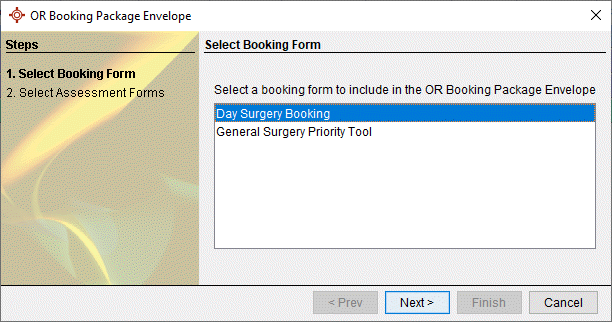
- Click to select the appropriate booking form and click Next.
- Click to select the appropriate assessment form and click Finish. The forms you selected are now attached to the patient's virtual chart.
Edit Booking Request on the Wait List
- Click on the Wait List button on the Accuro Navigation bar.
- Double click the request on the Wait List to open the Edit Request window.
- Make the desired changes and click
 .
.
Note: To make updates to multiple Booking Requests at one time, see the Mass Status Update section.
Delete Booking Request from the Wait List
- Click on the Wait List button on the Accuro Navigation bar.
- Double click the request on the Wait List to open the Edit Request window.
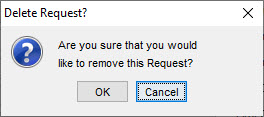
- Click Delete.
- Click OK to confirm the deletion.
Book a Patient from the Wait List
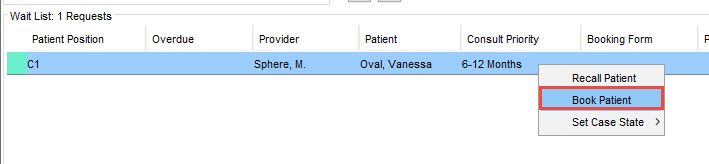
- Click on the Wait List button on the Accuro Navigation bar.
- Right-click on a patient on the Wait List and select Book Patient. This ensures the selected patient becomes the global patient and opens up the main scheduler window in Accuro.
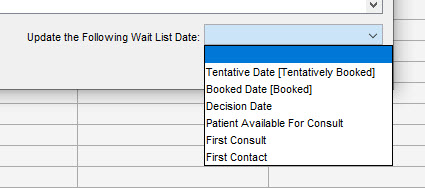
- After the appointment is booked in the Scheduler, a Wait Lists Requests window will open.
- Select the desired option to update the Wait List and the OK or click Ignore to proceed without updating the Wait List.
. 

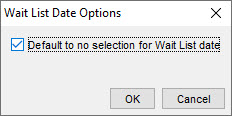
Note: The configure button  will allow the option to have the Wait List Date dropdown default to have no selection rather than defaulting to another option.
Matching Appointments to the Wait List
When you create an appointment in the Scheduler for a patient on the Wait List, the Wait List Requests window will open.
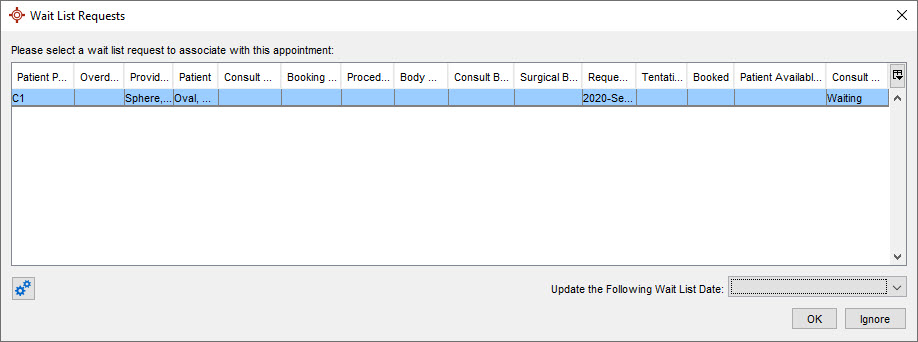
If it is the correct request/reason for this appointment, select the appropriate update from the Update the Following Wait List Date and click .
If the appointment is for a different reason to the one on the Wait List, click Ignore and the Scheduler will only show the original information from the Appointment Details.
Note: The configure button will allow the option to have the Wait List Date dropdown default to have no selection rather than defaulting to another option.
Recall a Patient from the Wait List
- Click the Wait List button on the Accuro Navigation bar.
- Right-click the applicable patient and procedure, select Recall Patient. The New Task window is displayed.

- Complete the details of the new task, as required.
- Click OK. A task has been sent to recall this patient.
Move Patient to Surgical Wait List
After the first consult appointment, the Wait List request will either be completed, or the patient will be moved to the Surgical Wait List.
- Click on the Wait List button on the Accuro Navigation bar.
- Double click the request on the Wait List to open the Edit Request window.
- Click on the Surgical Information tab.
-
Click and select the Surgical Priority level. See Surgical Priority to manage this field.
-
Click and select the Surgical Type of booking.See Surgical Type to manage this field.
-
Click and select a Surgical Status from the dropdown list. See Surgical Status to manage this field.
-
Click and select a Surgical Site from the dropdown list. See Surgical Site Management to manage this field.
-
Select a Booked Date, Tentative Date, Patient Availabel for Surgery, or Target Date as applicable.
-
Fill in all relevant fields and dropdowns to your office. For reporting purposes, the following fields should always be used:
• Decision Date
• Status: Waiting
-
Once the information and needed dates are filled out on this tab, the patient will now show on the Surgical Wait List.
- Make the desired changes and click .
Once the surgery is ready to be booked, follow the same instructions in Book a Patient from the Wait List.
Complete a Wait List Booking Request for a Patient
Once surgery has been completed, and the booking request is ready to be closed in Accuro.
- Click the Wait List button on the Accuro Navigation bar.
- Click the desired Booking Request from the appropriate View.
- Click into the Completion Information tab. This will display any info that has been configured according to Completion Management.
Here is an example:
- In the top right of the Booking Request, set the Case State to Closed. The Case Closed Date will automatically populate with the date it was Closed. Double click this field to bring up the calendar to modify the date.
Note: If there are multiple Booking Requests that are to be closed on the same date, see the Mass Status Update section.
Mass Status Update
This function allows multiple Booking Requests to be update at one time.
- Click the Wait List button on the Accuro Navigation bar.
- In the desired View, click the Mass Status Update button.
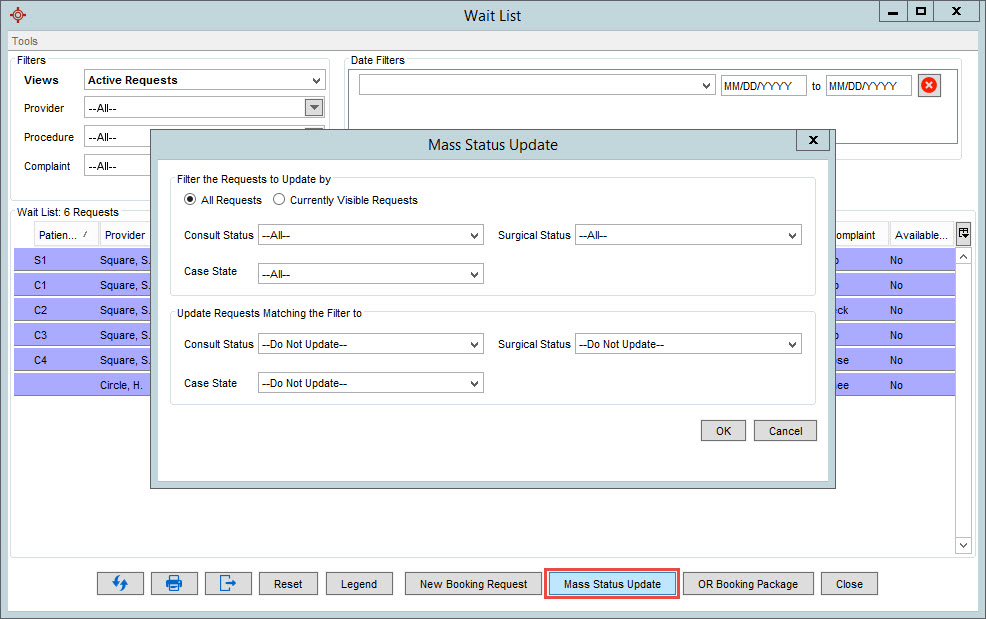
- Select the type of Booking Requests to be updated and what the desired selections are.
For example, the below is all to update all Surgical Requests that are listed as Completed but were left as Active, to Completed and Closed.
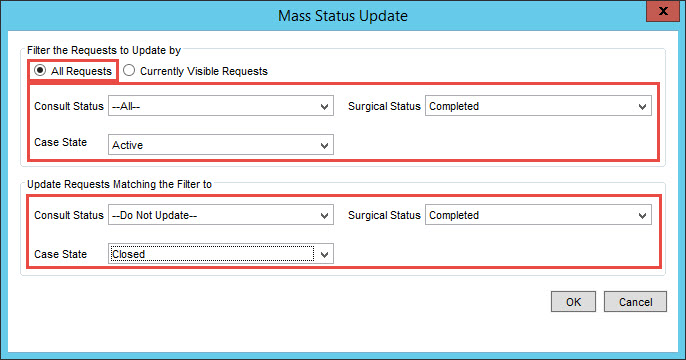
- The Booking Requests that fit the chose parameters will be updated.
Export the Wait List to a CSV File
Export to CSV allows you to take the Wait List outside of your Accuro software and view it in a spreadsheet software package.
- Click the Wait List button on the Accuro Navigation bar.
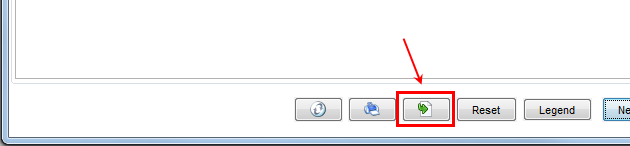
- Click the Export button
 .
.
- Browse and select a file location, type in the filename and click Save.
Note: The default filename is Waitlist.csv.
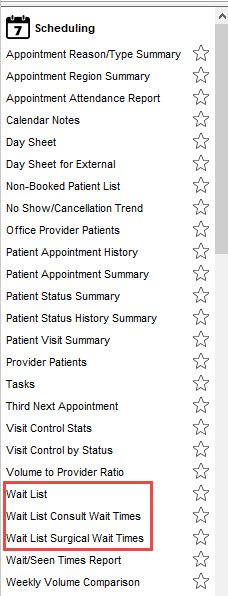
Wait List Reports
- Navigate to the Accuro start menu .
- Select Reports and Reports, once again.

- Under Scheduling, chose one of the 3 Wait List reports and complete the required information.
Note: For accurate data, the Procedure and Body Area fields on the Wait List Booking Request must be used.
- For the Wait List report:
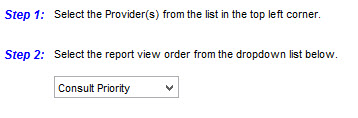
For the Wait List Consult Wait Times report:
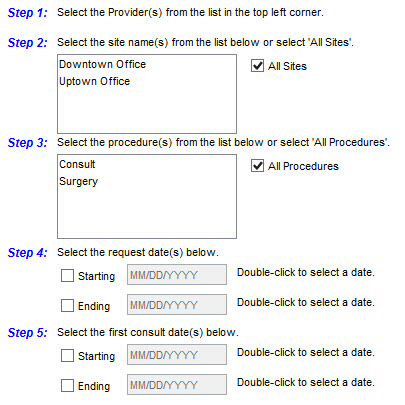
For the Wait List Surgical Wait Times report:
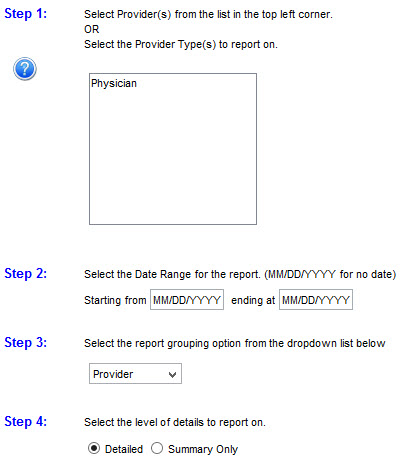
- Click Generate Report.
Note: For more Wait List reporting, see Wait List and the Query Builder.
Accuro also offers an enhanced Data Analytics and Dashboard platform that allows Providers to easily organize their patient and office data into insightful and visually appealing reports as well as work with healthcare organizations to support patient programs directly from the software. Data from the Wait List can be used to populate this Dashboard. If you or your office are interested in learning more about Data Analytics, please contact us at 1 (866) 534-3627.
Wait List and the Query Builder
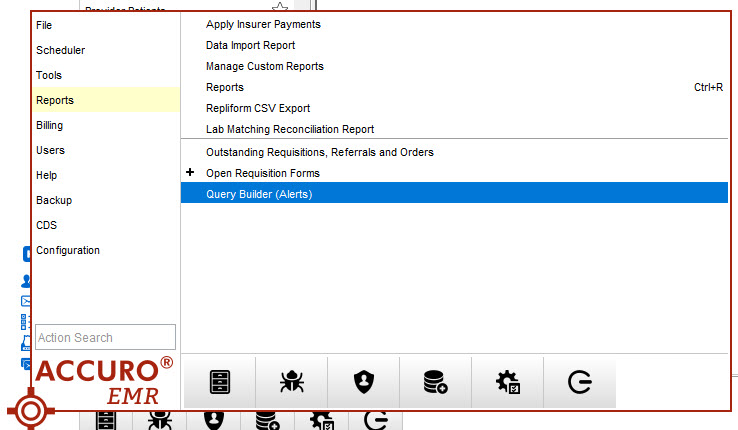
- Navigate to the Accuro start menu .
- Select Reports and Query Builder (Alerts).
- Create a new query with the button and a name for the Alert Definition.
- Navigate to the Rule Category and select Appointments from the dropdown.
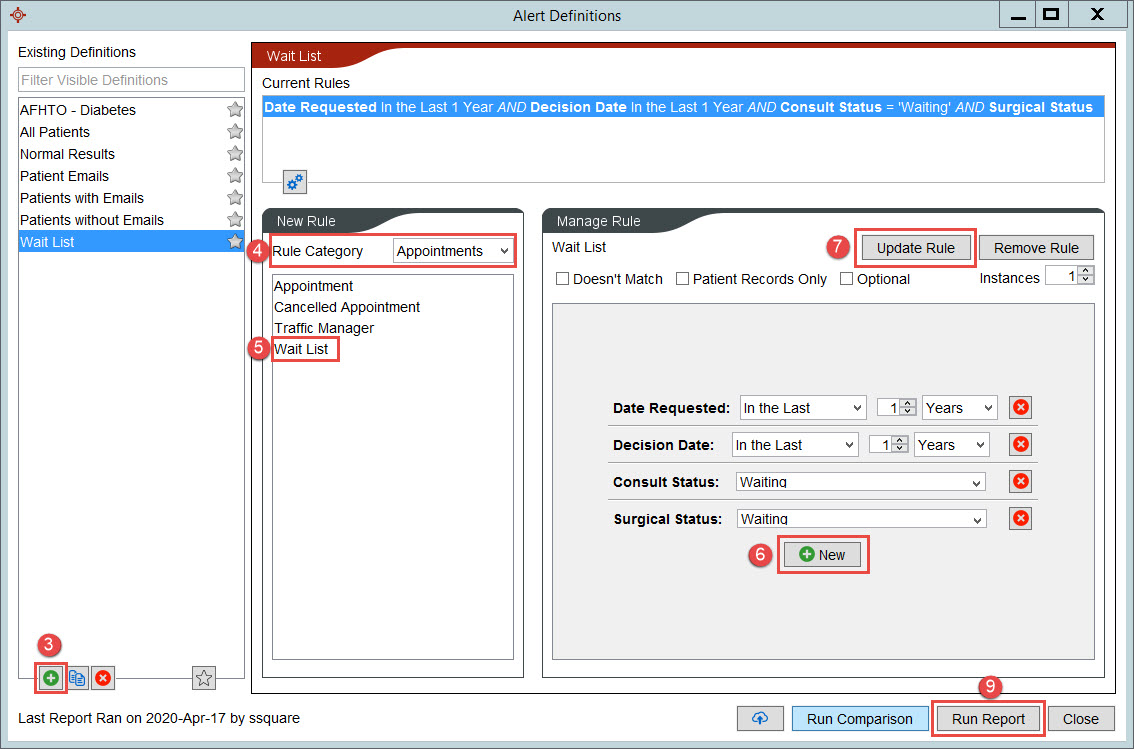
- Click to highlight the Wait List to create a New Rule.
- Under the Manage Rule area, select
 to add constraints to the rule. The available constraints are:
Date Requested
Decision Date
Consult Status
Surgical Status
- Select Add or Update Rule.
- Add any additional rules to your Query as you see fit. For more information, see Query Builder (Alerts).
- Click Run Report.
Note: Accuro offers an enhanced Data Analytics and Dashboard platform that allows Providers to easily organize their patient and office data into insightful and visually appealing reports as well as work with healthcare organizations to support patient programs directly from the software. Data from the Wait List can be used to populate this Dashboard. If you or your office are interested in learning more about Data Analytics, please contact us at 1 (866) 454-4681.
WaitOne Module (BC)
WaitOne is an orthopaedic module designed to standardize the data collection for Orthopaedic Referrals in order to extract and combine data to achieve accurate statistics on wait times. Accuro creates data that is maintained and delivered as an update list to WaitOne clinics.
The complaint and refusal reasons are lists that are maintained by Optimed. Users cannot manage and add items to these lists. If a site requires further choices to be added to the list they must contact QHR. This is because the data being collected is standardized and all WaitOne clinics have access to the same droplists. Once the WaitOne module has been activated users can select WaitOne – Orthopaedics for appropriate wait list entries and select the complaint and refused reasons.
To update an item on the Wait List for WaitOne follow the procedure below:
- Click the Wait List button on the Accuro Navigation bar.
- Double-click the appropriate entry on the wait list. The Edit Request Window is displayed.
- In the first dropdown (at the top of the window) select WaitOne – Orthopaedics.
- In the referral section toward the bottom of the window click the arrow to the right of Complaint and select from the list displayed.
In the referral section toward the bottom of the window click the arrow to the right of Refused Reason and select from the list displayed, if appropriate.