Suggestions
In Scheduler Management Suggestions section users can Add, Remove, or Edit Appointment Suggestions: Suggestion are what the appointment should be used for (e.g. surgery, lunch etc).
Create Appointment Suggestion (Scheduler)
- Press and release the Alt button on the keyboard, click Scheduler and select Scheduler Management from the list displayed.
- Click the Suggestions tab.
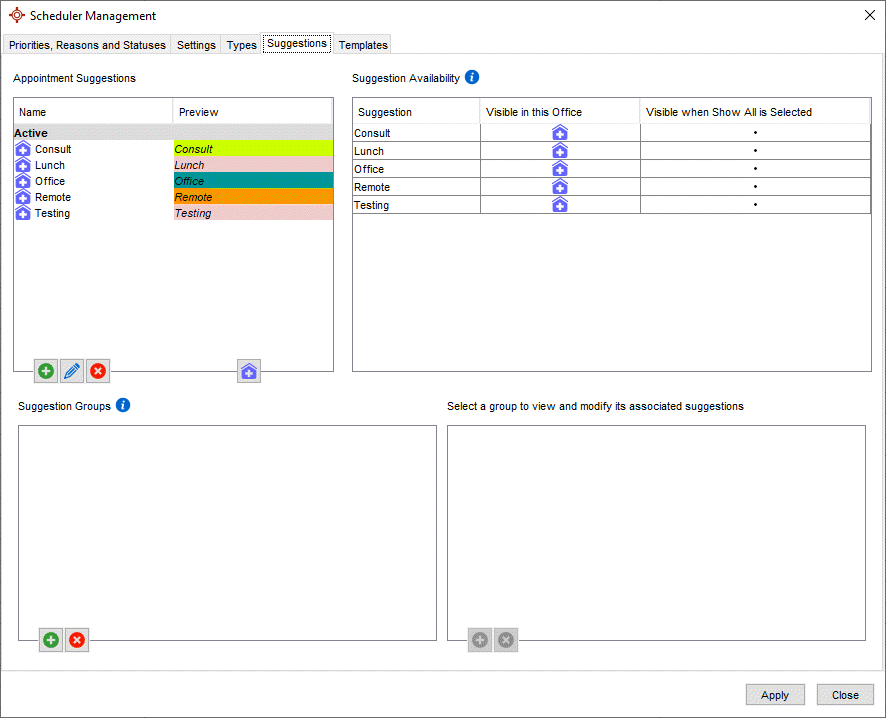
- In the Appointments Suggestions section, click the Add button
 . The Appointment Suggestion window is displayed.
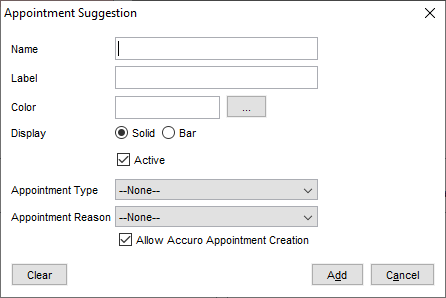
- Edit the name of the Label, Appointment Slot Color, Appointment Type and Reason, as required.
- Select/deselect the Allow Appointment Creation and Active checkboxes, if required.
- Click Add to save your changes.
Edit Appointment Suggestion (Scheduler)
- Press and release the Alt button on the keyboard, click Scheduler and select Scheduler Management from the list displayed.
- Click the Suggestions tab.

- In the Appointments Suggestions section, click to select the suggestion being edited.
- Click the Edit button
 . The Template Suggestion window is displayed.
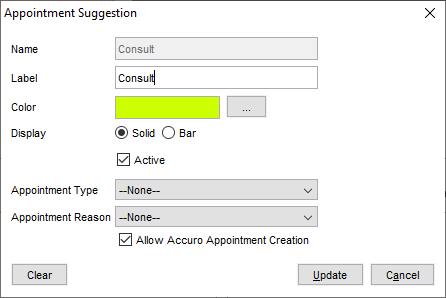
- Edit the name of the Label, Appointment Slot Color, Appointment Type and Reason, as required.
- Select/deselect the Allow Appointment Creation and Active checkboxes, if required.
- Click Update to save your changes.
Delete Appointment Suggestion (Scheduler)
- Press and release the Alt button on the keyboard, click Scheduler and select Scheduler Management from the list displayed.
- Click the Suggestions tab.
- In the Appointment Suggestions section, click to select the suggestion being deleted.
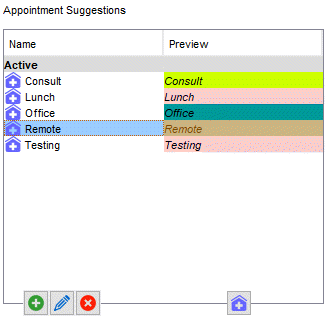
- Click the Delete button
 . A window is displayed asking you to confirm the suggestion being deleted.

- Click Yes to delete.
Note: A suggestion in the popup window is to make the template suggestion inactive. This is done in the Template Suggestion window by deselecting the Active checkbox.
Office Specific Template Suggestion
- Press and release the Alt button on the keyboard, click Scheduler and select Scheduler Management from the list displayed.
- Click the Suggestions tab.
- In the Suggestions Availability section selecting "Visible in this Office" restricts the corresponding suggestion with the specific office the user is currently in.
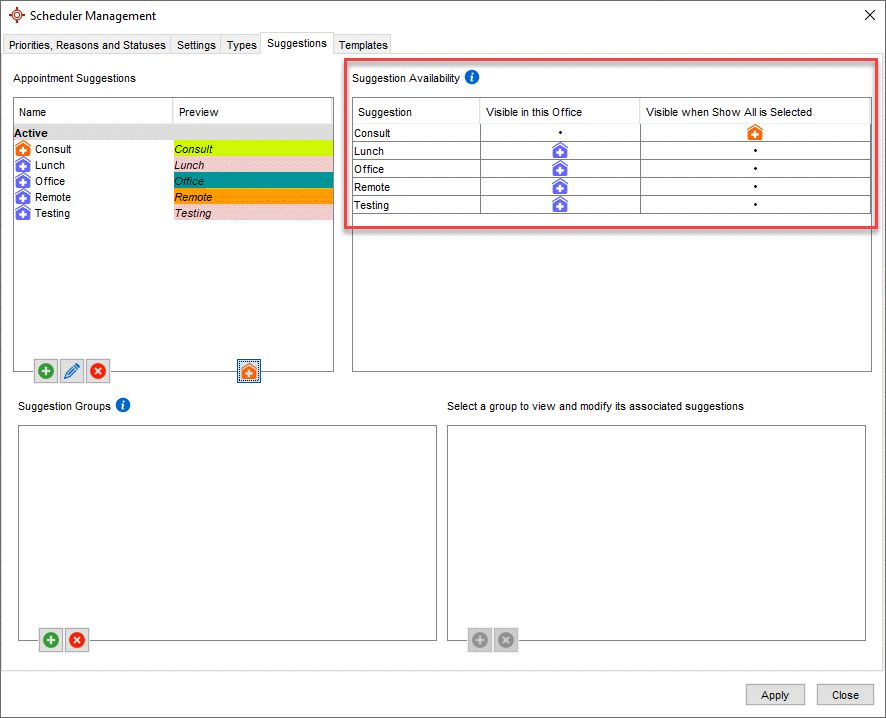
- Toggle either the orange
 icon to show all suggestions available or purple
  icon to restrict suggestions to only those visible in the currently office. The icon is under the Appointment Suggestions section outlined below. In this example the "Consult" Sugggestion is visible with the orange
  icon but is not available in the currently selected office.
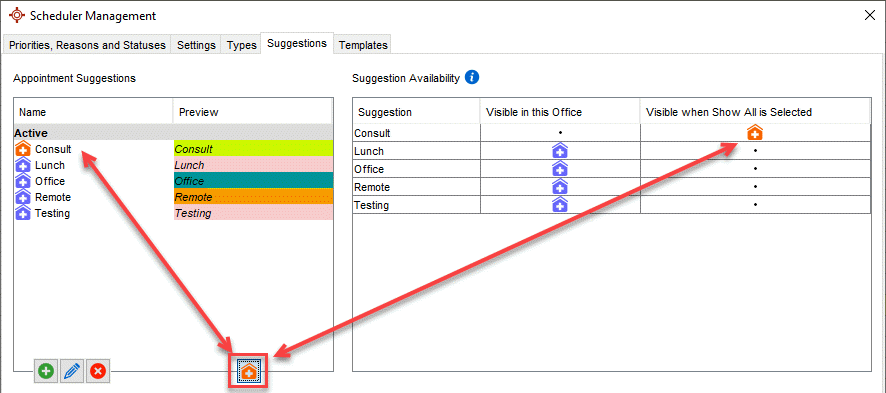
Note: Users (with the required permissions) are able to set suggestions to be either office specific (any combination of offices you may have) or available to all offices. Appointment Suggestion specific to other offices, and not the one currently selected, are then filtered from the view leaving the user with the suggestions that they actually use. The orange icon  indicates that a suggestion is for all offices; the purple icon
  shows that a suggestion is office specific.

 . The Appointment Suggestion window is displayed.

 . The Appointment Suggestion window is displayed.

 . The Template Suggestion window is displayed.


 icon to restrict suggestions to only those visible in the currently office. The icon is under the Appointment Suggestions section outlined below. In this example the "Consult" Sugggestion is visible with the orange
![]() indicates that a suggestion is for all offices; the purple icon
indicates that a suggestion is for all offices; the purple icon  shows that a suggestion is office specific.