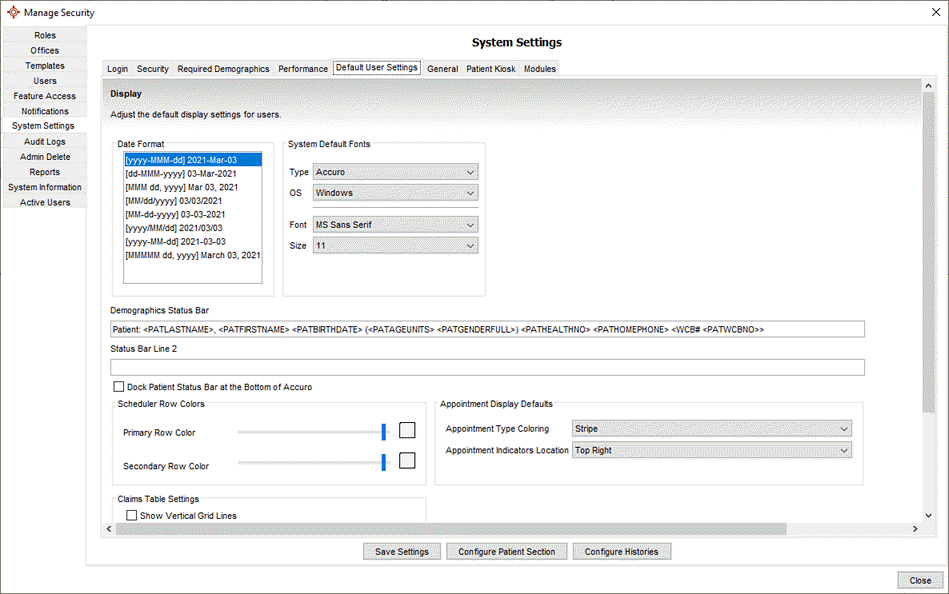
In the Default User Settings, Users can adjust display items for existing and new users. Not all Users have access to the Default User Settings section.
If you think you should be able to access options in the Default User Settings area of Accuro and you cannot, please contact your office administrator. Some options require Administrator or Power User roles.

To access this section navigate though:
 or press Alt button on the keyboard, click Users and select Manage Security from the list displayed.
Date Format: Select the format of how dates are displayed.
Type: Select "Accuro" to change fonts within Accuro. Select "Status Bar Font" to change the font for the Demographic Status Bar.
OS: Select the Operating System "Windows" or "Mac OS" for the appropriate fonts in the Font dropdown list below.
Font: Select the font style.
Size: Select the text font size.
Demographics Status Bar: Select demographics to display in the Status Bar by either typing or right-clicking and selecting the desired tags.
Status Bar Line 2: Edit the second line of the Demographic Status Bar by either typing or right-clicking and selecting the desired tags.
Dock Patient Status Bar at the Bottom of Accuro: By default the Patient Status Bar is displayed in the top left of Accuro. This setting moves the Demographics Status Bar to the bottom left of Accuro.
Primary Row Color: Select the appointment time slot shading for even hours in the Scheduler.
Secondary Row Color: Select the appointment time slot shading for odd hours in the Scheduler.
Appointment Type Coloring: Select if the Appointment Type Coloring reflects in an appointment in the Scheduler with a "Stripe" on the left side, or the color is applied to the "Full" appointment.
Appointment Indicators Location: Select if the Appointment Indicators, such as arrived, confirmed, or statuses are displayed on the "left" or "right" side of the appointment in the Scheduler.
Show Vertical Grid Lines: In the Claims section, vertical lines will appear to divide each vertical column.
Table Row Color Transparency: Select the transparency of the Vertical Grid Lines above.