Customizing Lab Grouping
If your clinic receives a large number of lab results and these are difficult to manage, you can create your own customized groups to decide which results you want grouped together. The customized groups can be set up for either a Provider or for the entire office.
Create a New Lab Group
A Lab Group can be created from either Labs in the Home section or from Encounter Notes in the EMR section of Accuro. Follow either of the procedures below:
Creating a Lab Group from Within the Home Section of Accuro:
- Click the Home button
 on the Accuro Navigation bar and select the Labs folder.
- Select the folder for the appropriate Provider.
- Click to select an appropriate lab.
- Click the View Lab Summary button
 located in the bottom right of the window. The Lab Summary window is displayed.
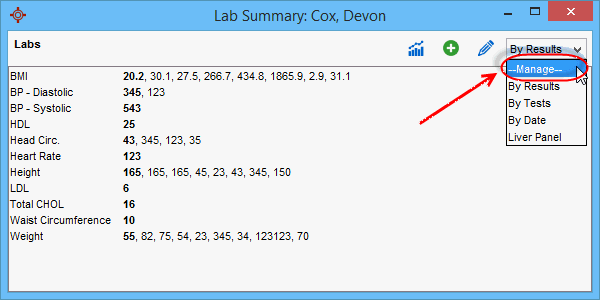
- Click the and select Manage from the list displayed. The Edit Lab Summary Configurations window is displayed.
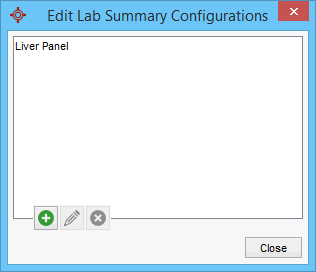
- Click the Add button. The Edit Lab Summary Configurations window is displayed.
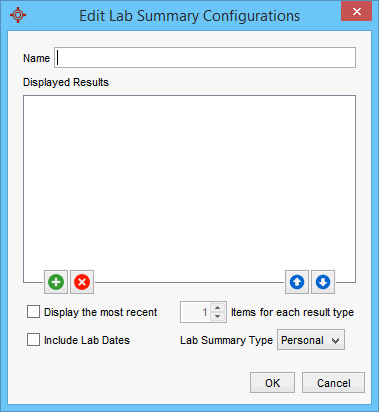
- For Lab Summary Type click the and select from Personal or Office.
- In the Name field type in the name of the group being created.
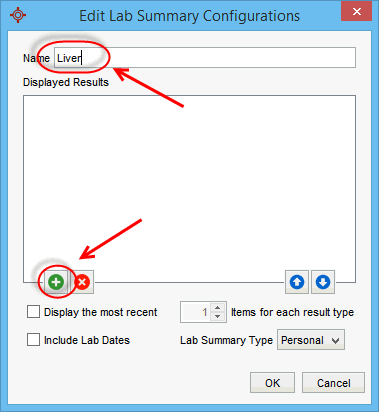
- Click the Add button. The Lab Search Results window is displayed.
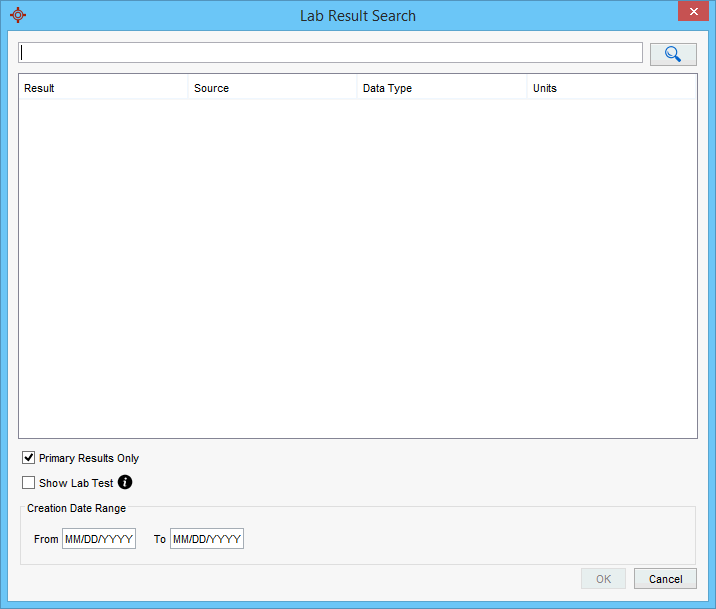
- Type in the results to be added to the group and click the Select button to add them to the list.
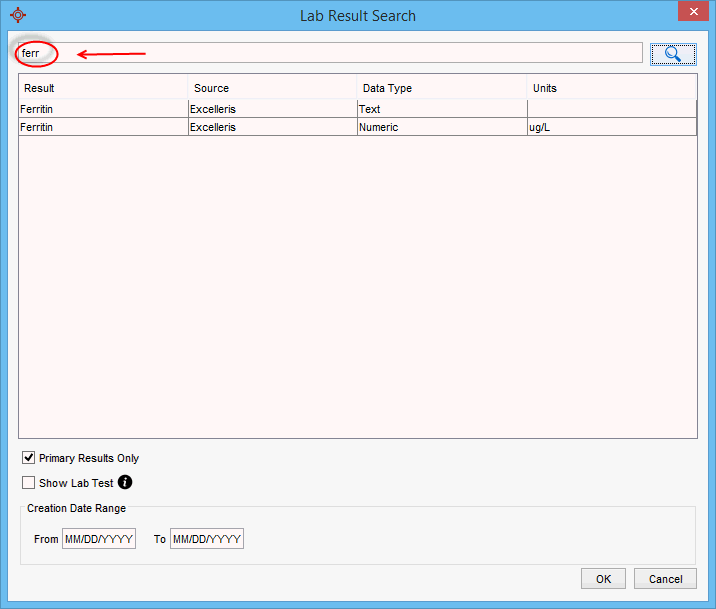
Repeat this step until you have added all the required results to your list.
- Click to select the Include Lab Dates checkbox.
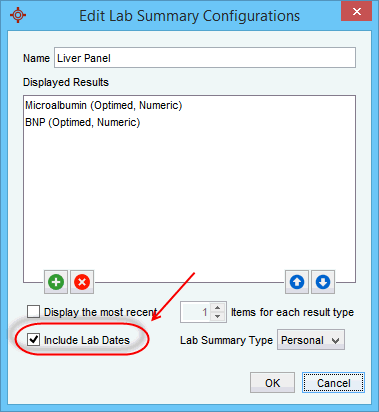
- Click OK to save your group.
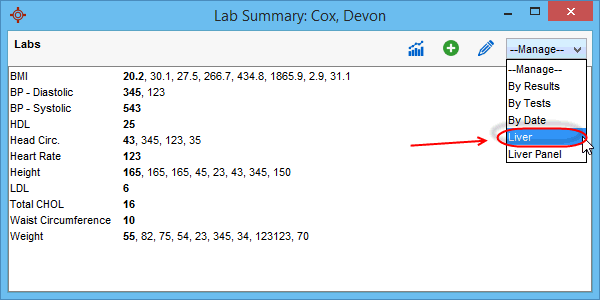
- Click Close to exit the Edit Lab Summary Configuration window. Click the on the Lab Summary window and the new group can be selected as a display option.
Creating a Lab Group from Within the EMR Section of Accuro:
- Click the EMR button
 on the Accuro Navigation bar.
- Select the Encounter Notes tab.
- Click the
 in the labs section (bottom of the window in the middle)and select Manage from the list displayed. The Edit Lab Summary Configurations window is displayed.
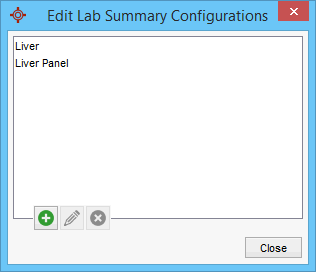
- Click the Add button
 . The Edit Lab Summary Configurations window is displayed.
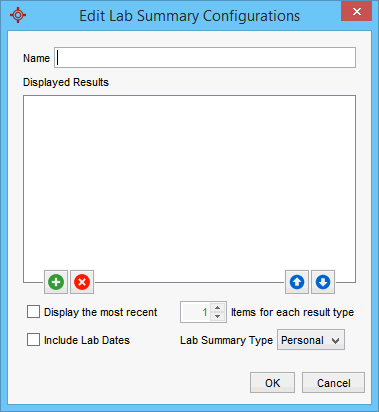
- For Lab Summary Type click the
 and select from Personal or Office.
- In the Name field type in the name of the group being created.

- Click the Add button
 . The Lab Search Results window is displayed.

- Type in the results to be added to the group and click the Select button to add them to the list.
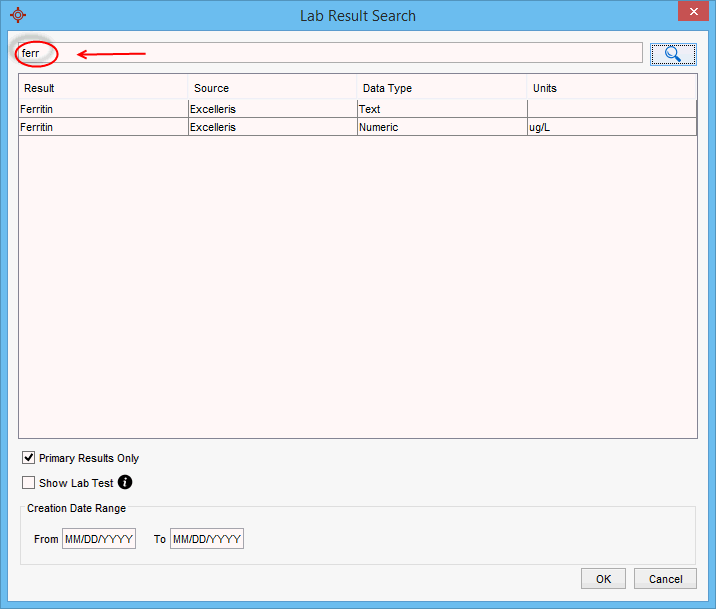
Repeat this step until you have added all the required results to your list.
- Click to select the Include Lab Dates checkbox.
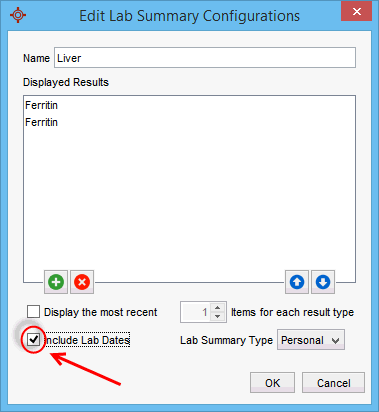
- Click OK to save your group.
Create a Manual Lab Result Form
- Click the Home button
 on the Accuro Navigation bar and select the Labs folder.
- Right-click in the section of the window where the labs are listed (see below) and select New Lab.
- Select the appropriate patient from the list displayed. If the correct patient is not displayed, type in their name and then select from the list displayed
Note: If the manual lab form being creating is not specific to any patient i.e. it is being creating for use at some point in the future, select any patient in order to continue.
- Click the Edit Tests button to bring up the Edit Lab Tests window.
- Click the Add button
 to bring up the Input window, type in the name of the new test and click OK.
- Click the Add button "
 " in the Available Results box (toward the bottom of the window) to bring up the Input window.
- Type in the name of the new result and click OK.
- Edit the reference range and the units of measurement in the Edit Result window and click OK to save.
Note: Repeat this step as necessary, until you have all the required results fields.
- Select the results from the Available Results list and click the Arrow button to move them to the Selected Results list.
- Use the Arrow buttons
 to move the results up and down to display in a convenient order.
- Click Add Test
- When completed, click Close.
Edit a Manual Lab Result Form
- Click the Home button
 on the Accuro Navigation bar and select the Labs folder.
- Right-click in the section of the window where the labs are listed (see below) and select New Lab.
- Select the appropriate patient from the list displayed. If the correct patient is not displayed, type in their name and then select from the list displayed
- Click the Edit Tests button to bring up the Edit Lab Tests window.
- Click to select the lab test form to be edited and click the Edit button
 .
.
- Type in the name of the new results and click OK.
- Edit the reference range and the units of measurement in the Edit Result window and click OK to save.
Note: Repeat this step as necessary, until you have all the required results fields.
- Select the results you want from the Available Results list and click the chevron to move them to the Selected Results list.
- Use the Arrow buttons
 to move the results up and down to display in a convenient order.
- To delete results that are no longer required, click to select the result and then click the Delete button
 .
.
- Click Update Test and Close.
Delete a Manual Lab Result Form
- Click the Home button
 on the Accuro Navigation bar and select the Labs folder.
- Right-click in the section of the window where the labs are listed (see below) and select New Lab.
- Select the appropriate patient from the list displayed. If the correct patient is not displayed, type in their name and then select from the list displayed
- Click the Edit Tests button to bring up the Edit Lab Tests window.
- Click to select the lab test form to be deleted and click the Delete button
 .
.
- A delete confirmation message is displayed, click Yes followed by OK.
Note: Any test names that have (Optimed) after them are standard in the Accuro software and cannot be deleted.
- Click Close.
Add a Manual Lab Result
- Click the Home button
 on the Accuro Navigation bar and select the Labs folder.
- Right-click in the section of the window where the labs are listed (see below) and select New Lab.
Select the appropriate patient from the list displayed. If the correct patient is not displayed, type in their name and then select from the list displayed.
- In the Lab Result Search window select the appropriate test and click Select.
- Click the Add button to enter the lab results into the value column. Use the scroll bar to move down the list of results.
- Click Apply and OK to save the lab results.


