CDM Worksheets
CDM Worksheets can be found in the Encounter Notes area of the EMR. The CDM Worksheets availably varies from province to province.The CDM Form Editor allows users to import form templates from other provinces. This enables users to take an existing CDM form as a starting point for their own customized form.
There is a button on CDM Worksheets called "Select Recent Values" when pressed the most recent values are selected and loaded into the worksheet.
When Select Recent Values is clicked, the appropriate rows are colored pink. The coloring of the rows is only applicable to SK, ON and any custom made forms This is not applicable to MB forms)
The Next Due date is calculated by using the lab observation date rather than the worksheet encounter date.
Edit Recalls
Recalls is a feature of Accuro where you can set up recall schedules for procedures done on a regular/repetitive basis e.g. flu vaccinations, Child immunizations, PAP smears. The recall list is created based on a patient's defined criteria and the date of their last test/vaccination. As well as identifying patients you need to recall, you can generate a telephone list or a letter to contact your patients.
Note: Once a recall is being used it cannot be edited or deleted.
Create a New Recall for a Diagnosis
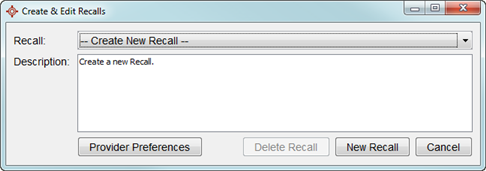
- Press and release the Alt key, click Tools and select Edit Recalls from the list displayed. The Create & Edit Recalls window is displayed.
- Click the New Recall button. the New Recall dialog is displayed:
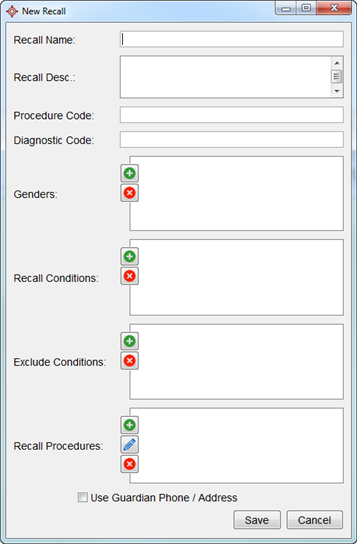
- Type in the Recall Name.
- Type in the Procedure Code and Diagnostic Code.
- Click the
 to select Gender. You can select male, female or unknown.
Note: To select both, select male and then go back and add female afterwards.
- Click the to select Recall Conditions. You can select male, female or unknown.
- Click to select Diagnosis.
- Click the Search button
 .The Diagnosis Search window is displayed:
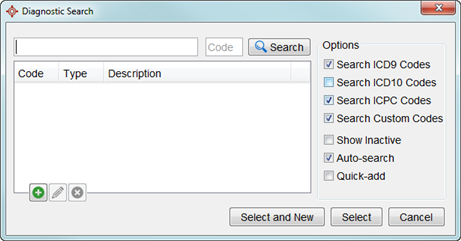
- Click to select the checkboxes for the diagnosis codes you want to use.
- Type the diagnosis into the search field and click the Search button
 .
.
- Click to select the appropriate diagnosis from the list displayed and click the Add and New button otherwise click the Select button.
- To add a Custom Diagnosis code click the Add button . The Custom Diagnosis window is displayed.
- Type in the custom code and description, click OK to save.
- Click the to select Exclude Conditions. Click the
 and select from the list displayed. Scroll down the list of results and select the appropriate condition. Click Select. The Exclusion Duration dialog is displayed.
- Type in the number and click the to select from Days, weeks, Months or Years. Click OK to save.
- Click the to select Recall Procedures. The Add New Recall Procedure window is displayed:
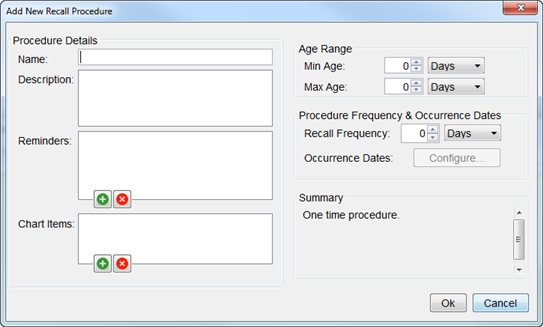
- Type in the procedure Name and Description.
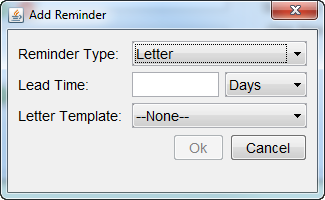
- Click the to select Reminders. The Reminder Type window is displayed:
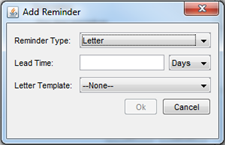
- Click the to select the Reminder Type from Letter or Phone Call.
- Type in the Lead Time (i.e. how many days/weeks/months/years prior you want to contact the patient) number and click the to select from Days, weeks, Months or Years.
- If you selected letter click the to select the letter template from the list displayed. Click OK to save.
- Click the to select Chart Items. Click the and select from the list displayed. Scroll down the list of results and select the appropriate condition. Click Select. Click OK to save your changes.
- Select the Use Guardian Phone/Address checkbox, if applicable.
- Click Save.
Create a New Recall for a Chronic Condition
- Press and release the Alt key, click Tools and select Edit Recalls from the list displayed. The Create & Edit Recalls window is displayed.
- Click the New Recall button. The New Recall window is displayed:
- Type in the Recall Name.
- Type in the Procedure Code and Diagnostic Code.
- Click the to select Gender. You can select male, female or unknown.
Note: To select both, select male and then go back and add female afterwards.
- Click the to select Recall Conditions. You can select male, female or unknown.
- Click to select Chronic Condition.
- Click the to select from list of Conditions displayed. Click OK to save your selection.
- Click the to select Exclude Conditions. Click the and select from the list displayed. Scroll down the list of results and select the appropriate condition. Click Select. The Exclusion Duration window is displayed.
- Type in the number and click the to select from Days, weeks, Months or Years. Click OK to save.
- Click the to select Recall Procedures. The Add New Recall Procedure window is displayed:
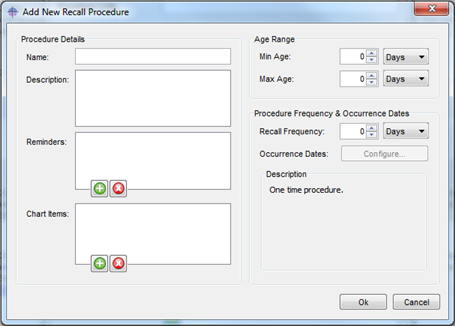
- Type in the procedure Name and Description.
- Click the to select Recall Conditions. The Add Recall Condition window is displayed:
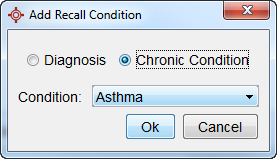
- Click the Chronic Condition radio button.
- Click the to select the Condition from the list displayed. Click OK to save any changes.
- Click the in the Recall Procedures section to create the recall.
- Click the in the Reminder section to create the reminder.
- Type in the Lead Time (i.e. how many days/weeks/months/years prior you want to contact the patient) number and click the to select from Days, weeks, Months or Years.
- If you selected letter click the to select the letter template from the list displayed. Click OK to save.
- Click the to select Chart Items. Click the and select from the list displayed. Scroll down the list of results and select the appropriate condition. Click Select. Click OK to save your changes.
- Select the Use Guardian Phone/Address checkbox, if applicable.
- Click Save.
Edit a Recall
- Press and release the Alt key, click Tools and select Edit Recalls from the list displayed. The Create & Edit Recalls window is displayed.
- Click the to the right of Recall and select the recall you want to edit from the list displayed. Click the Edit Recall button.
- Edit the recall as required. Use the Add button , Remove button
 or Edit button
  to make your changes.
- Click the Save button to save your changes.
Delete a Recall
- Press and release the Alt key, click Tools and select Edit Recalls from the list displayed. The Create & Edit Recalls window is displayed.
- Click the to the right of Recall and select the recall you want to delete from the list displayed.
- Click the Delete Recall button. The recall you selected has been deleted.
Recall Provider Preferences
Provider Preferences is the area of recalls where you select the Generated Letter preferences for each Provider.
- Press and release the Alt key, click Tools and select Edit Recalls from the list displayed. The Create & Edit Recalls window is displayed.
- Click the Provider Preferences button.
- Click the to the right of Provider and select the Provider from the list displayed.
- Click the to the right of Letterhead and select the preferred letterhead from the list displayed.
- Click the to the right of Footer and select the preferred footer from the list displayed.
- Click the to the right of Watermark and select the preferred watermark from the list displayed.
- Click OK to save your changes.