CDS Export (Ontario Only)
Please note you will need System Administrator permissions to run a
CDS Export.
Preparation for an Export
It is essential to prepare for a large export, clinics should run and
review a test export prior to performing an export.
There are many optional settings, consult with the export recipient
(ahead of time) to determine which options should be selected.
Perform a trial run ahead of your planned final export to determine
how long the ‘real’ export will take and to determine whether it can be
done in a single run.
If you are a multi-office site, you will need to set up a special "Export
Office" to export all the appropriate data, CDS Export only exports
data visible in the Current Office.
Exports containing patient’s PI and PHI must always be secure, therefore
QHR Technologies strongly recommend that encryption used.
QHR Technologies strongly recommends that clinics purchase at least
one hour of training and project management consultation if they need
to run a business-critical, "All Charts" export, and that a
trial run is done at least one month ahead of the planned final export
(three months ahead for very large exports).
The CDS Export window is accessed by clicking the Accuro icon  at the bottom left of your window. Click
File and then Export. Select the appropriate CDS Export version.
at the bottom left of your window. Click
File and then Export. Select the appropriate CDS Export version.
Explanation of Each Tab
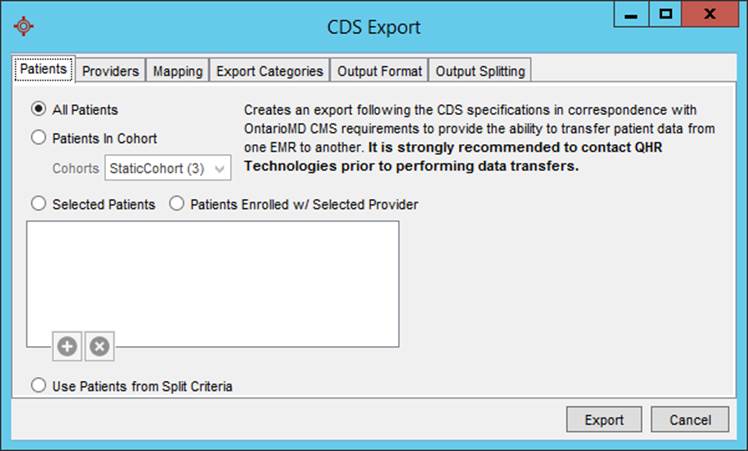
Patients Tab
- All Patients: this is the recommended option. However, it may not
complete due to your computer/server system limitations (especially
if you have a very large clinic).
- Patients in Cohort: This is recommended for very large exports
but needs to be setup prior to starting the export. (Use the Query
Builder to break down data set into manageable batches.)
- Selected Patients: This is used for individual chart exports, creating
a small test batch or for re-exporting fixed charts (please use Cohorts
for larger batches).
- Patients Enrolled (with Selected Provider): only use this
if you are certain your enrollment setting is complete and current
and that you don't want any "owned" patients included too.
Providers Tab
Note: This is for "Providers'
data", not "Providers' patients".
- All Providers: recommended (this means "All providers in current
office").
- Selected Providers: this option should only be used if you know
which Providers are linked to the charts you want to export.
Mapping Tab
If the recipient has confirmed that they can process this option, use
these mappings to sort forms and documents into separate Categories. Different
versions of the CDS Export support different Categories, ensure you have
selected the correct CDS export version.
Export Categories Tab
- For export to other vendor: select all except Accuro
Extensions.
- For export to Accuro: select all.
- The Audit Trail export is only available in CDS Export V5. (for
more information see further down this page).
Output Format Tab
The recommended setting is AES Encrypted and a very strong password.
However, PGP Encryption is much stronger, but typically can only be managed
properly by technical staff.
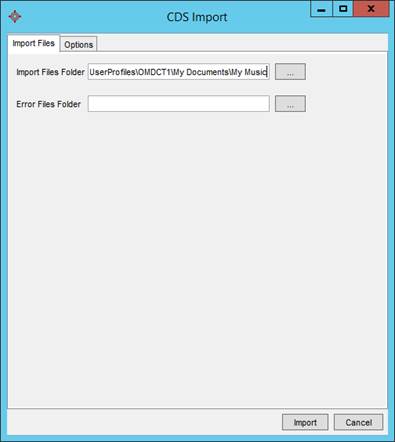
Output folder: select a secure location on either your computer or the
server, with adequate diskspace.
If you are unsure about either encryption and/or a secure file location,
please contact your clinic’s security/privacy person.
Output Splitting Tab
Do not use this option unless you are exporting on a CD-R (or
equivalent).
Not Included in a CDS Export
The following are not included in Ontario MD's CDS Export specification:
- Tasks/Recalls
- Billing
- Address Book
- Custom demographics fields.
- Other fields
For more information please refer to the Ontario MD’s Data Portability
Specification.
How to do a CDS Export
Note: If the patients' data
you are exporting is going to be imported into another Accuro system,
the Accuro Extensions (Accuro to Accuro) checkbox on the Export Categories
tab must be selected.
- Press and release the Alt
key on your keyboard, click File
and select Export from the
list displayed.
- Select CDS Export from
the list displayed.
- Select CDS V3, CDS
V4, or CDS V5 as required.
The CDS Export window is displayed.
- Click the Patients tab
and select All Patients, Patients in Cohort or Selected
Patients. If you selected Patients in Cohort, select the appropriate
cohort. If you chose selected patients add the appropriate patients
to the list.
Note: To use the cohorts option,
you must be using cohorts in Accuro.
- Click the Providers tab
and select All Providers or
Selected Providers. If you
choose selected providers add the appropriate providers to the list.
- Click the Mapping tab and
click Configure Mapping. Click
to select the appropriate document types from the list displayed.
Click OK to save your selection.
- Click the Export Categories
tab. The default is all checkboxes selected. If there are any categories
you don't want exported, click the checkbox to deselect.
- Click the Output Format
tab and select from Unpackaged,
PGP Encrypted or AES
Encrypted. If you choose one of the encrypted formats, type
in the password and then type the password in again to confirm. Browse
to the Output Folder location on your computer by clicking the Ellipses button
 .
Click the Custodian Consent
checkbox.
.
Click the Custodian Consent
checkbox.
- Click the Output Splitting
tab and select from the options listed. Not split keeps the export
file as one large file. Common Format, splits the export file into
sections that are the correct size to fit on a CD or DVD, as required.
Custom Format allows you to specify the size of the split files and
whether you are saving to a USB Disk (Flash Drive), Disk or Other.
- Click the Accuro Ext. Options
tab and select the appointment or billing date range. Select to either
Use Same Folders or Only Send as Documents.
Note: You only have this option
if CDS V3 was selected.
- Click the Export button.
This step may take several
hours. When completed the progress bar disappears.
Verifying your CDS Export Completion
- Open the folder where you saved the export (either on your computer
or your server).
- If the export directory does not contain a file named "_temp_etc.",
and it contains a Readme.txt file telling you that there were zero
errors and that the total patients exported is the number you expect,
then you can assume the export has completed without issues.
- If there were errors during the export, there will be a patientIDError.log
file which contains the Patient IDs of the charts that were not exported.
The remedial steps to address the errors are:
- Search the export.log file for ‘START: Patient <zero filled
10-digit patient id, e.g. 0000000014 >’
- Go into Accuro and fix the issues identified.
- Re-run the export for only the patients listed in the error
log file.
- If the Warnings count in the Readme.txt is greater than zero. These
are minor glitches (usually formatting):
- Search the export.log file for every instance of the word "WARNING"
- Go into Accuro and fix the issues identified.
- Re-run the export for only the patients listed in the error
log file.
Compressing Your CDS Export
If your clinic needs to compress the CDS Export file(s), there are many
file compression packages available. Contact your IT department or Technical
person for further information.
Audit Trail Export
The Audit Trail export is new in CDS Export V5. The Audit Trail data
is saved into an Excel spreadsheet. The integrity of any links (that were
displayed in the Accuro Audit Trail) are maintained. If a user clicks
a link in the spreadsheet, an XML file containing the appropriate information
is opened.
Transferring the Files to Media Devices
How files are transferred to a media device will vary depending on the
media device and operating system being used.
QHR recommends that a flash drive is used as the preferred method of
transferring files. To do this insert a flash drive into the computer’s
USB. Open the file browser and locate the files being exported. Select
all the files, copy and paste the files onto the flash drive.
Note: If you need any help with
obtaining a flash drive or copying the files, please contact your IT department
or Technical person for help.